
These Paper Napkin Decoupage Pumpkins are so easy to make by covering decorative pumpkins with fancy paper dinner napkins. Display them as part of a centerpiece or around your home as a touch of rustic elegance for the fall season.
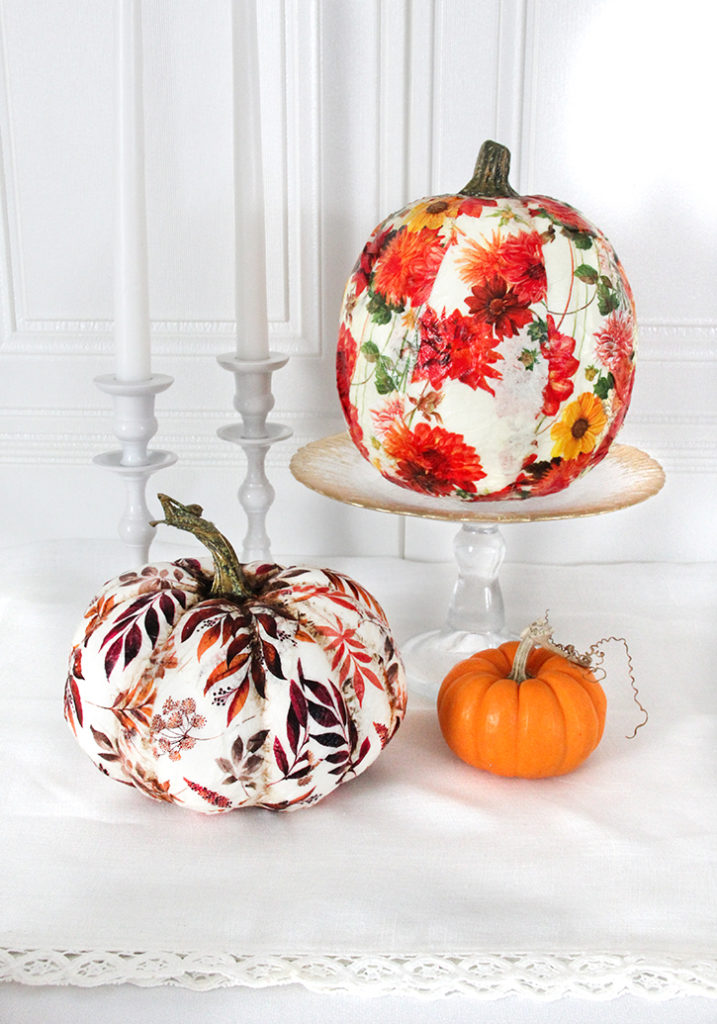
Turn a plain pumpkin into beautiful room décor with our easy paper napkin decoupage technique. You can use any paintable pumpkin figurine for this project, however real pumpkins are not recommended. Upcycle and reuse a decorative pumpkin from your own collection to give it a new look. Materials such as plastic, ceramic or paper mache are ideal. The carveable foam kind from a craft store or dollar store will also work just fine! The look comes from fancy dinner or cocktail napkins in an allover print.
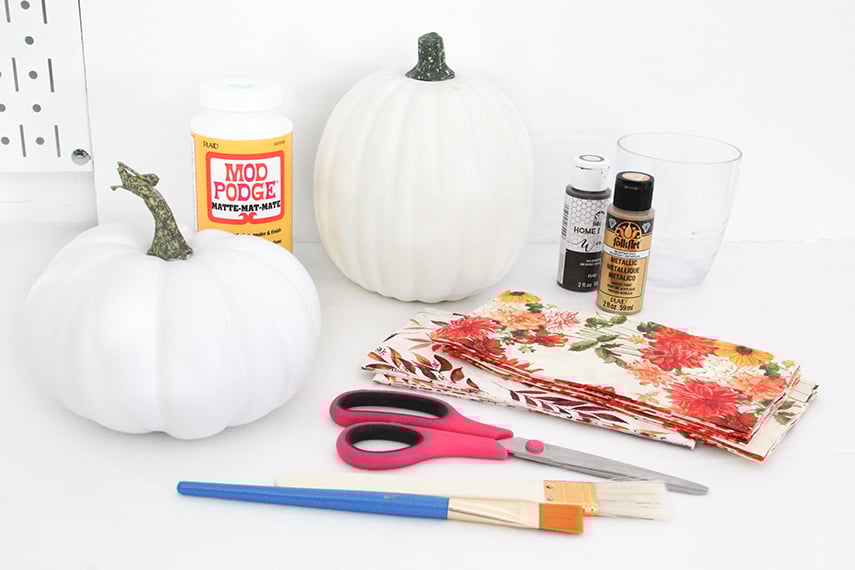
Gather your decoupage supplies.
For this project, I used fancy paper dinner napkins. They are thicker and have a fabric-like feel to them. You could also use rice paper, tissue paper or even fabric. One napkin could cover a whole 6″ size pumpkin, so it’s good to have a whole pack or plenty of material on hand if you are covering several pumpkins, or larger pumpkins. You will also need sharp scissors to cut the material.
Use a matte finish decoupage medium such as Mod Podge Matte to apply the material, it brings a classic china look to this project. The lack of glare makes the designs easier to see in all lighting situations, and makes wrinkles harder to see. You might also want to cover your work surface with wax paper to prevent anything from sticking while you work.
A wider soft craft brush for coating surface area in decoupage medium is needed. It can be a sponge brush or a bristle brush. Having a low cup or small bucket to set the pumpkin on while you cover the bottom also comes in handy.
As an optional step, you could add an antiqued finish and embellish the stems of the pumpkins with metallic paint, so have those handy for this project too if you decide to do this. Have a smaller brush or two on hand for any extra embellishing you might do.
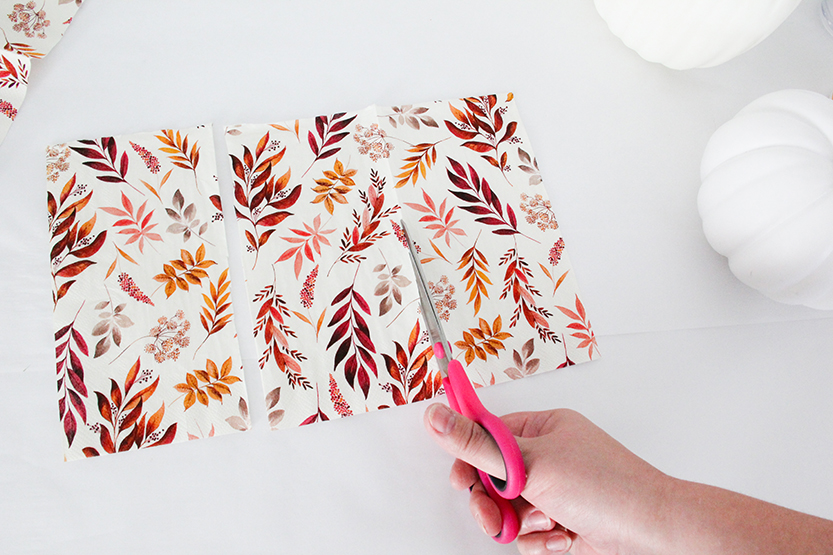
Choose your paper napkins.
Patterns such as toile or botanical look best on the rounded surface of a pumpkin. You could use patterns such as plaid any other linear pattern, or with words in a block typeface (not a flowing script), but bear in mind those can distort on a round surface. The napkins can be thick, so you might want to cut the napkin apart into panels for easier application.
Getting Started.
You can stack two or three panels together for cutting, depending on how thick they are. Most paper napkins are two or three ply, and you may prefer to separate the plain layers from the printed layer. This yields a more transparent, tissue like material to work with. Leave all the layers together if you like. The material is sturdier, and wasn’t problematic to work with.
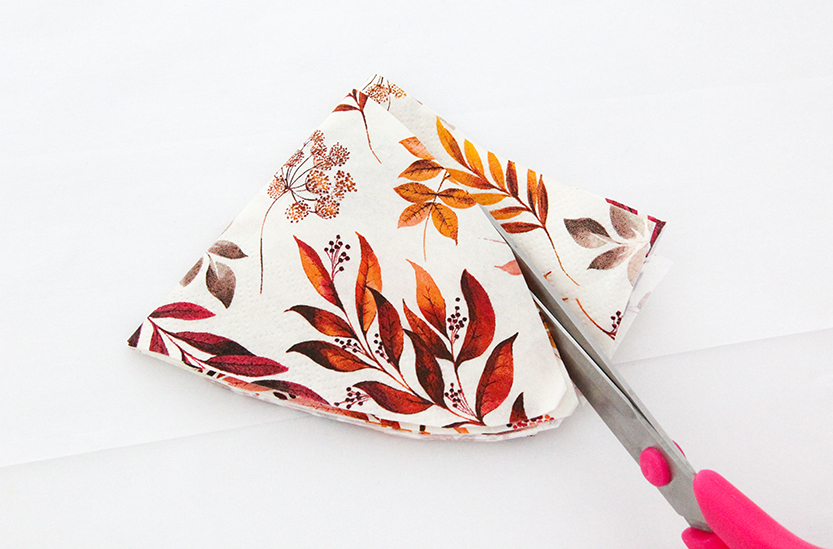
Fold the stack in half and cut into an elliptical leaf shape. This shape molds more easily onto a rounded surface. Cut up at least one napkin into panels for a smaller pumpkin, but more for a larger pumpkin. Set them aside until you’re ready to apply them.

Decoupage medium.
The white craft store pumpkins I selected to cover were already a neutral white finish, which worked fine for the look I wanted. (I used a small squat one like this, and a larger one like this.) Paper will become more transparent once the decoupage medium is applied, so bear in mind an undertone will show through. You could leave the pumpkins orange if you want, but just paint them a light neutral color if you prefer.
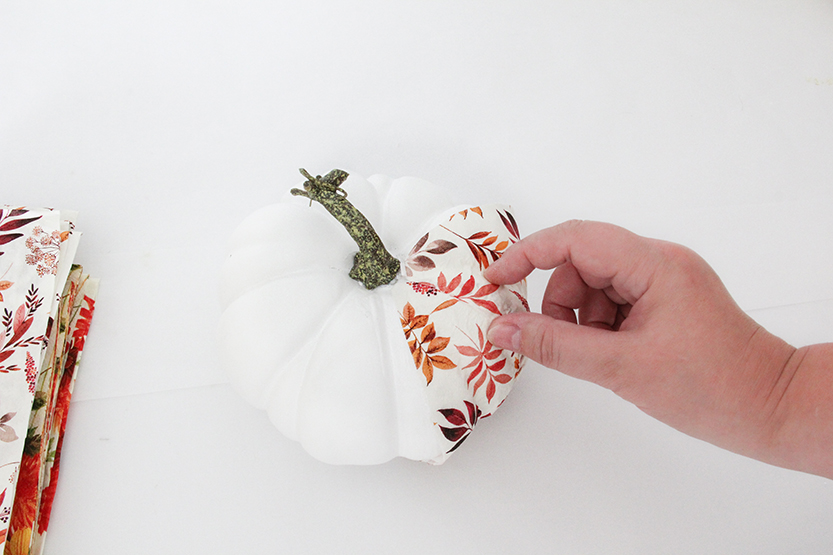
Starting at the base of the stem, paint a smooth, even layer of decoupage medium onto the top third of the pumpkin, one section at a time. Do not layer too thickly, or it will cause more wrinkling in the finish.
Covering a pumpkin.
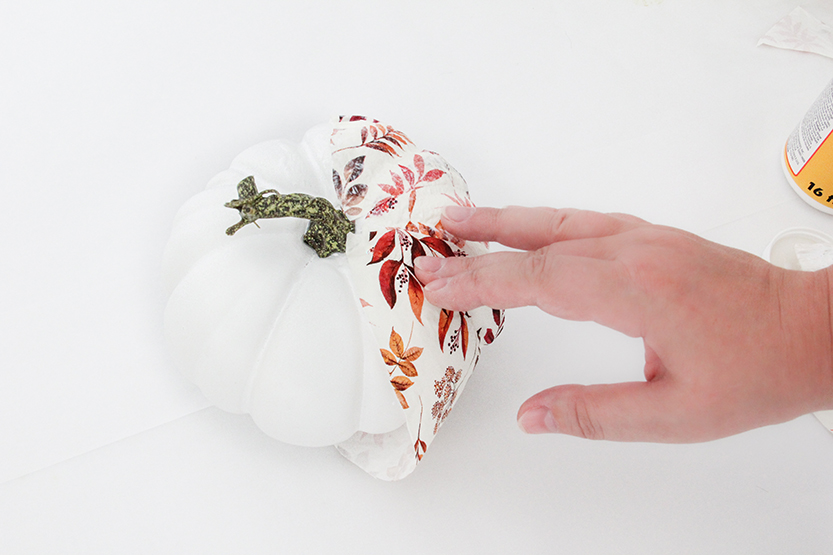
Carefully place a paper panel onto surface you just coated. Coat another section of the pumpkin in Mod podge, then add another paper panel, overlapping over the edge of the last panel. With your fingertips or a brush, gently push paper down into the lower areas between each lobe as you go along. Avoid bearing down too hard, or the paper might tear.
Paint, Cover, Repeat.
Repeat the process until all the sides of the pumpkin are covered. Then paint over the top of the paper with more Mod Podge as far down as it has adhered to the surface of the pumpkin. Apply it in a light smooth layer, making sure the edges of each panel of paper are coated. Don’t rub too hard, or the paper might tear. If it does you can apply a patch of the paper to it.
Set the pumpkin aside for at least thirty minutes before sealing the bottom part of the pumpkin. This will allow the decoupage medium to dry to a non-tacky finish.
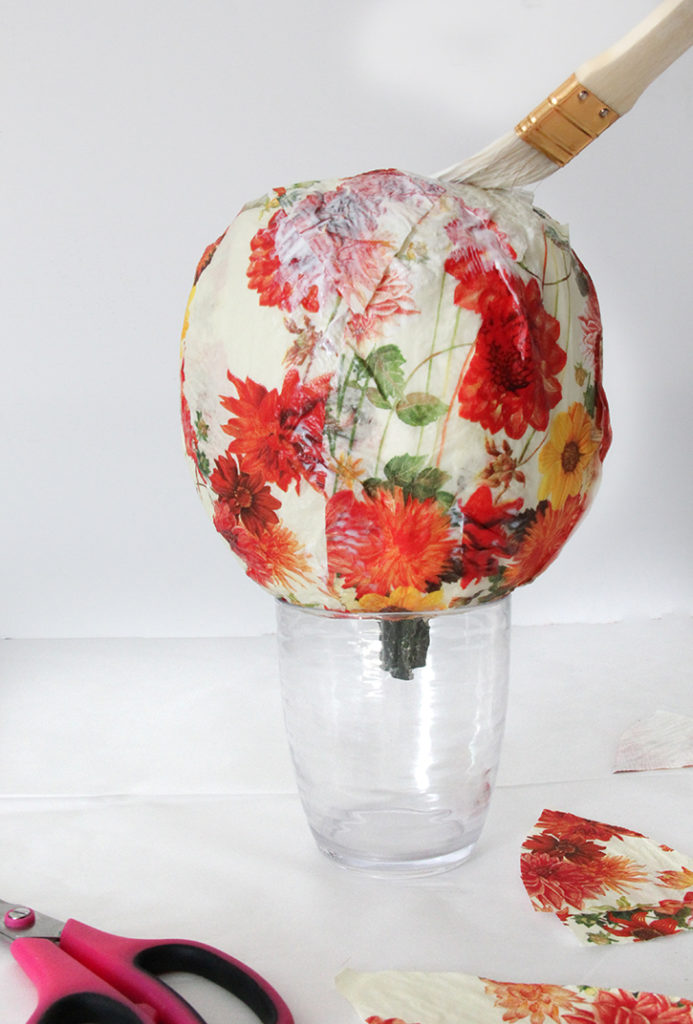
Finishing the Bottom.
When your pumpkin is dry, set it stem down in a cup or other container. Finish sealing the bottom of your pumpkin, repeating the same basic instructions from covering the top. You can easily fill in gaps with clippings or panels of the decorative paper. This works especially well for larger pumpkins.
Let the sealed surface dry and cure up for about 24 hours before adding any more embellishments to the pumpkins.
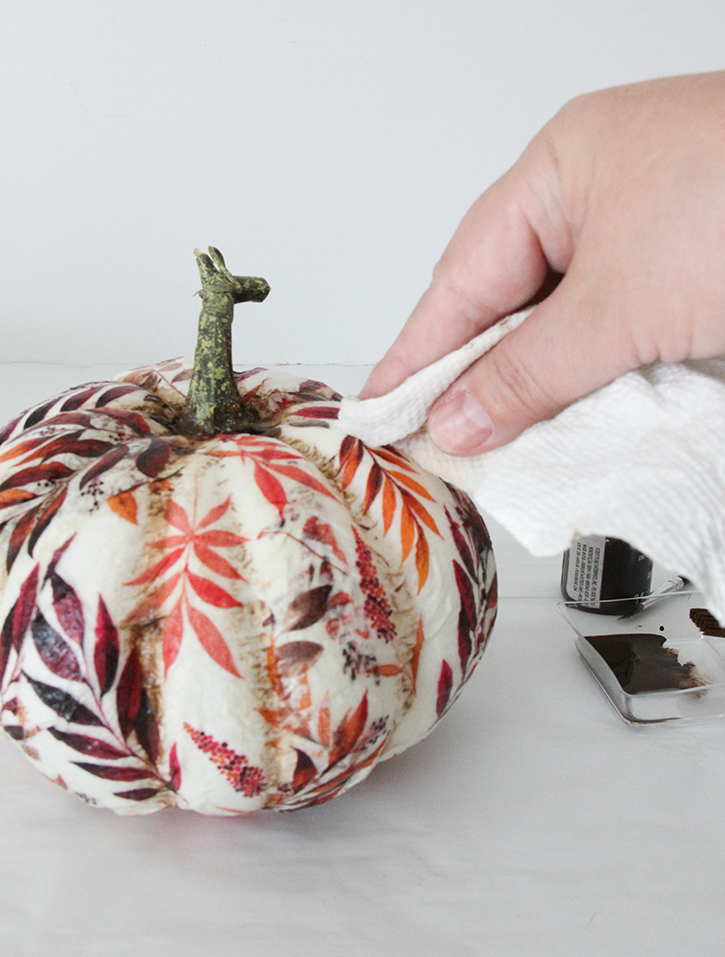
Add some faux finishing.
You have the option of adding faux finishing to your pumpkin once the surface is dry. I decided to paint on a light coat of antiquing around base of stem and between lobes and buffing off high areas with a damp cloth to add more definition.
This rich brown antique home decor wax adds more of a vintage look to the pumpkins, and gives them a rustic flare.
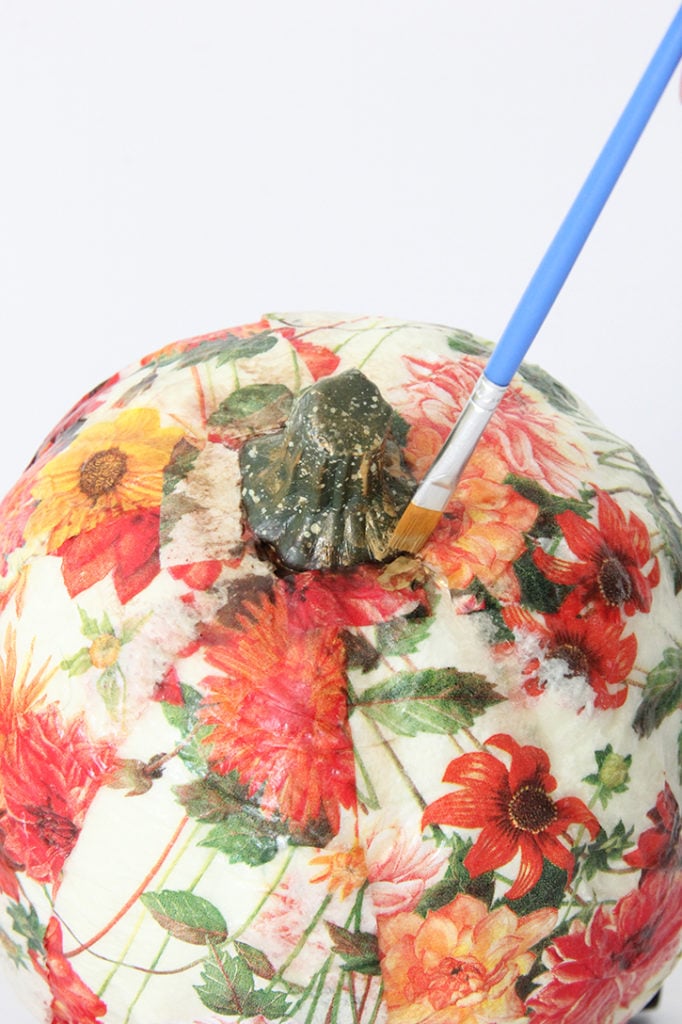
If you like, you could paint the stem of the pumpkin any color that suits you. I decided to leave the existing dark green color on them, but enhanced the finish by dry brushing on a transparent layer of antique gold craft paint to the raised areas to highlight texture.
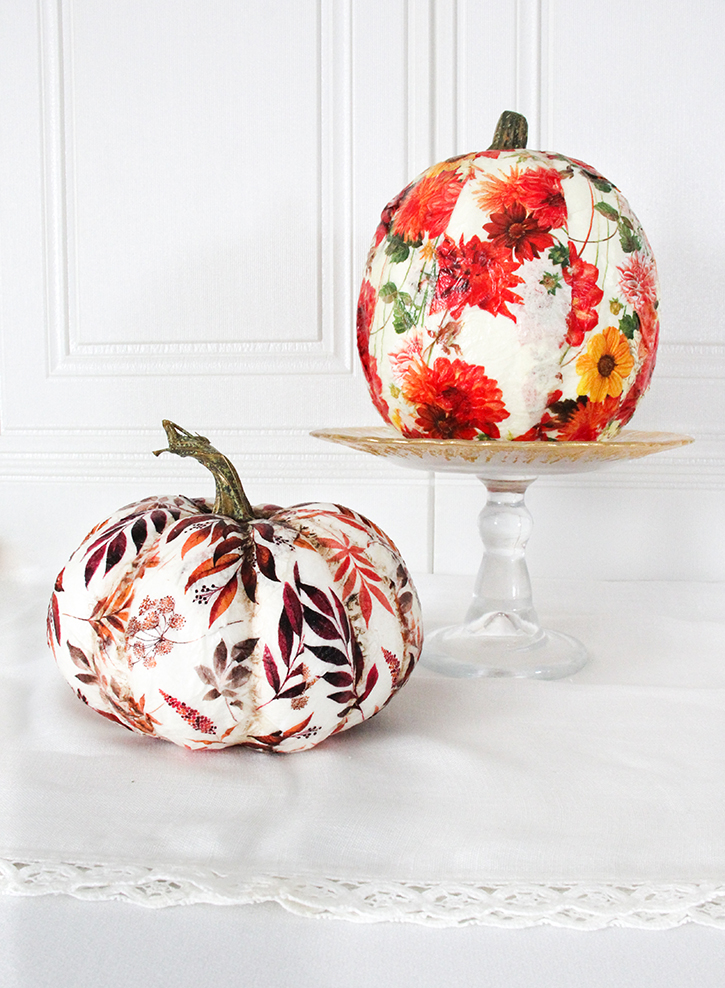
Instant Autumn Vibes.
You can make these paper napkin decoupage pumpkins look as formal or rustic as you like. The patchwork look I chose definitely has a more cottagecore or farmhouse style to it. They can become a seasonal pumpkin decor for fall decorating for years to come. Use as a grouping to spruce up a dining room table, on a sideboard, or anywhere around the house for the whole Autumn season.
For another DIY fall decorating idea, take a look at making your own beautiful ribbon wreath using thrifty materials.