
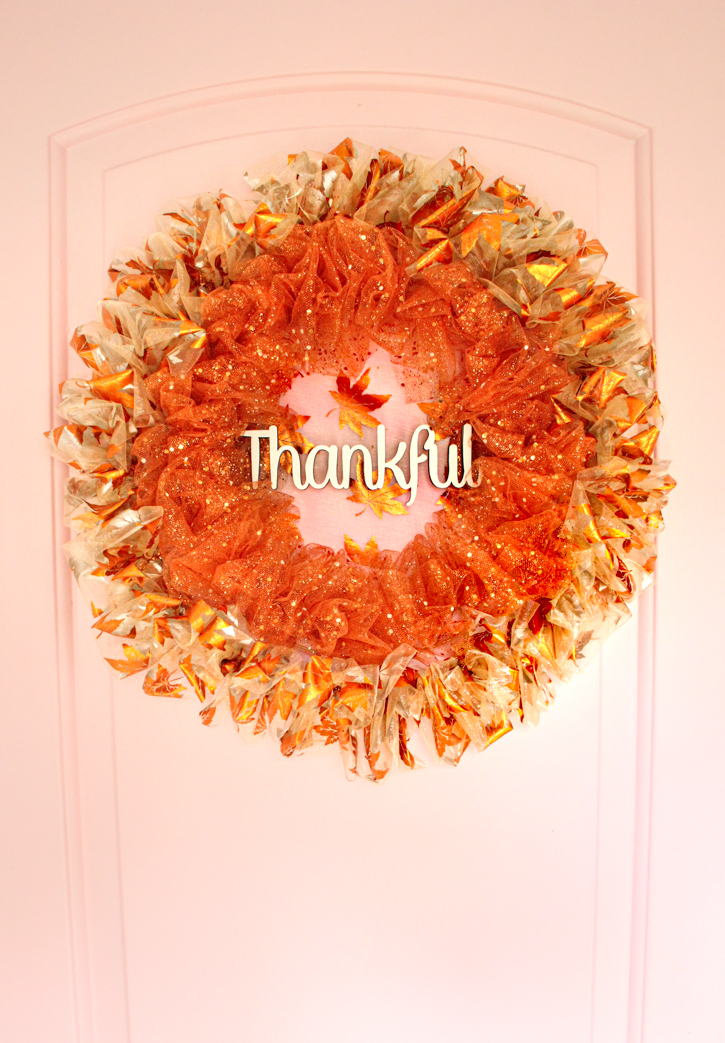
DIY your own beautiful ribbon wreath for fall using thrifty materials. Customize it with a seasonal sentiment or personalize it with a monogram.
Celebrate the Season.
Halloween is over, and it seems we’re all preparing for Christmas. But the whole month of November is still ahead of us! So why not slow down and savor autumn before diving headlong into the winter holidays? Decorate your front door with décor that celebrates Fall and Thanksgiving. This DIY ribbon wreath is crafted for a fraction of the price of a ready-made ribbon wreath. Create your own custom wreath with materials you can find at a dollar store. (Or on sale at your favorite craft store!)
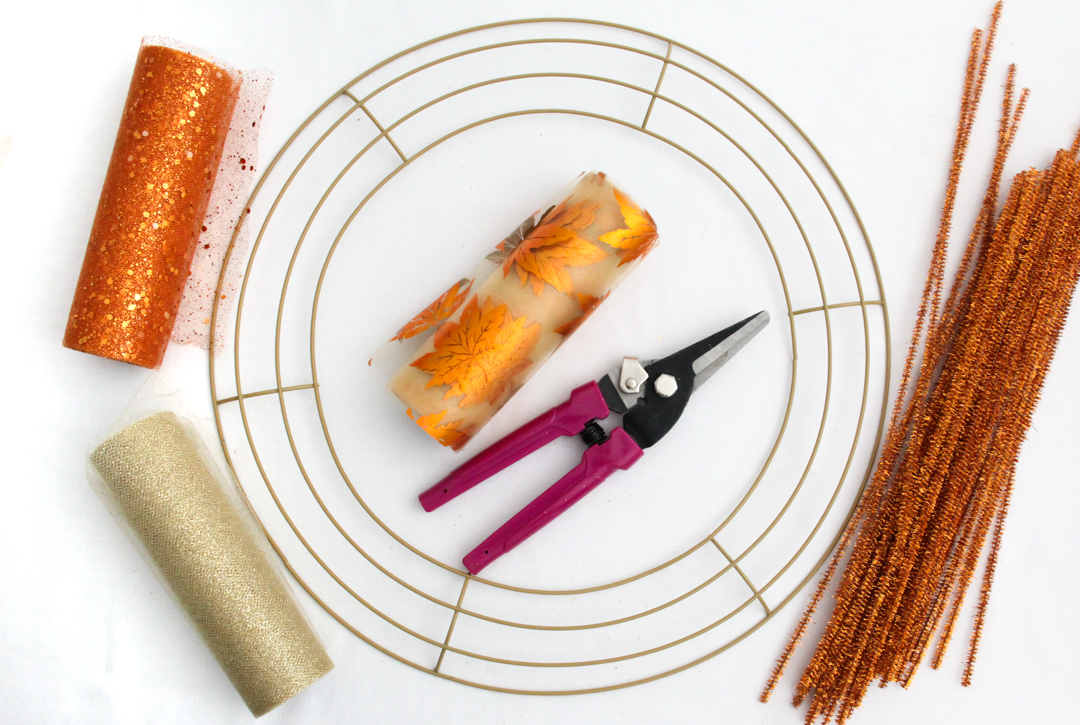
First Steps: The Essentials.
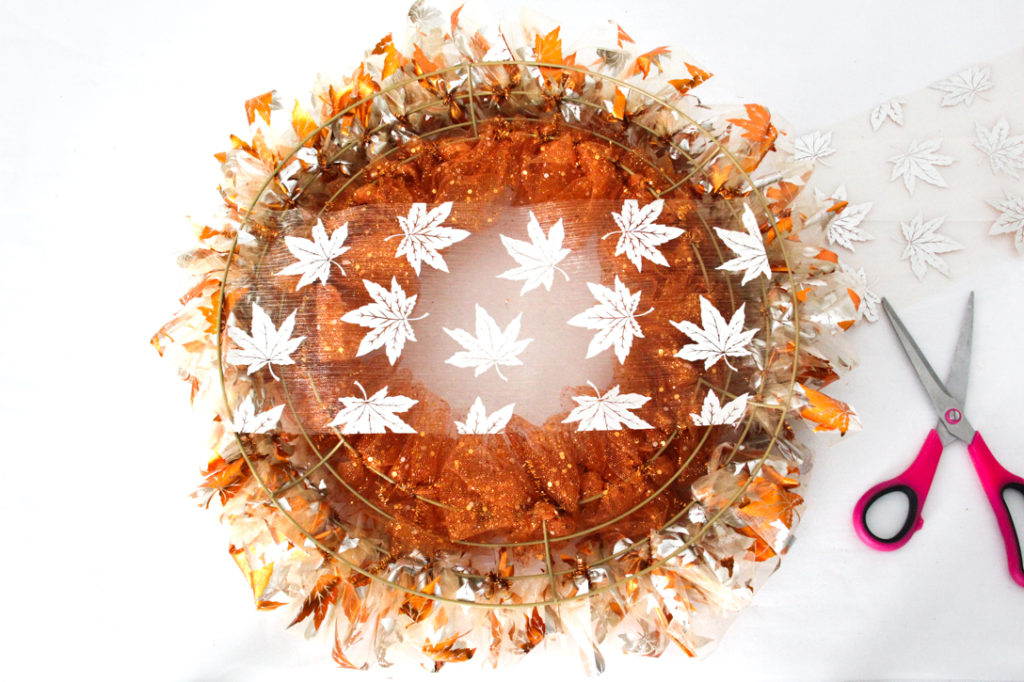
Use two or three different ribbons, and choose coordinating colors and patterns. They can be any type of wired ribbon, mesh, or even burlap. I used three to four rolls of 6″ x 3 yard unwired tulle, and the same amount of organza ribbon for this project. Be sure to have plenty of craft stems on hand that fit the color scheme. Especially if you are using a more transparent ribbon (like this one). Buy a 12″ or 14″ wire wreath frame. This size has a good visual impact on most doors. I found this nice tan wreath frame at Dollar Tree, along with the spools of ribbon and stems. Use a pair of floral shears or wire cutters to cut the wire stems.
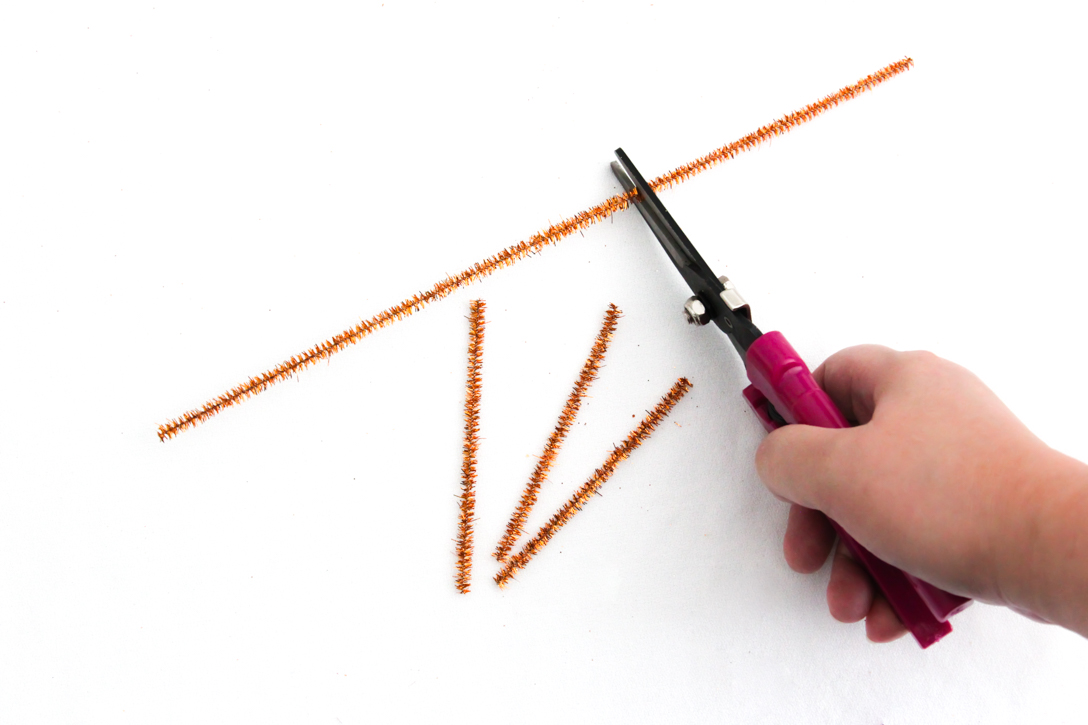
A little prep work goes a long way.
Start by cutting several of the craft stems into three pieces. Most craft stems are 12″ long, so each one can be cut into three 4″ lengths. Make yourself a pile of these 4″ pieces to have on hand, because this will speed up attaching the ribbon to the wreath frame.
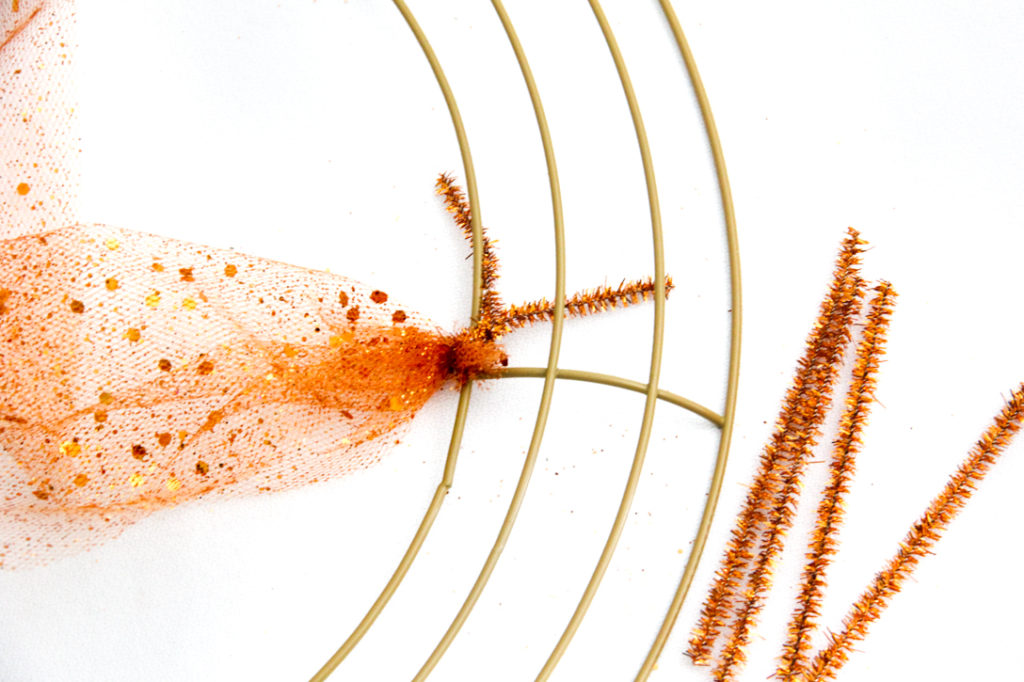
Getting Started
Begin by scrunching up the very end of some ribbon, and tightly looping a piece of stem around that. Then attach that piece of ribbon by tying it to one of the innermost wires of the wreath. Repeat this step every time you start a new spool of ribbon.
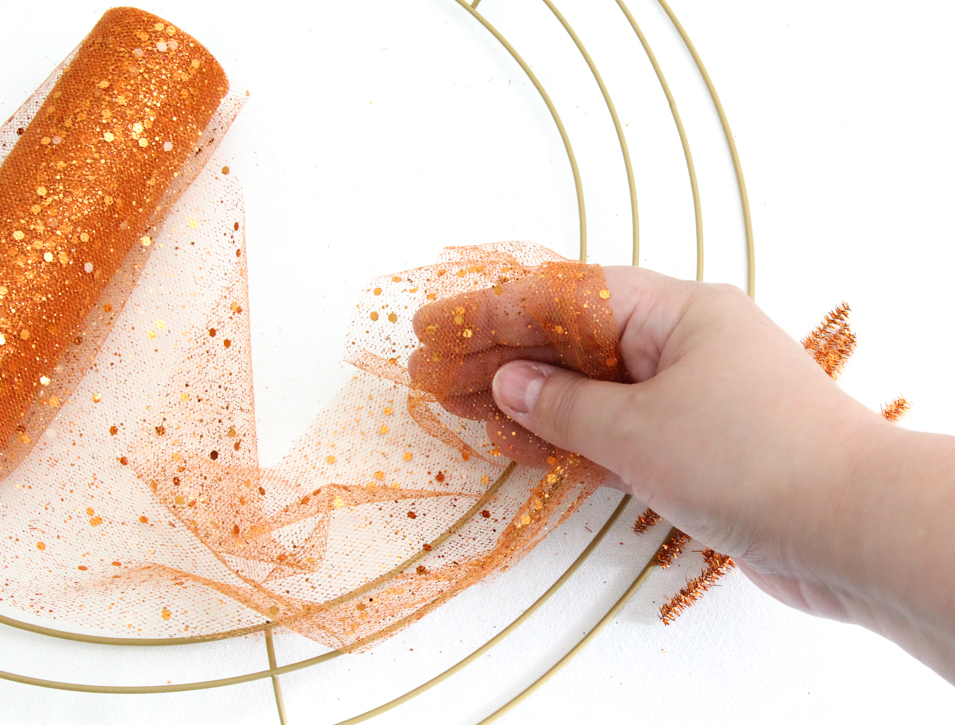
Next, form a ruffle by looping the ribbon around the width of your fingers. Using your fingers as a guide makes forming consistently sized ruffles easier. It’s easier than measuring out about a 6″ length of ribbon every time, until you can eyeball the amount of ribbon you need for each ruffle.
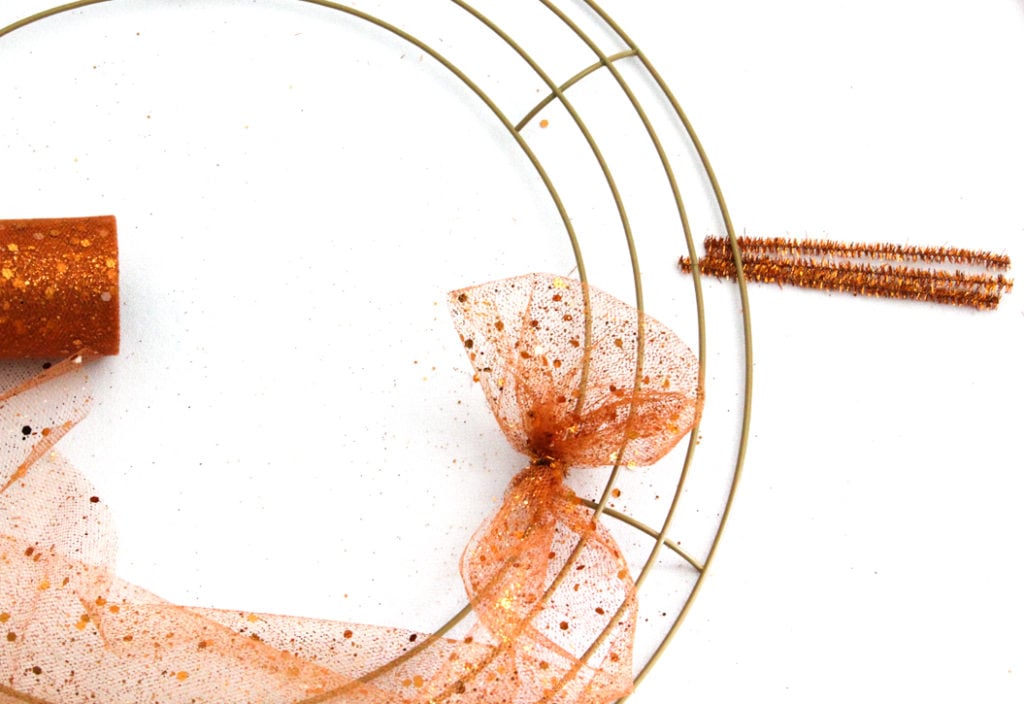
Scrunch, Tie, Repeat
Scrunch the ruffle together at the bottom, and tie it to the wreath frame with a piece of stem. Form the next ruffle, repeat these steps until the inside of the wreath is full. Start the process over on the second wire from the outside to add the outer layers of your wreath. If you are using regular width ribbons that are 2″ to 4″ inches wide, attach ruffles to alternating wires in a zigzag pattern. This will help fill the wire frame, as the ruffles will build up as you go along.
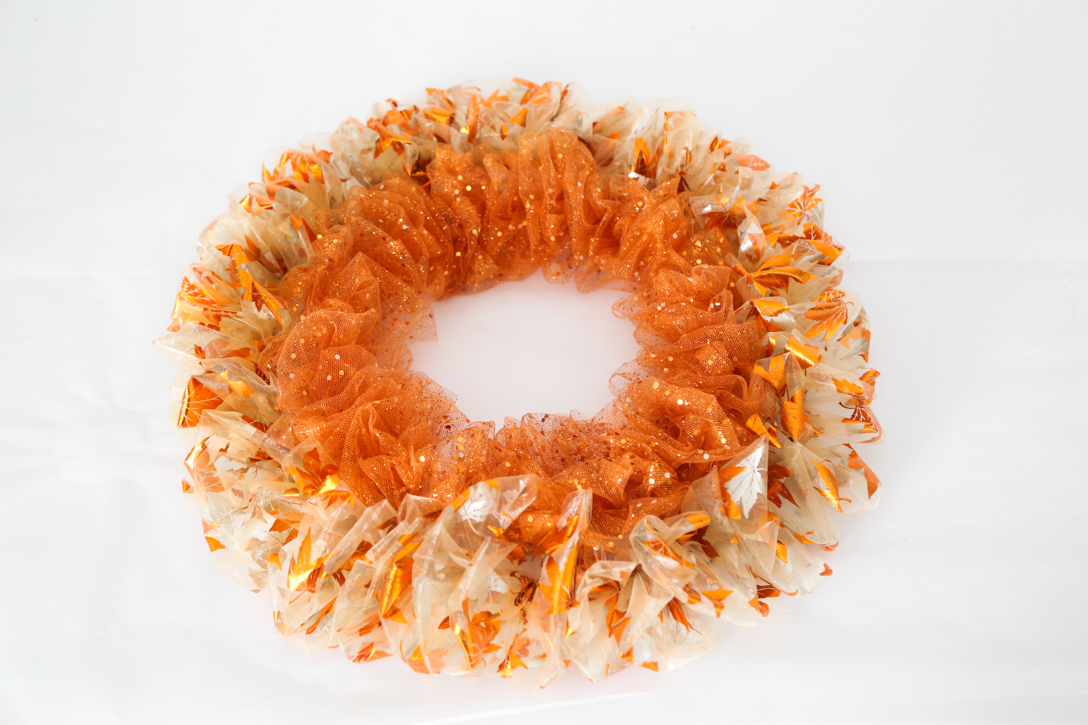
Layer up for more dimension!
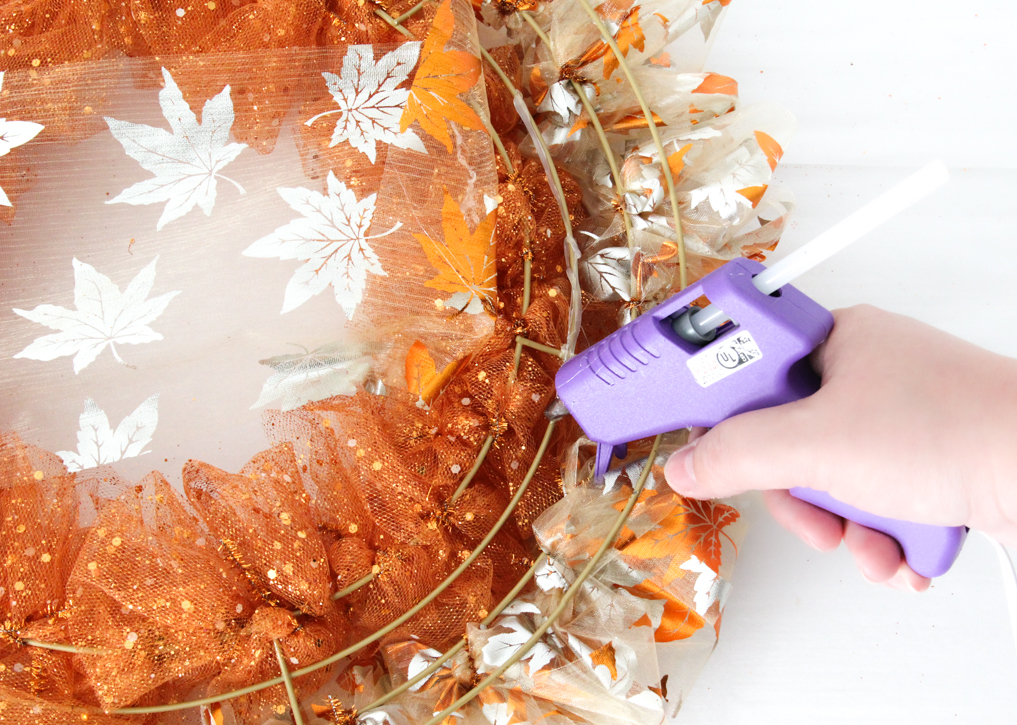
Add contrasting layers to give the wreath more dimension. I just love this filmy ribbon printed with a coppery foil leaf pattern. Since it’s a lighter color, I decided to use this on the outer layers of the wreath to make it look larger. Layering solid colored and patterned ribbon separately creates a more simplified design.
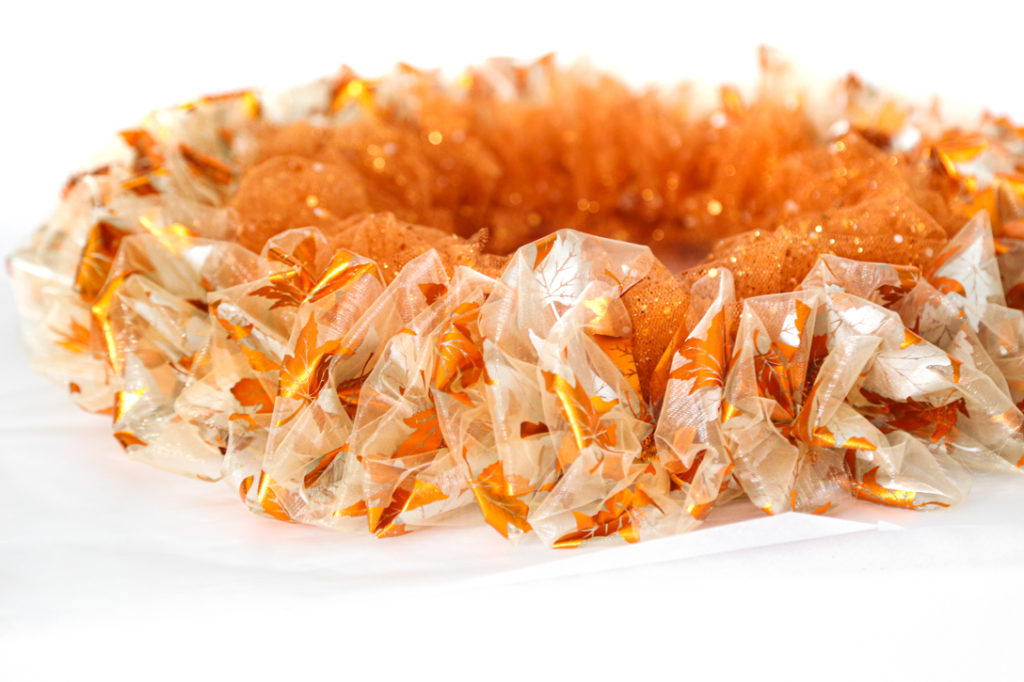
Fluff Out The Ruffles.
Using wider ribbon will fill more of the width of the wreath. Fluff out each ruffle into a bubble shape. For a more even appearance, you can spread out bunches of ruffles by sliding them along the wire frame. To make it look fuller, add more ruffles of ribbon.

Add Some Sentiment
Add a greeting word or phrase to your DIY Ribbon Wreath for a more custom look. These are inexpensive, and readily available at most craft stores or online. They come in a variety of sizes and styles. And they are usually made from lightweight materials such as wood. The natural wood color may look good with your wreath, or you can paint by hand to make it stand out more.
Special Effects.
A large word could be laid across the front of the wreath, and attached with hot glue. If the size of your text is smaller and you don’t want to tie it to the wreath, some ribbon can be an anchor to attach your text to. To do this, first lay your wreath facedown and cut a length of it that’s wide enough to cover the opening.
Attaching the Background
To attach this ribbon to the back of the wreath, secure it to the wire frame of the wreath on both sides with hot glue.

Ready to Hang on Your Door.
Turn the wreath back over, and use more hot glue to attach your text to the ribbon background in the center. Now it’s ready to hang!
For those with an eye toward Christmas, check out our article for a beautiful Christmas wreath: Make a Vintage Wreath with Grandmother’s Dishes.