
Here’s an offbeat idea for holiday decorating – this No-Sew DIY Necktie Wreath! It’s a quick and inexpensive decoration to make, so it won’t strain your schedule or your budget. But it’s also fun and easy to create something so unique! Create your own to add an unconventional detail to any room you hang it in.
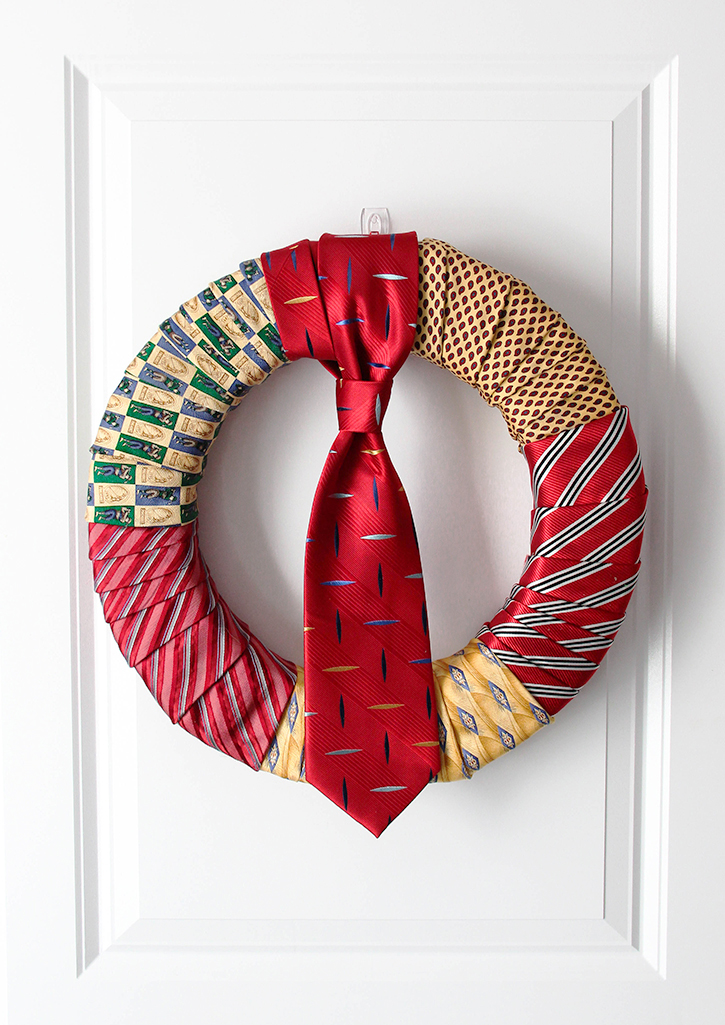
This wreath has a touch of classic midcentury modern style, or it can lean somewhat preppy. A real conversation starter, it’s a great way to upcycle old neckties into a piece of quirky décor. I chose neckties in festive colors, but you could use a collection of holiday themed ties to make this wreath.
This could also be a more personalized gift idea for dad, as a retirement gift or for Fathers Day. You could use ties with his favorite sports team logo, a golfing theme, music or any other motif that’s available on neckties.
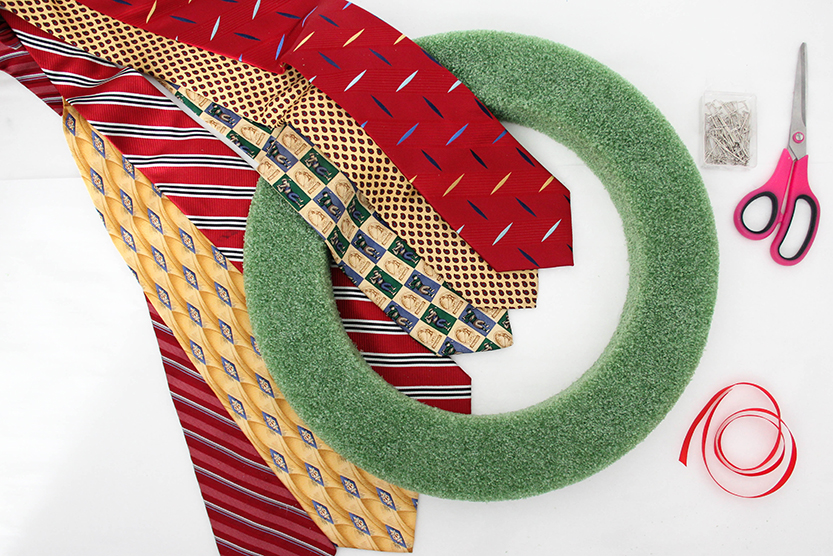
Basic Materials You’ll Need
You can use vintage or heirloom ties for this project to keep it inexpensive. A good thrift store can be a wonderful source for neckties if you don’t have any on hand! These were thrifted and only cost about a dollar apiece. I used six, which was just enough to cover this 15″ boxy foam wreath. You would need less for anything smaller, and more for a larger wreath.
Use a foam wreath form. Because it works best for this project. It makes the best foundation under the ties, plus it’s lightweight and easy to work with using this method. I don’t recommend a wire frame for this project, because the wire can show through the material. You can find foam wreath forms like this one online but they usually can be found in different shapes, sizes and materials at your local craft store or discount store.
Since this is a no-sew project, hot glue could be used to secure the ties, but I prefer to use straight pins or quilter’s T pins like these. These have a good firm grip once they are in place, and are easy to remove if needed.
You will also need a short length of ribbon to make a hanger, and a sharp pair of scissors.
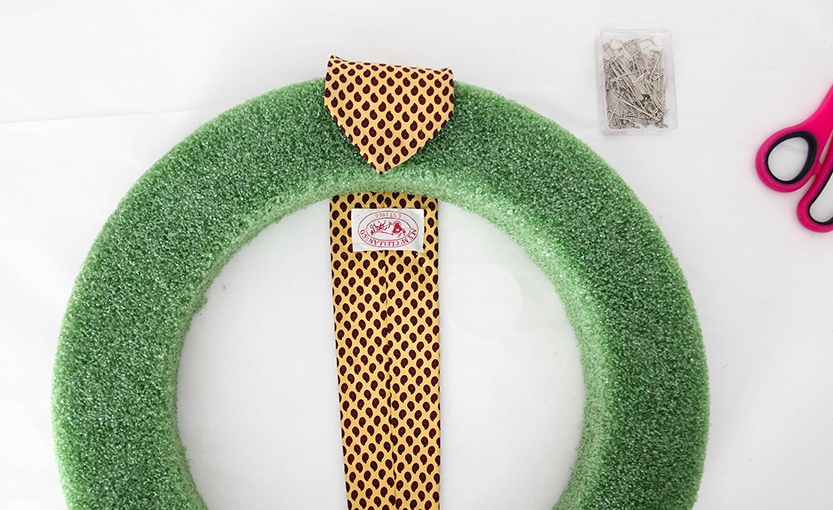
Getting Started
Start your No-Sew DIY Necktie Wreath by tacking down the front of the wide end of a tie to the foam wreath with a T pin.
Loop the tie over once and reinforce with another T pin. This will be on the back of the wreath.
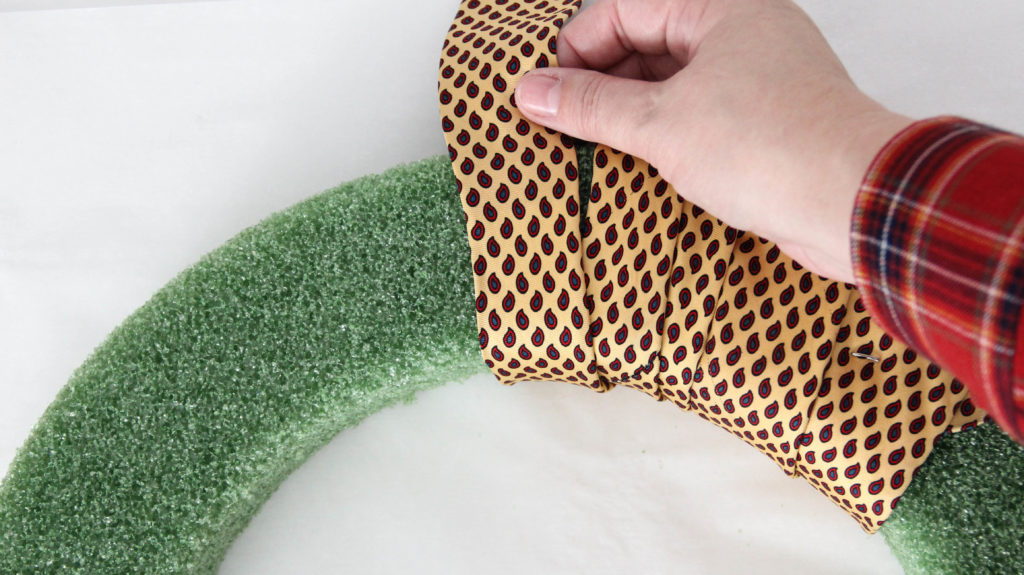
Wrap the remainder of the tie around the wreath form, spreading each loop out, but barely overlapping in the layers. Wrap the necktie around the form just tight enough to not hang loose.
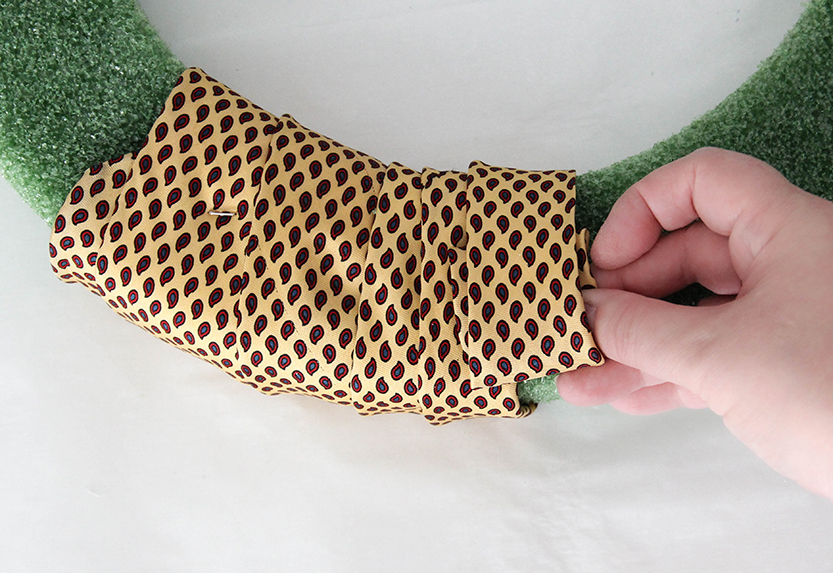
When you come to the end of the tie, tack the end down with a T pin to the back of the wreath form. If you don’t like where the end of the tie falls, you could clip off the excess piece of tie. But if you want to preserve the integrity of the necktie, fold the excess under and tack it down to the back of the wreath with a T pin.

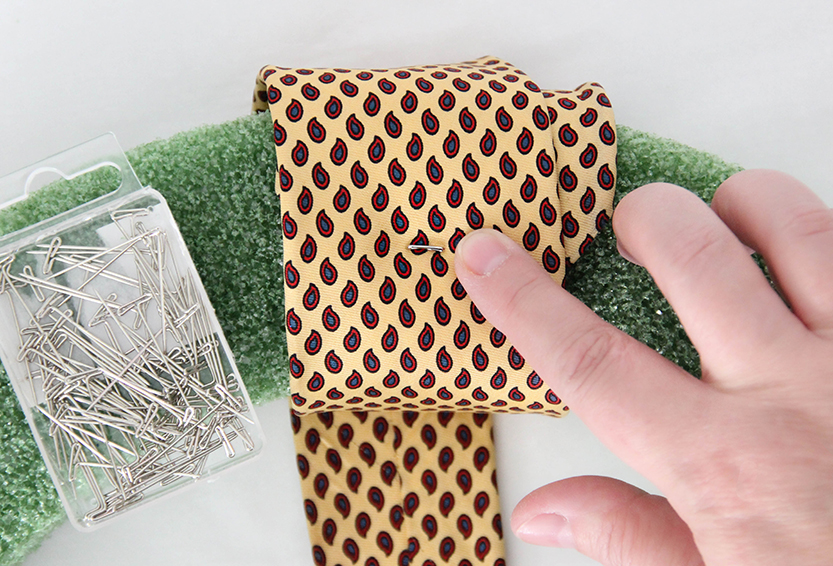
The Next Step
Start the next layer by tacking down the wide end of a tie just enough to overlap where last tie ends. Repeat the process until the wreath is mostly covered
Some helpful hints-You can unpin the ties and make adjustments to the wrapping, and re-pin them into place easily. This is why it’s best to not use hot glue-using the T pins, you have the flexibility to adjust the tightness of the wrap, add or remove ties, change the order the ties are in, et cetera.
Note: It’s okay to let a little of wreath form to show through, just make sure it’s on the back of the wreath where it won’t be seen.

The Final Touch
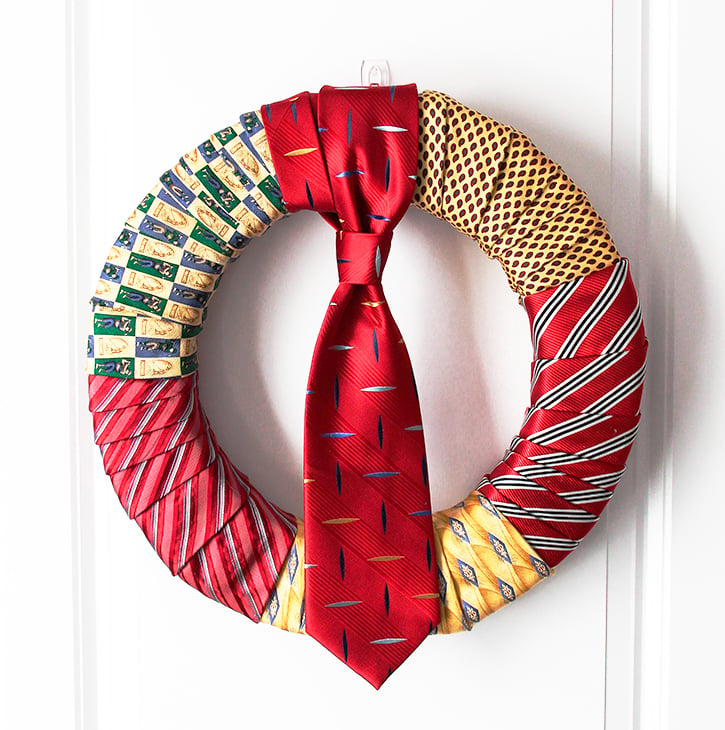
Add a statement necktie as the final touch to the wreath. Save the favorite tie for last! Start looping it around the wreath from the middle of the tie. Make sure the wide end is draped over the front of the wreath facing out, and the thinner end hangs over the back. Wrap around the wreath from each end to cover last the part of the form if any is showing.
Leave enough of each end of the tie to hang down to bottom of wreath. You can adjust the wrap or the length left over as needed.
Tying the Tie
Tying a necktie around a wreath is different from putting one on your neck. I used a version of a simple oriental knot to create this final whimsical detail. You could tie more of a proper Windsor knot if you have that ability, but otherwise it can be helpful to look up tutorials online of how to tie a necktie.
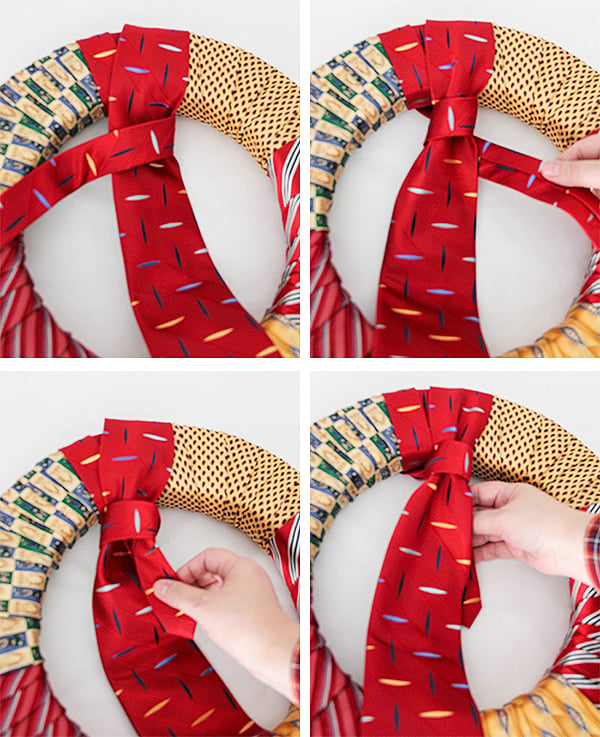
This is how to tie bit of a faux knot in 4 easy steps:
- Loop the thinner part of the tie around the wider part.
2. Pull the thinner part through the loop, on the back of the tie.
3. Gently pull each end of the tie to tighten the knot.
4. Tuck the thinner end into back of the wider end of the tie.
Making a Hanger
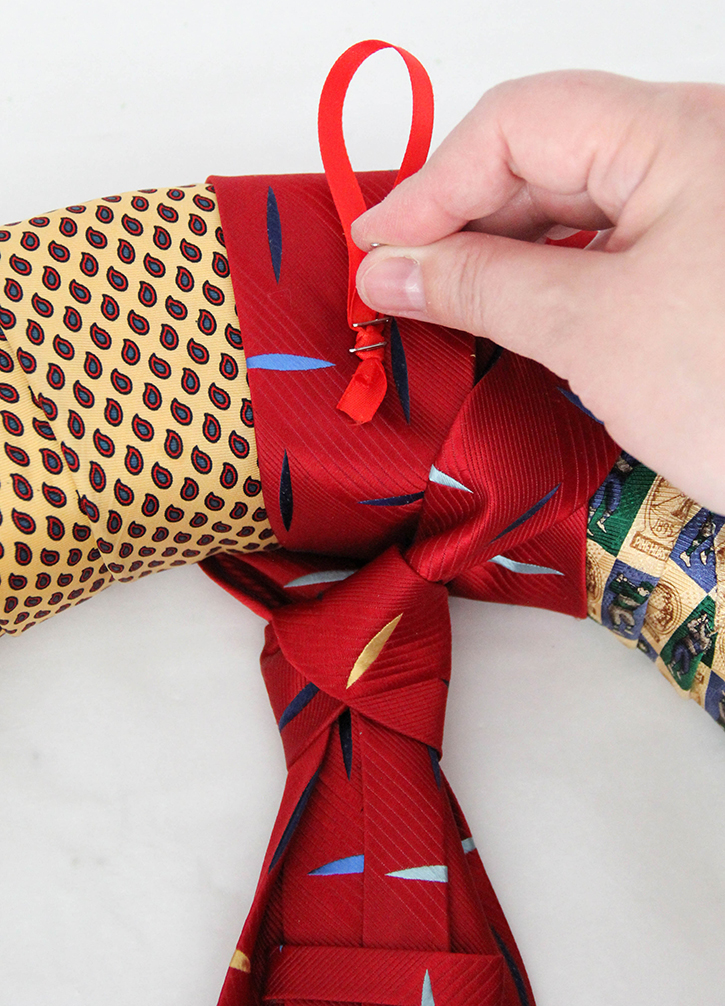
Cut about a 5″ length of ribbon and tie it into a loop to make a hanger. Firmly tack the ribbon loop to the back of the wreath with three or four T pins.
Now your necktie wreath is ready to hang!
This No-Sew DIY Necktie Wreath was an easy, quick, not messy project – it only took a bit over half an hour to assemble. Even with unpinning in places and making adjustments. Tying the finishing necktie actually took the most time for me, because I don’t have experience tying neckties! It was not too difficult to figure that part out, so almost anyone could do this.
A necktie wreath like this one would look interesting in an office or study setting. Or over a bar cart next to a cool retro tinsel Christmas tree! This could be a conversation starter at your next holiday party-your guests could admire it over cocktails and mocktails.
For more holiday decorating with panache, try making this DIY Sparkling Brooch Wreath!