
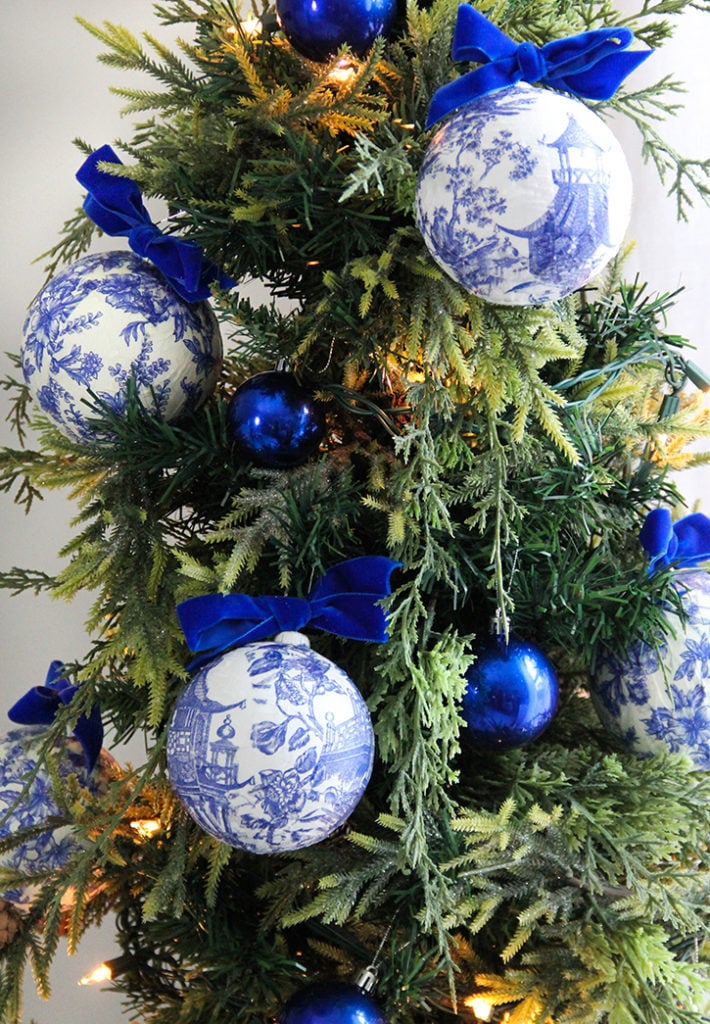
Making DIY Chinoiserie Ornaments is an inexpensive and easy way to transform old ornaments or dollar store ornaments into something fresh and elegant! A blue and white chinoiserie theme has an enduring appeal that lends a touch of refinement to your Christmas tree.
So many of us find ourselves in a crunch for money and time these days. In this blog post, I’m going to give you instructions to create your own custom Christmas tree ornaments, using just a little time and on a budget. And this project is not time-consuming at all, apart from some drying time.
New ornaments can give your tree a makeover, but which direction you would like to go in?
Consider a blue and white chinoiserie theme. It’s timeless. It will add beauty to your home for the holiday season.
Here’s how to do it.
The Basics
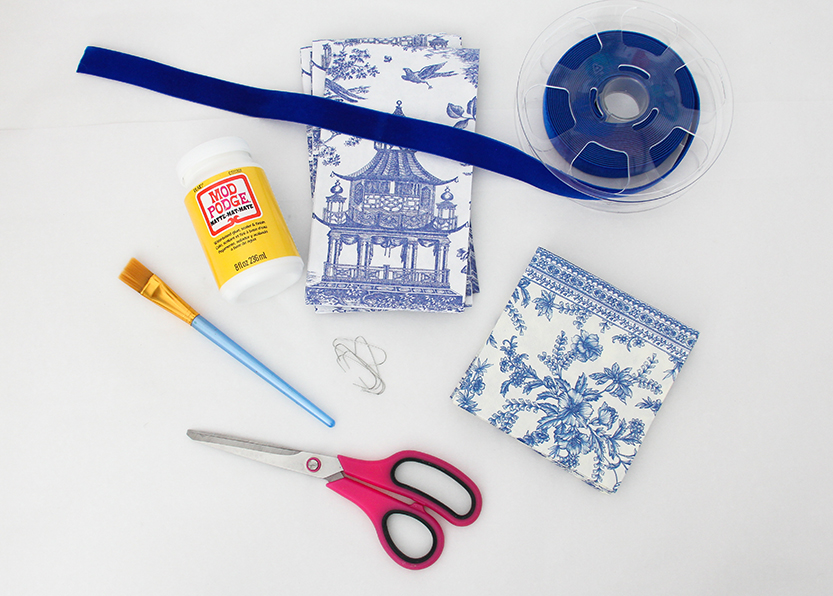
To get the look, you will need a some cocktail napkins or several sheets of tissue paper. I already had cocktail napkins (here and here). But you can usually find good quality printed cocktail napkins online or at stores like HomeGoods. A pack of 25 napkins would easily cover at least two dozen 5″ ornaments like the ones I used. The amount of paper you need will depend on the size and number of ornaments you want to cover, so it’s best to have plenty on hand!
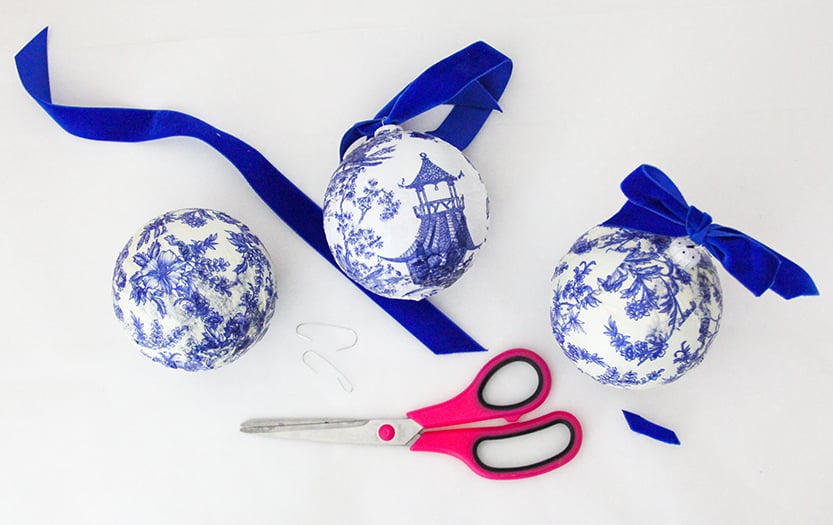
A spool of coordinating ribbon of your choice can be added to the ornaments to dress them up if you like. This three eighths inch wide royal blue velvet I used really gave the ornaments a more formal look.
A flat paint brush works best for applying the decoupage medium to the ornament. I used a matte finish Mod Podge, but it’s also available in satin or gloss finishes. A small dish of some kind to pour the decoupage medium into will come in handy. Sharp craft scissors and some ornament hangers will also be needed for this project.
Some helpful hints for this project:
Having some coathangers to hang the ornaments from while they dry is a great idea, because it keeps them from getting stuck to another surface as they dry.
Covering your work surface in some nonstick material, like a couple of pieces of wax paper or parchment paper is also very helpful.
Choose Your Ornaments
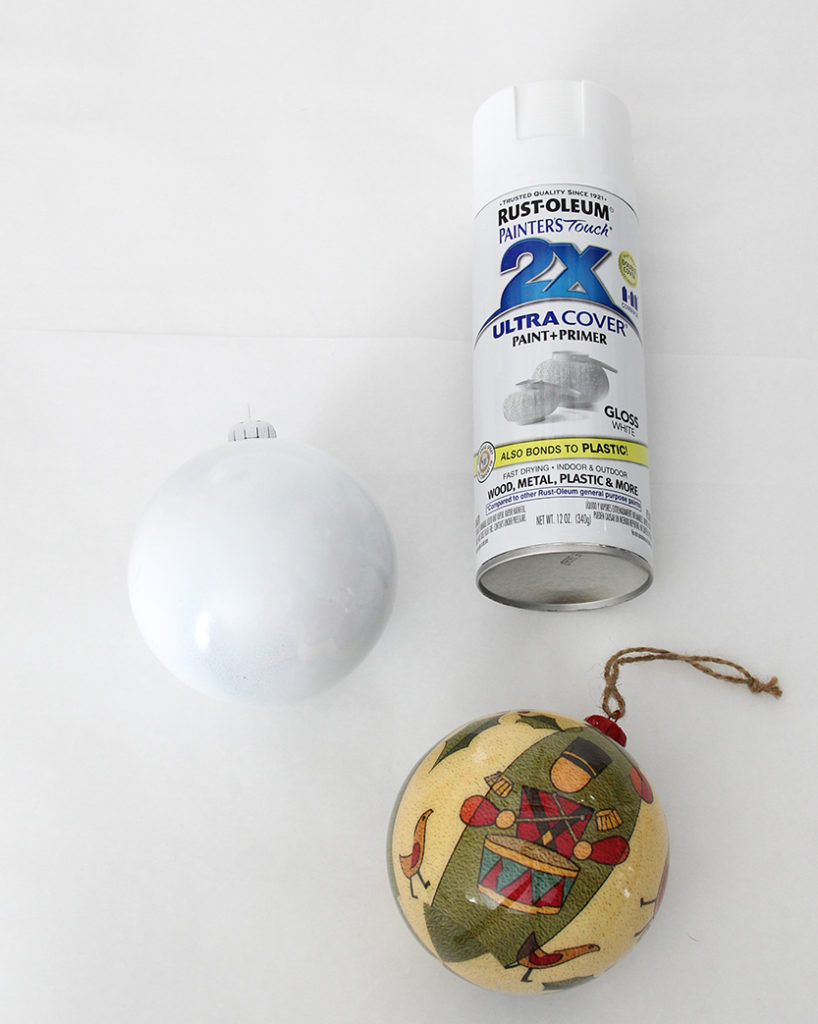
This is a great way to upcycle old ornaments of any curved shape. The round ones I used are made of Styrofoam, so they’re shatterproof. You could also use ornaments from the dollar store-just make sure whatever you’re using is shatterproof and not glass (glass is really almost too delicate). Also, this technique works best with a smooth ornament with no glitter or 3d elements on it. White or silver makes a good base color, but if your ornaments are not those shades, don’t worry! Krylon Rust-Oleum paint and primer spray paint comes to the rescue. It covers any bright or dark colors in one or two coatings, and sticks well to most surfaces.
White as an undercoat color makes the best base generally, especially for blue and white chinoiserie. It will go with the white background and make the blue color stand out even more. The paper is transparent and any base color will show through, so bear this in mind if even if you use a different color scheme or theme.
I left left the caps and loops on my ornaments and went ahead and painted them white. You can cover them with painter’s tape, paint them a different color, or even cover the caps with glitter later if you like. You can remove them before painting if you prefer, but remember replace them after painting so that the ornaments can hang from coathangers for the spraypaint to dry and cure up overnight.
Don’t worry if the paint coating is perfectly even, or if the ornament has any cracks or dimples on it. The paper covering you will apply to it will cover all that.
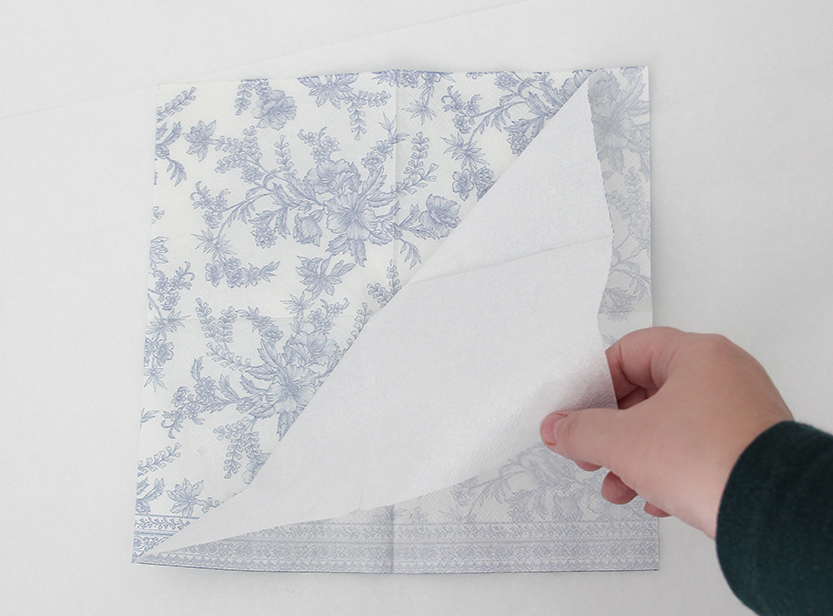
Preparing the Cocktail Napkins
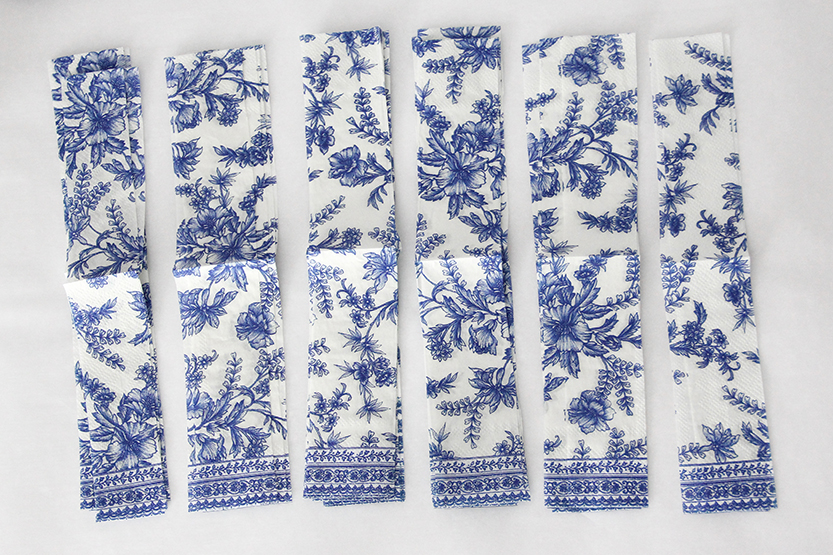
If you’re using tissue paper, skip this step. Lay each napkin flat, facedown. Carefully peel any blank extra plies off the back. Most cocktail napkins have one extra ply, some might have two. You can discard these, reuse them or recycle them. We’re just using the top layer with the image printed on it. This will reduce the napkins to a kind of tissue paper.
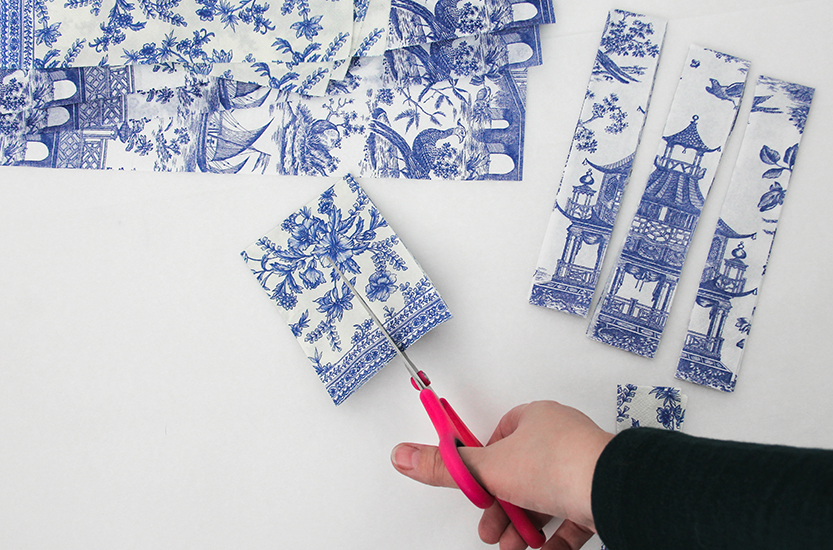
Cutting the Paper to Fit a Curved Surface
Cut the paper into strips 1 to 1.5 inch wide (thinner for smaller ornaments) and just long enough to go vertically down the side of each ornament from top to bottom. Trim off excess length if needed so the layers don’t build up on the bottom of the ornaments.
A Helpful Hint
Line the strips of napkins up in order to keep the continuity of the image as they are applied, even though the strips may overlap a little on the ornaments.
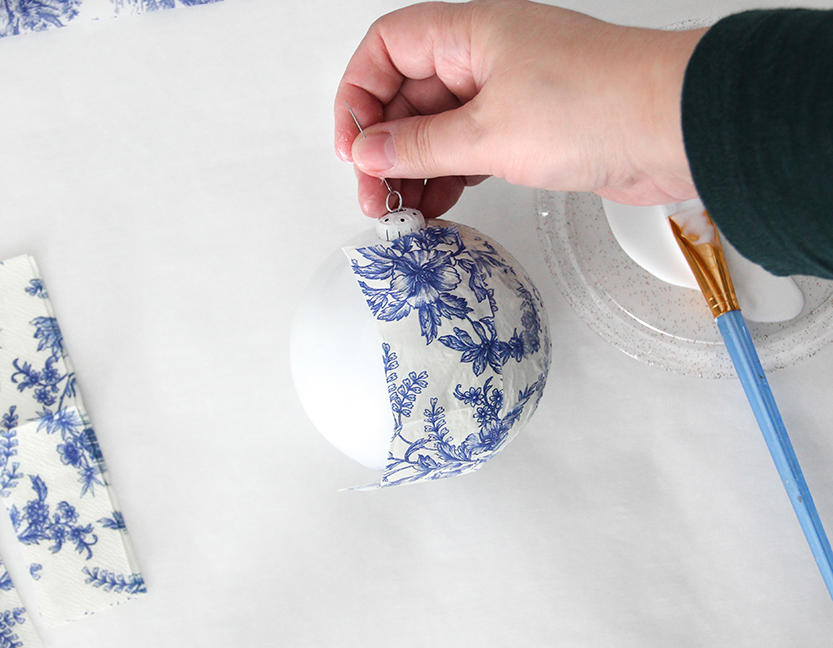
Applying the Decorative Paper
Using the flat brush, lightly paint on a vertical band of decoupage medium onto the ornament. Carefully apply the first strip that begins the design on the paper to the paste, from top to bottom. Smooth the strip of paper flat by brushing another light layer of the decoupage medium over it.
Some notes: The paper is very thin and delicate, and will wrinkle as it dries. Using thick layers of the decoupage medium can make the paper more wrinkly, so don’t paint it on too thickly.
Also, it’s best to avoid handling the wet paper too much, because it will stick to your fingers. You can handle the ornament by the cap and hanging loop to turn it, and even adding a hanger might make it easier to handle.
If you rip any of the fragile paper during application, you can peel it off while it’s still wet, and replace it easily. If a spot of napkin gets pulled off by touching with tacky fingers, you can patch it with a piece of napkin.

Continue the Process
Continue pasting the strips onto the ornament in the same way, overlapping the next strip with the previous one, just enough to cover the edge. Don’t worry if there are tiny edges of white showing here and there, though. They won’t be that noticeable. Along with a little wrinkling, it’s just the nature of the handmade look of these ornaments. A little bit of imperfection is part of their beauty. They will definitely not look mass produced!
Repeat the process until the ornament is covered. As you finish each ornament, hang from a coat hanger to dry, leaving enough space between them so that they do not touch. They should be dry to the touch in about thirty minutes, but you might want to let them cure for about a day before putting them on your tree.
A Finishing Touch
You can hang the finished ornaments as is, but you might want to add some ribbon to dress them up. Tie or glue a bow onto each one, or use a length of the ribbon to hang the DIY Chinoiserie Ornaments on your tree.
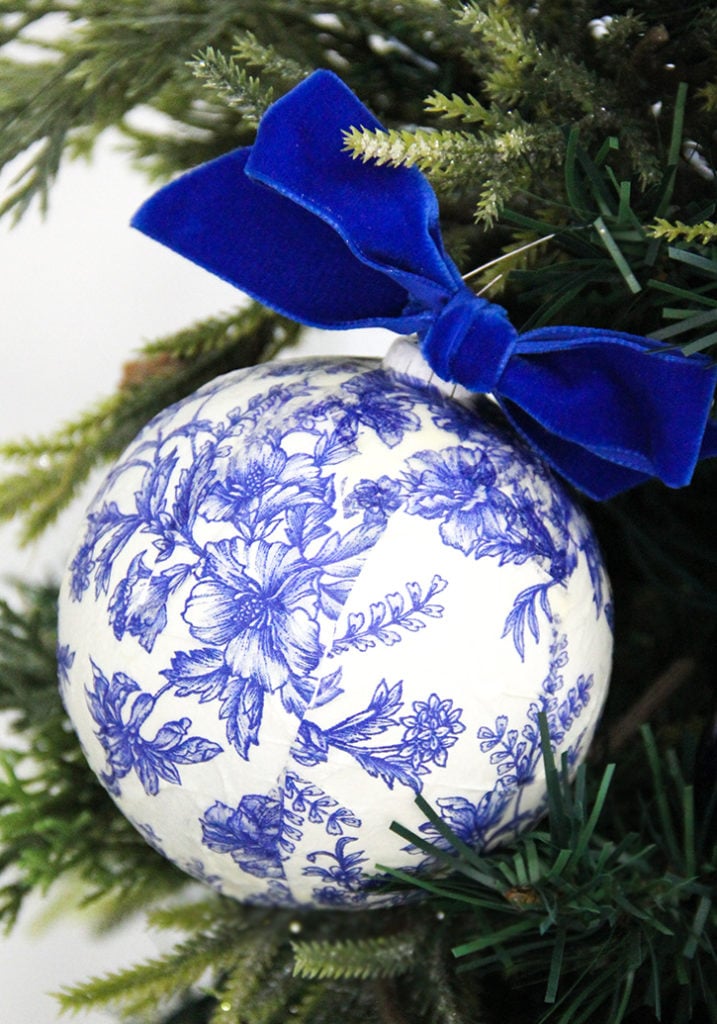
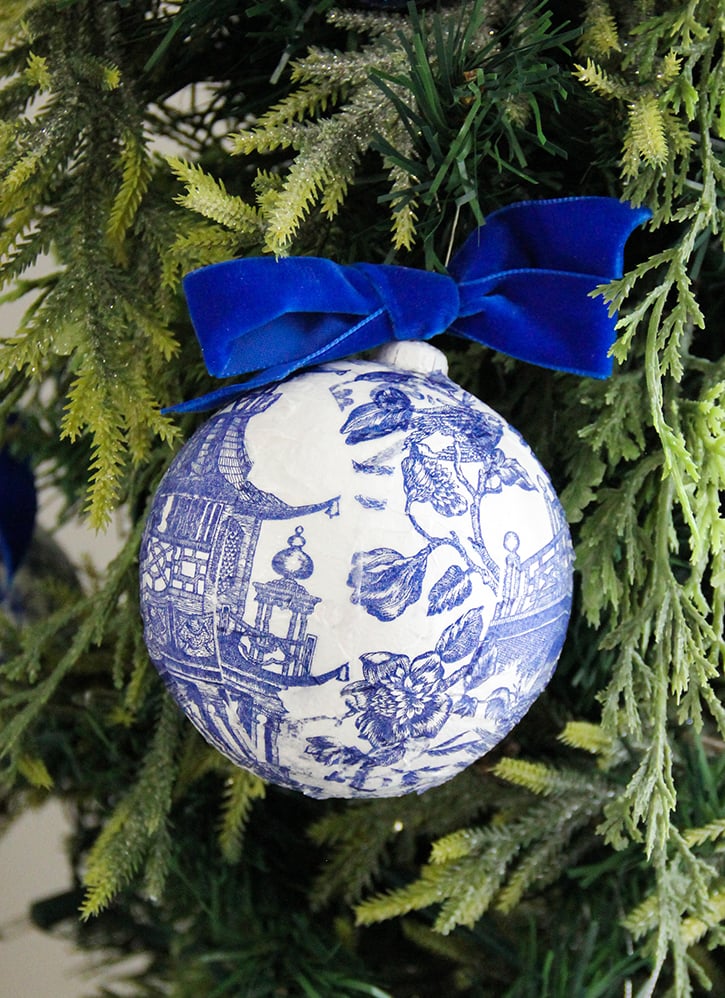
These beautiful DIY Chinoiserie Ornaments are lightweight, but have an elegant fine china look.
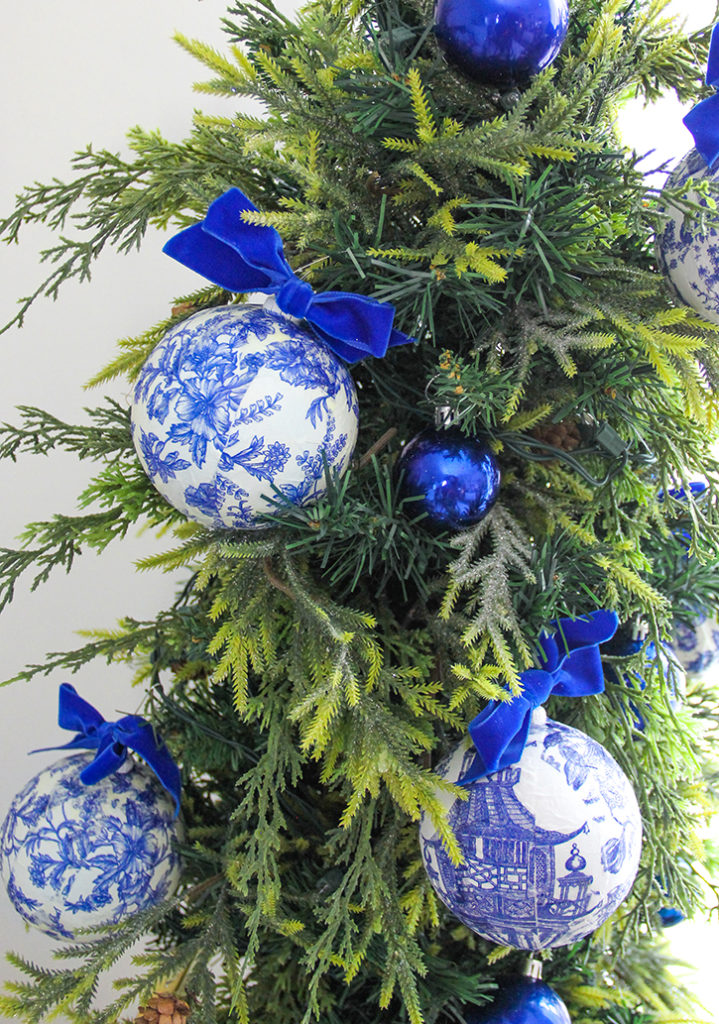
These elegant DIY Chinoiserie Ornaments are more on the fancy side without being ostentatious. They fit well in a more traditional interior design setting. Pair with blue, white, silver and gold ornaments on your tree for an elevated, yet fresh look.
If you would like another DIY Christmas décor idea, try to Make a Vintage China Wreath Using Grandmother’s Dishes.