
This Keepsake Box Makeover is a fun project transforming an old jewelry chest into something completely new. Upcycle a dated box into a custom creation for yourself, or for a unique gift for someone special.
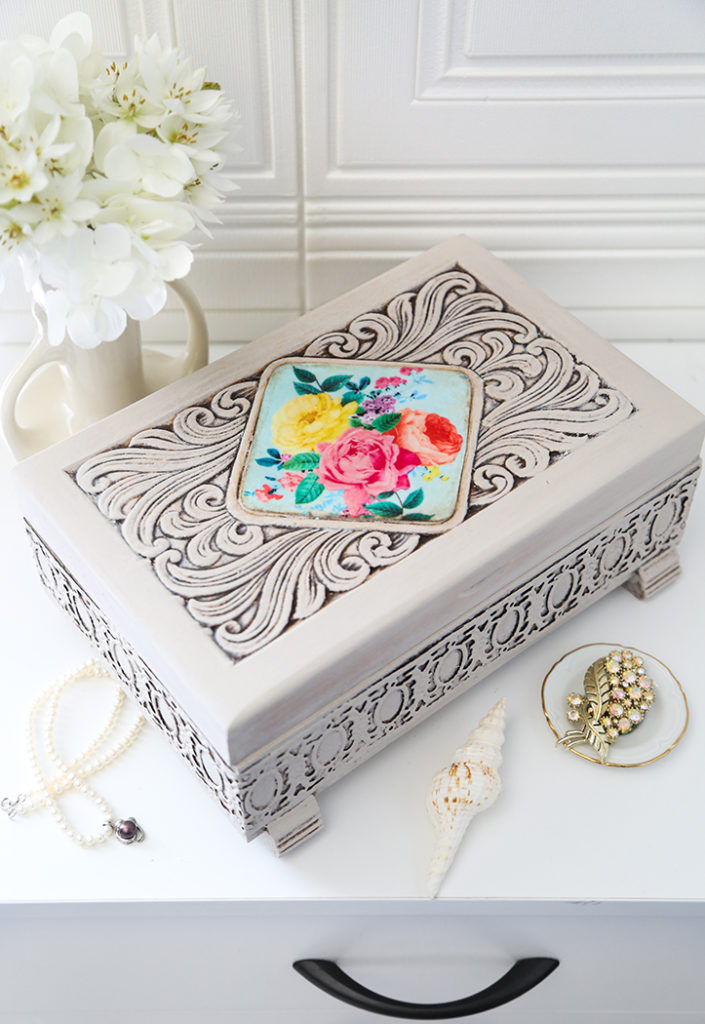
I found this vintage jewelry chest in a thrift shop. It was not in the best shape, but it had beautiful carved detail on the lid. I was inspired to give it a total makeover into a shabby chic, cottagecore style by adding a chalk paint finish, extra embellishments and new hardware.
Treasure Box Transformation!
It took a few steps to refurbish this old jewelry chest and give it new lease on life as a keepsake box to hold personal treasures. There are so many directions you can go with color and style! With a darker finish and simpler details, this box could have gone with a completely different look. Explore all of your color and finish options to bring your own distinct style to this project.
Prepping the Box.
Skip this step completely if the box is newer or unfinished. Can’t tell? Put some acetone nail polish remover on a cotton ball and rub it on the surface. If some varnish or paint comes off, the finish is water based. All you need to do is clean the surface you want to paint. Chalk paint will cover acrylic or water based paint with no sanding required.
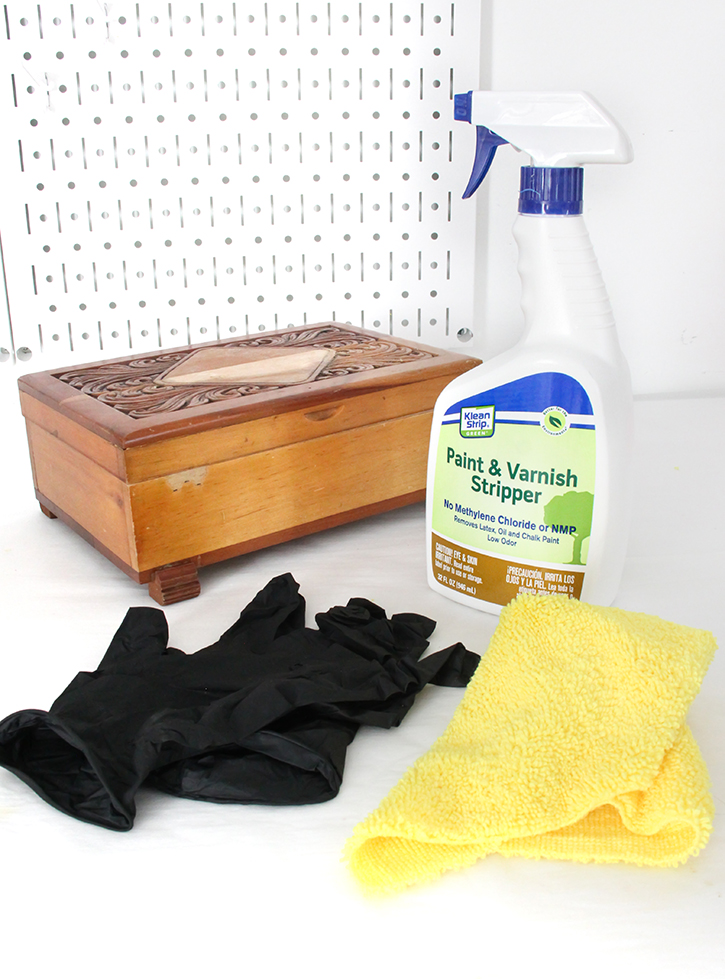
On a wooden box that’s probably at least 50 years old, it will more than likely have an oil based varnish. Chalk paint will not adhere oil based coatings in a durable finish. Refurbishing an old box like this, you will need to remove the original oil based finish. Klean Strip Green Paint and Varnish Stripper is less toxic, low-odor and can be used indoors. A sturdy shop cloth or two for removing finish and protective gloves are recommended for this step.
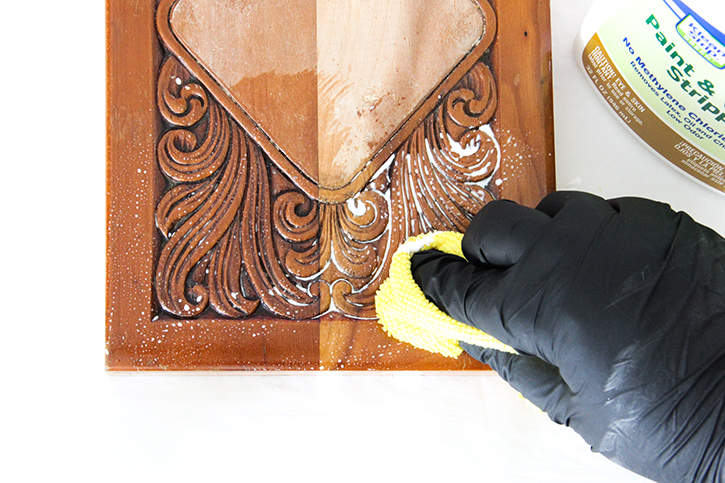
Follow the product instructions for your paint stripper. Apply it then let it set to dissolve varnish from the surface. It can be wiped off in about half an hour. The process might have to be repeated two or three times. It depends on how thick the layers of paint and varnish are on the surface. Cotton swabs can be handy to remove the residue from down in grooves of carved detail. Let the surface dry at least an hour before applying any paint.
Chalk paint and wax.
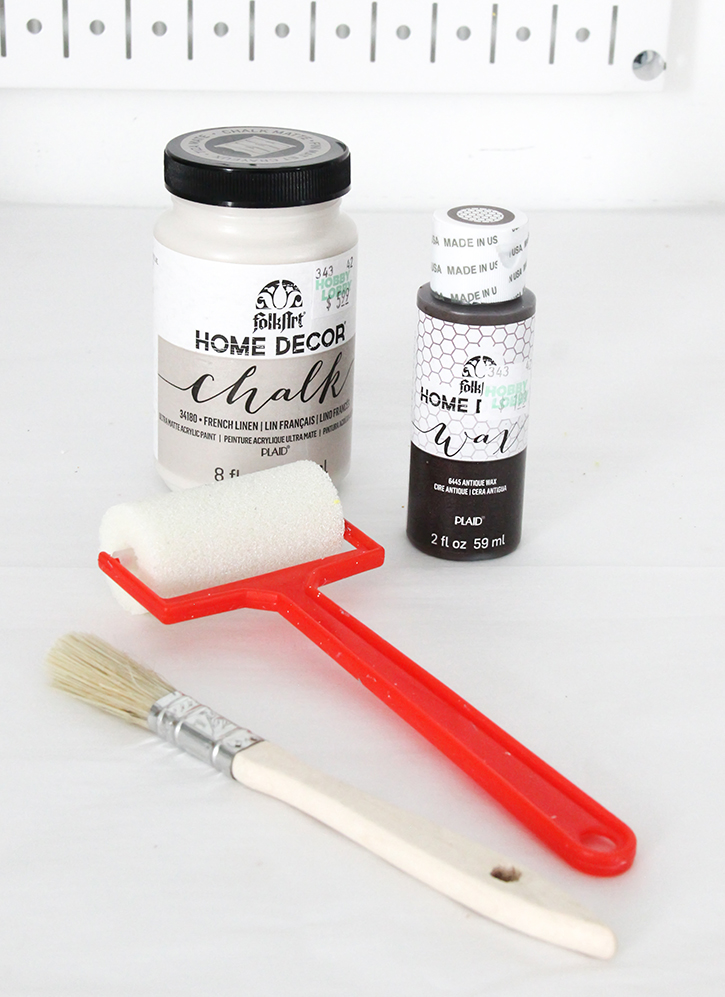
Chalk paint is available in many different colors, and can be found at all craft supply stores. There are different brands out there, but I chose this Folk Art brand home décor chalk paint. French Linen is a neutral color that makes a nice alternative to white or gray. The Antique color home décor wax acts as a sealer as well creating an antiqued finish. And the dark color is great for bringing out carved details and textures.
To create even more of a vintage look, chalk paint is also easy to sand or distress.
A small paint roller and soft brushes work well for applying the paint and wax. Specialty brushes are available for applying chalk paint, but these brushes with fine soft bristles work just as well.
Lining the box.
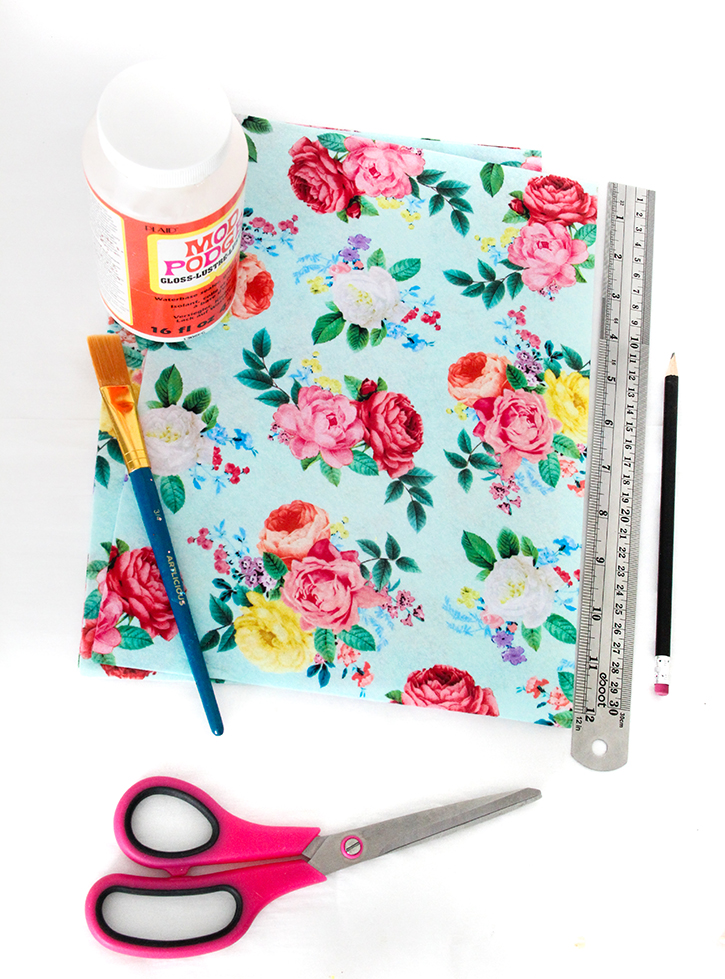
Up the ante on your Keepsake Box Makeover by adding a liner to the inside, which will make it look more finished. It also provides a softer surface for items to rest on. Almost any fabric or even paper can be used to line the inside of the box. I chose this soft, pretty printed felt to add to the grandmillenial style of this box. Felt is an ideal material for lining the inside of a box. It’s slightly rigid but soft, and it cuts and glues easily. There so many varieties of printed and textured styles of felt available, as well as the classic solid colors.
Hardware
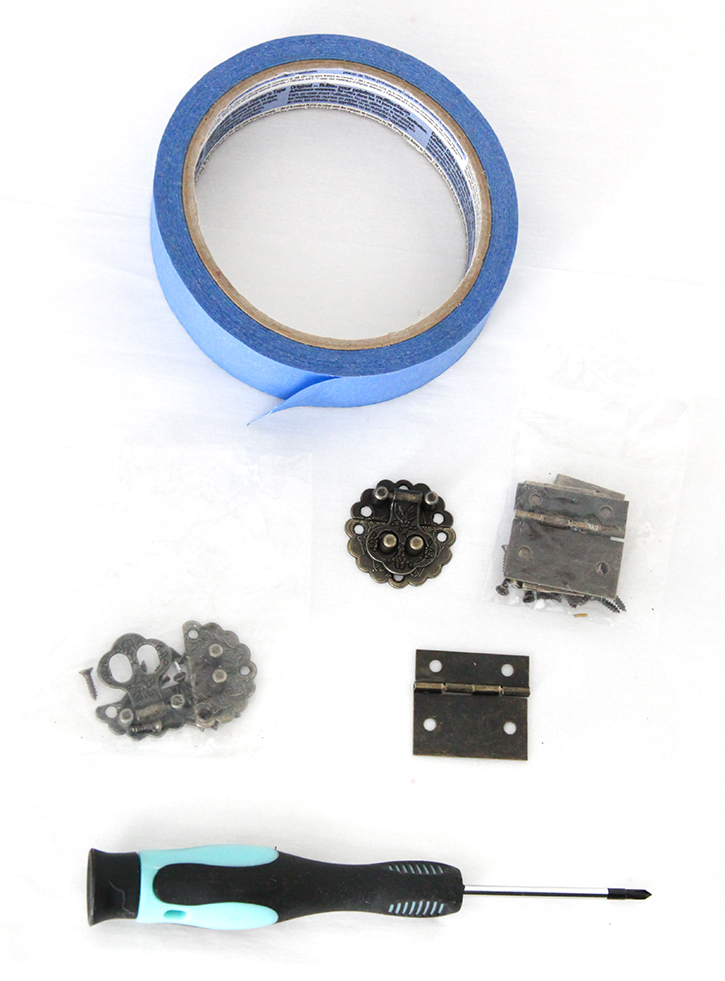
Do you want to replace the hardware on the box, or is it missing? Look for hinges and clasps the woodworking sections of craft stores. Hardware for small boxes often come with tiny screws, so have a screwdriver small enough to work with them. Use painter’s tape to hold hardware in place while you’re attaching it.
Possible embellishments.
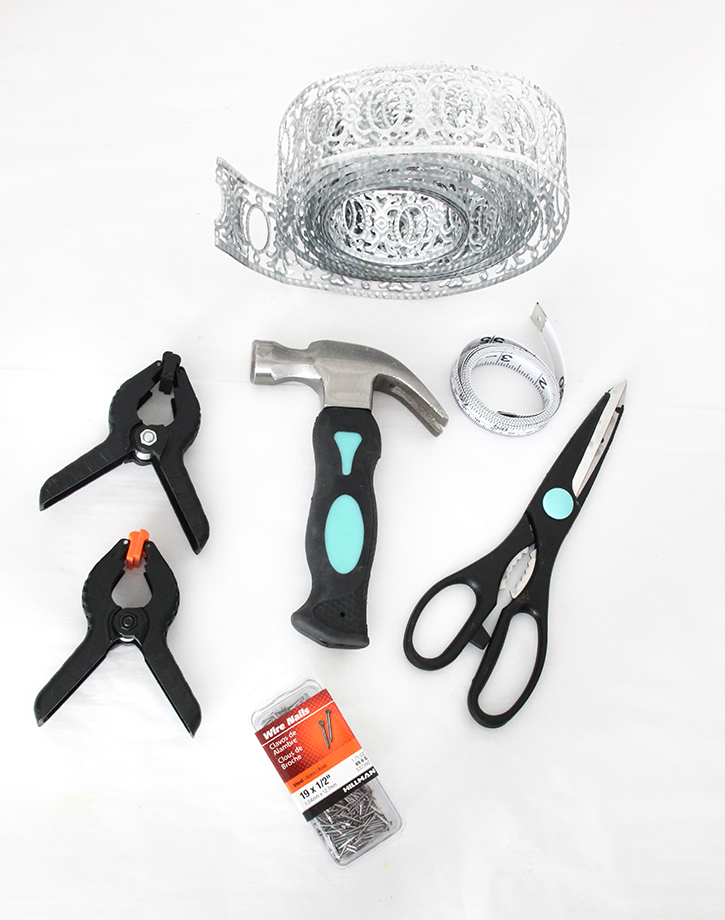
Metal ribbon like this can be used to trim a wooden box. Find it with the ribbon in the floral department of some craft stores. Use tin snips or other heavy duty scissors to cut it. You’ll need wood glue to adhere it to the box, clamps and perhaps even small wire nails.
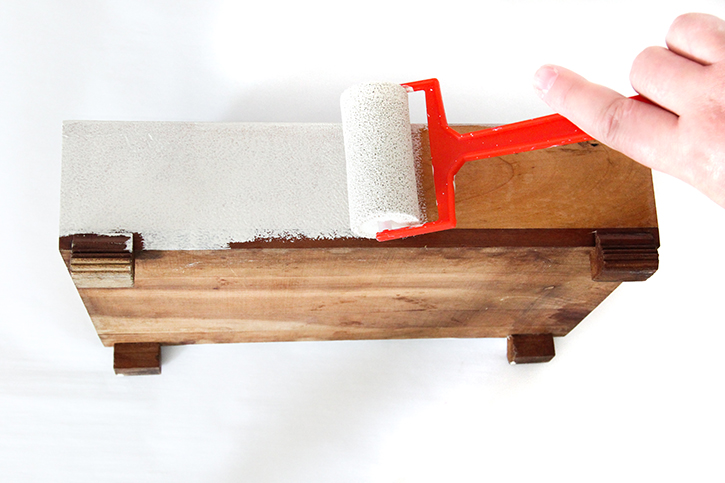
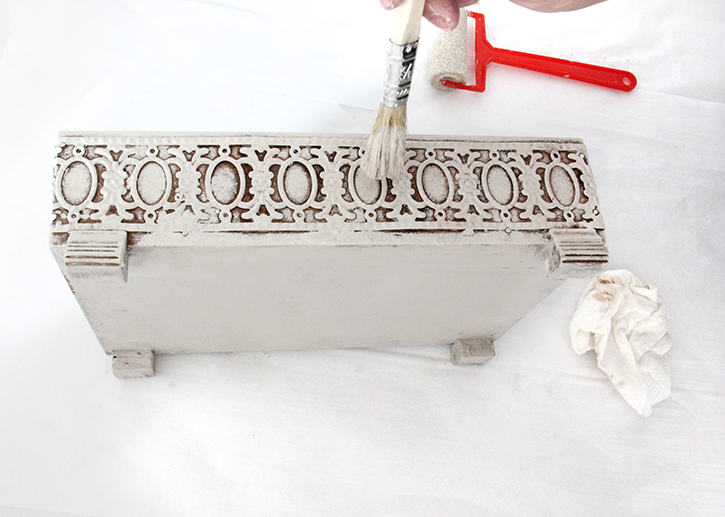
Roll it on.
Use a small roller to apply chalk paint onto flat surfaces. This is a quick way to cover larger areas in a smooth, even coating of paint. The first coat may be all that is needed, but let it dry two hours if another is needed.

Line the box.
Measure areas inside lid and base of the box. Dimensions for each piece of liner can be marked on back of the lining material with a pencil. Carefully cut out pieces with sharp scissors or a craft knife.
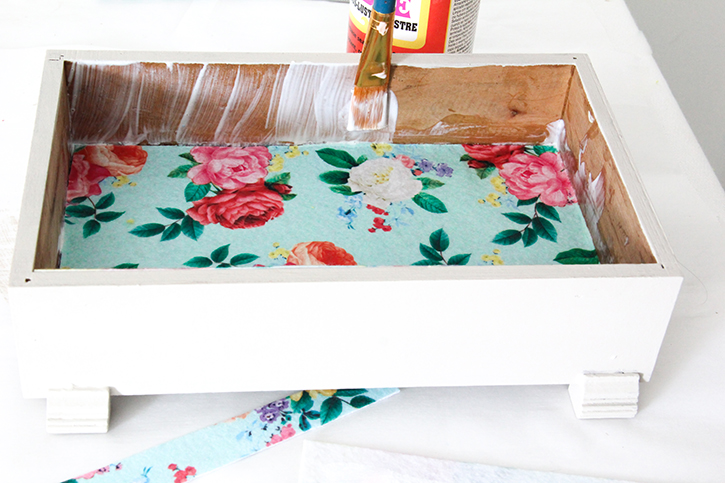
Paint the inside of the box before adding a liner, or you can leave it unfinished. This box had an unvarnished wood interior.
Apply decoupage medium or wood glue on inside surfaces of the box an area at a time. Lay each piece of liner over the glue as soon as it is coated, and smooth down with your fingers. I don’t recommend using hot glue for this. The sections of liner wouldn’t attach as smoothly, especially with a lighter material. Let the liner set and dry before any next steps. If you’re using paper as a liner, coat the surfaces in decoupage glue or clear polyurethane afterwards to seal it.
Add some trim.
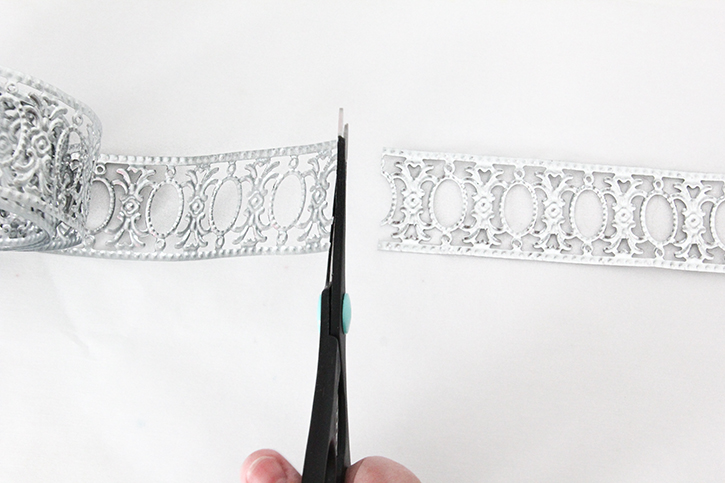
An extra accent trim can really dress up a jewelry chest. You could even use a length of lace! Measure around the outside of the box to get the overall length you will need. Allow about 1/2″ for overlapping in back. If you use metal ribbon, cut it with tin snips or other heavy-duty scissors.
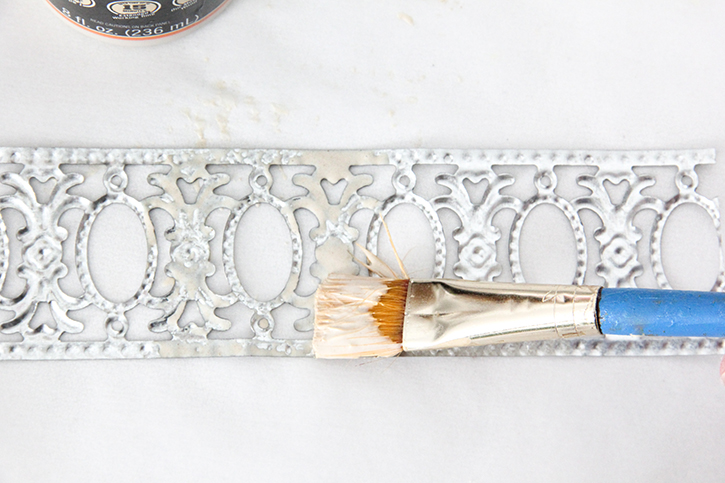
Paint the back of the ribbon with wood glue before wrapping around the box.
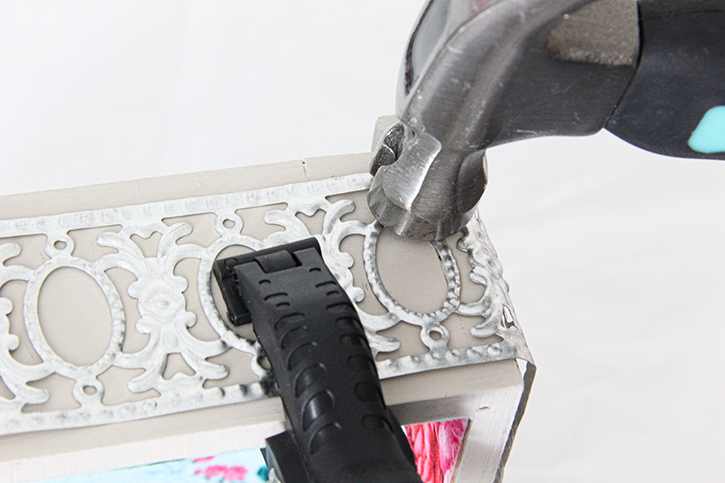
Wrap the ribbon around the sides of the box and clamp into place. If you’re using metal ribbon, drive wire nails into the corners to reinforce the hold. Let wood glue set and dry before painting.
Leave the ribbon in its original color, or paint over with with a coat or two of chalk paint.
Add dimension with wax.
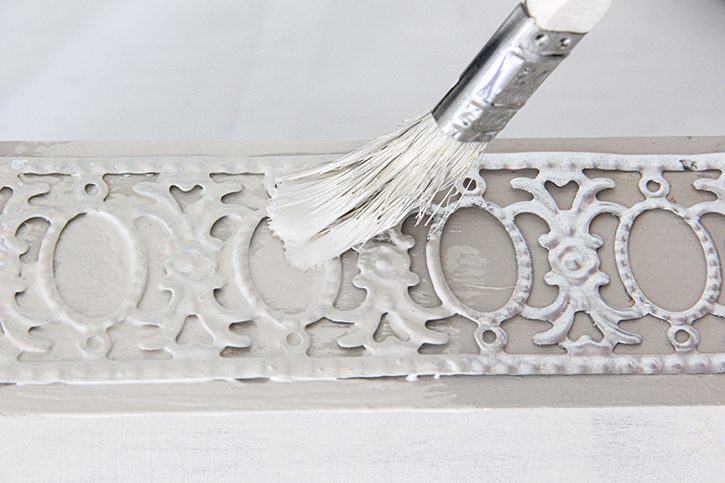
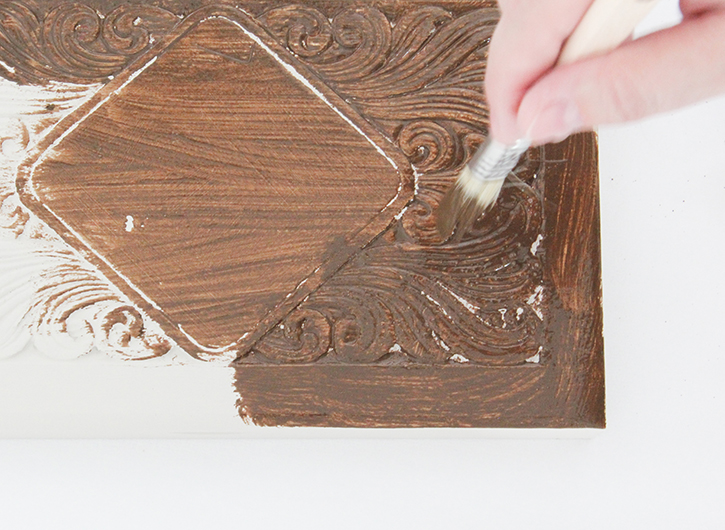
After the chalk paint layer has thoroughly dried, brush on the finishing wax. To make carved designs pop, be sure to apply thoroughly down in grooves and recessed areas.
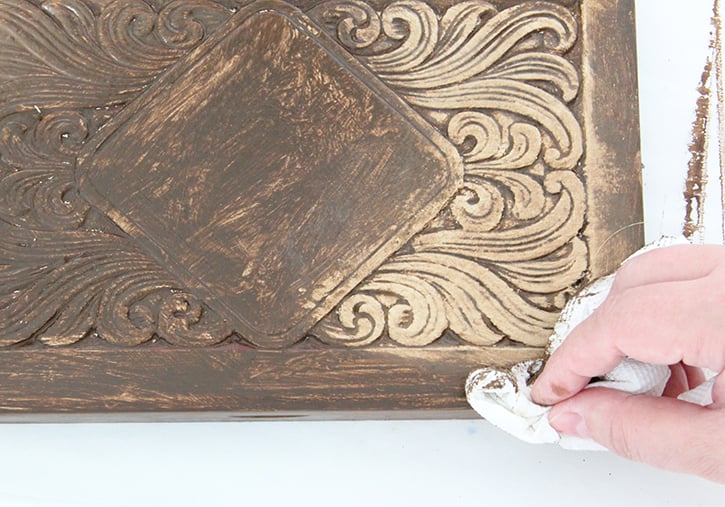
Let the wax dry and buff with a cloth according to product instructions for a darker finish. The darker finish looks rich over deeper base paint colors. For a lighter finish with some antiquing, gently buff the wax off while it is still tacky. Either way, the Antique dark wax really reveals and emphasizes carved details.
If the resulting finish is still a little too dark, lightly drybrush on another coat of base paint. This also highlights details and raised textures.
Coat the final layer of paint with clear polyurethane to protect the finish.
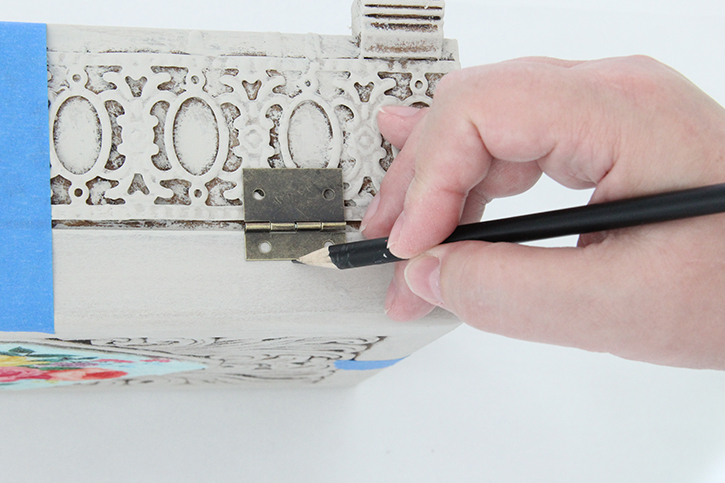
Add the hardware.
Hold the lid onto the base of the box with painter’s tape to make attaching hinges easier. Hardware can also be held into place with painter’s tape, if needed. Lightly marking placement of hardware with a pencil can also help you keep track of its placement.
Some suggestions for final embellishments.
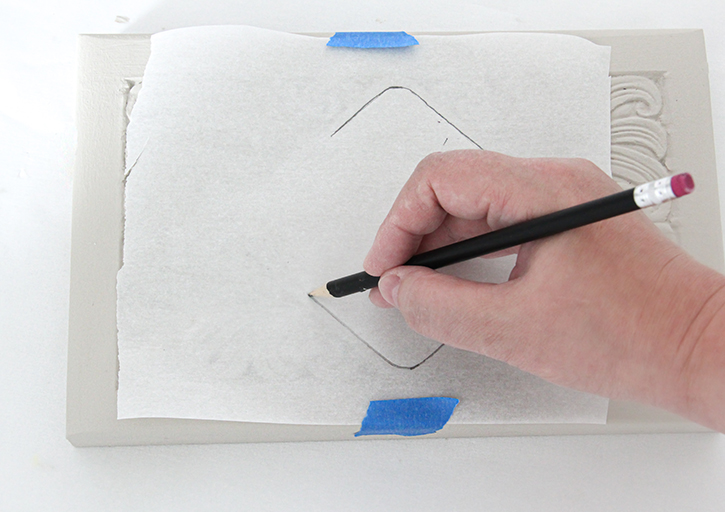
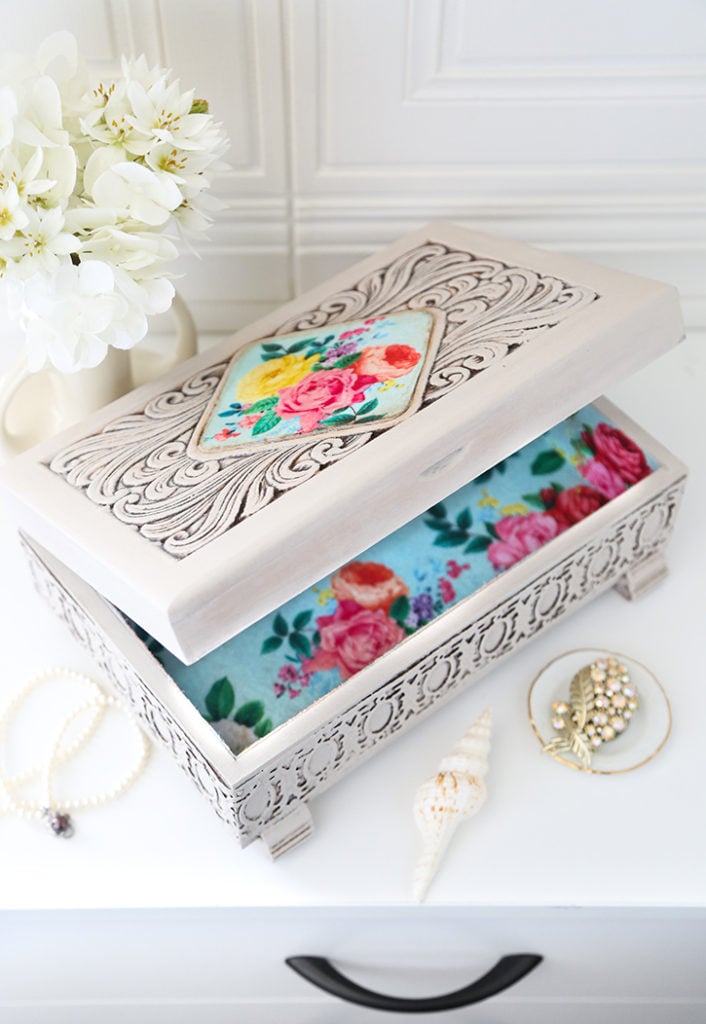
This box has a smooth, diamond shaped area in the center of the lid. It looks like it had some kind of decal on it originally. I was left with deciding what to do with this blank space in the overall design. A monogram would have been a pretty addition. Leaving it empty would have been fine too, However, I chose to add another cottagecore accent.
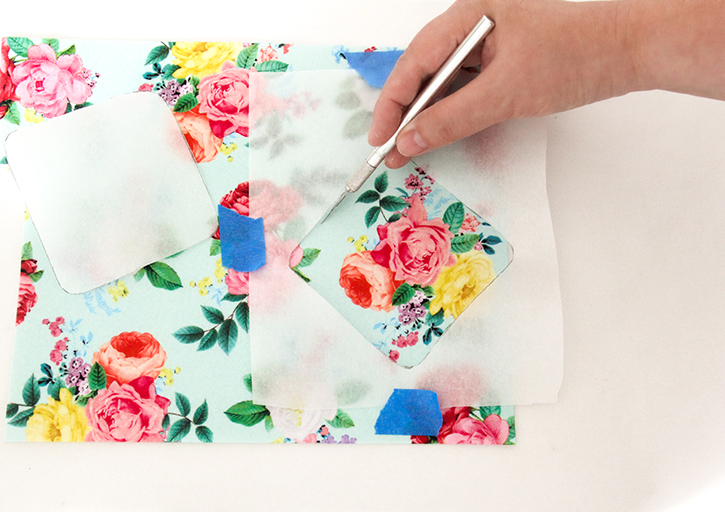
I chose a design element from an extra piece of the felt I’d used for the liner. It was easy to trace the shape of that area using a scrap of parchment, then cut out the shape. Using the paper as a stencil, I picked out the design to cut from the fabric, taped it into place, then lightly traced the outline in pencil. And then cut out the piece.
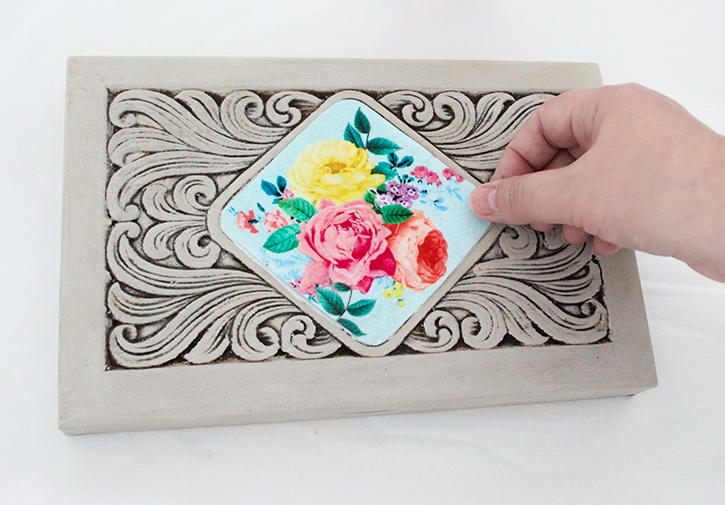
I attached this to the lid with decoupage glue. Then I applied a protective coating of decoupage over it. To match the vintage finish of the rest of the box, I added some of the antiquing wax to the edges of the felt.
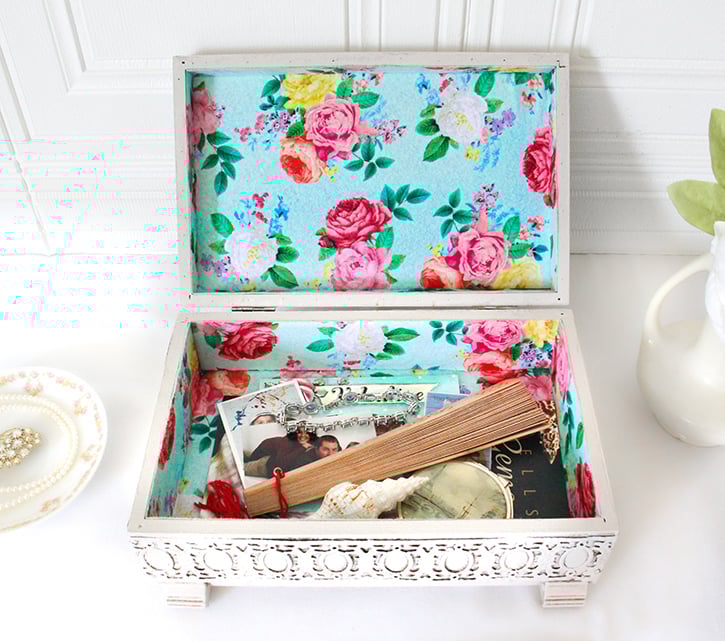
A place to store your treasures.
This Keepsake Box Makeover project is a creative way to upcycle a dated jewelry chest into a new keepsake box with a charming vintage style. If you do this project on your own, the design could go in any direction. Choose a style that fits you and have fun transforming something old into something new!
For another jewelry storage idea, take a look at this DIY Hanging Jewelry Holder!
Stunning! Is there a maker mark on the box? I would love to find one just like it.
Thanks Christy! Unfortunately, there didn’t seem to be any maker’s marks anywhere on the box. I looked because I was curious too. My mom had something similar back in the 70’s that probably came from Sears or Jefferson Ward. There was a lithographed decal on the lid of the box, of a landscape. This box had the remains of one on it, in the diamond shaped area. You might look for something like it on Etsy among the vintage items. Otherwise, I’d say keep looking in thrift shops, or at yard sales with with a lot of 70’s items.