
Elevate thrifted or inexpensive rabbit figurines into glam glitter bunnies like the ones seen in high-end boutiques! It’s easy to do just by adding a blingy finish to otherwise nondescript or kitschy figurines.
DIY Luxecycling.
Luxecycling is a new trend in upcycling that reinvents a used piece of furniture or home decor into something with more value or beauty. It’s usually achieved by adding a luxurious finish. In the UK, luxecycling has a funky, avant garde design aesthetic that feels right at home in at a modern art gallery. (For an adventure in design inspiration, check out Queen of Luxecycling Zoe Peacock’s mucknbrass.com shop or Instagram account.)
This trend can go into an off-the-wall direction, but you can still bring some of this style into your decorating scheme. If you’re more ambitious, you may decide to use a fancier treatment like metallic leaf for a project like this. But an easily accessible and affordable way to add your own twist using this trend is to add loads of glitter to bargain or thrifted decorative accents.
Getting started
Start with one or more rabbit figurines. They can be seasonal sale items like these. Thrift shop finds, dollar store decorations or even something you already have will work just fine. The figurines can have a smooth or textured surface. They don’t even have to match! These will be given a new lease on life.
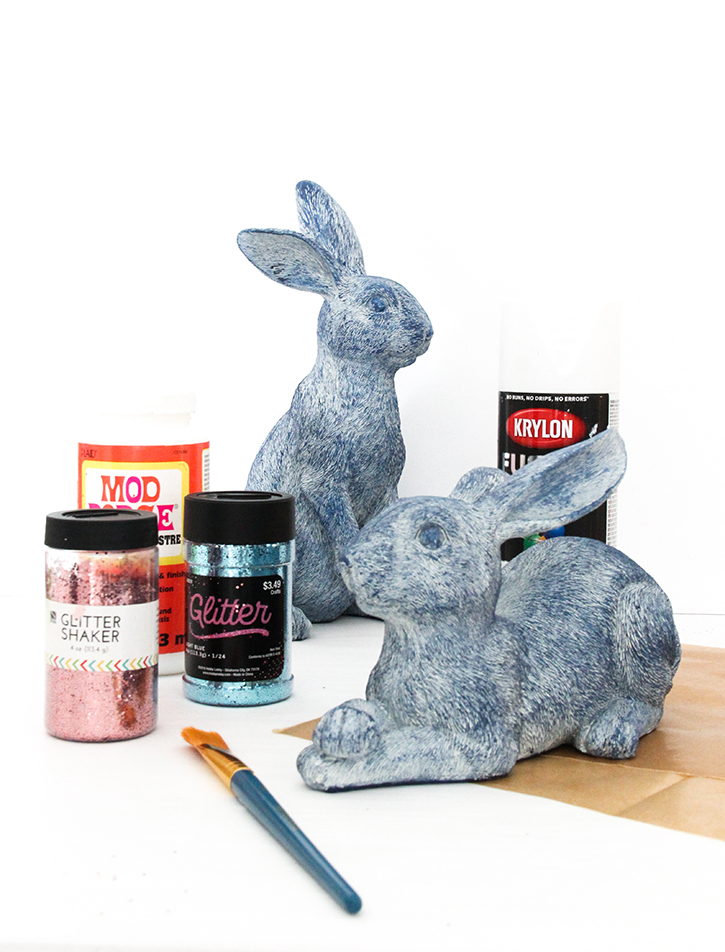
You will need spray paint for a base coat, decoupage glue and soft craft brushes for applying the coating, as well as a clear gloss spray paint to seal the surface.
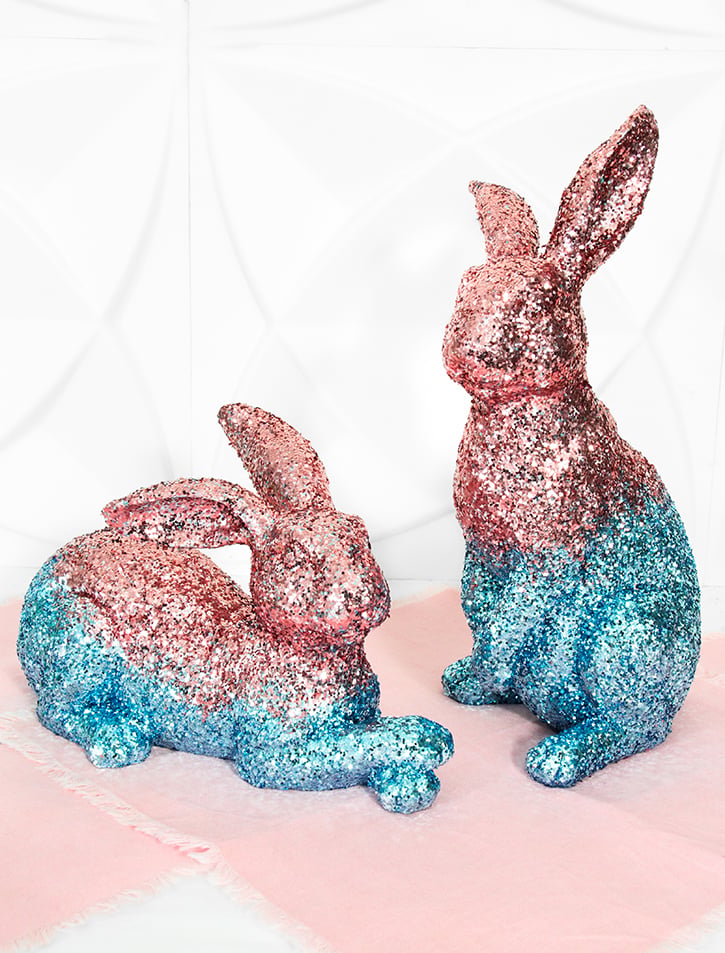
As far as glitter is concerned, you can use any colors you like! I used this light blue glitter on the bottom, and a rose gold on the tops of these bunnies. Also, some large pieces of wax paper will also come in handy for catching glitter after it’s poured on.
Prime the surface.
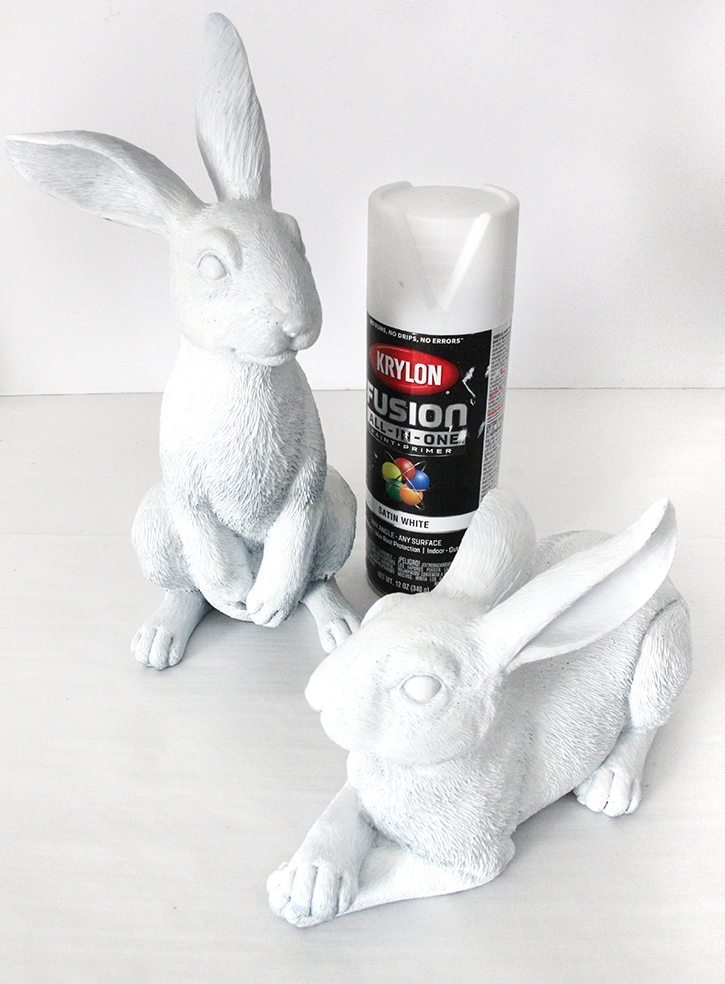
Clean the figurines of any dust, stickers or tags. Also, remove any decorations on them you don’t want to use. A good combination paint and primer spray paint for a base coat is a good idea, to cover the old color or finish. You can use any shade you like, but I used Krylon Fusion all-in-one spray paint in a basic satin white. Two or more coatings might be needed to cover up the old color or finish. Just follow the product directions, and let them dry thoroughly before continuing to any next steps.
Decoupage is the Crafter’s BFF.
You can use any type of decoupage, but Mod Podge Extreme Glitter sealer, glue and finish is ideal for projects involving glitter.
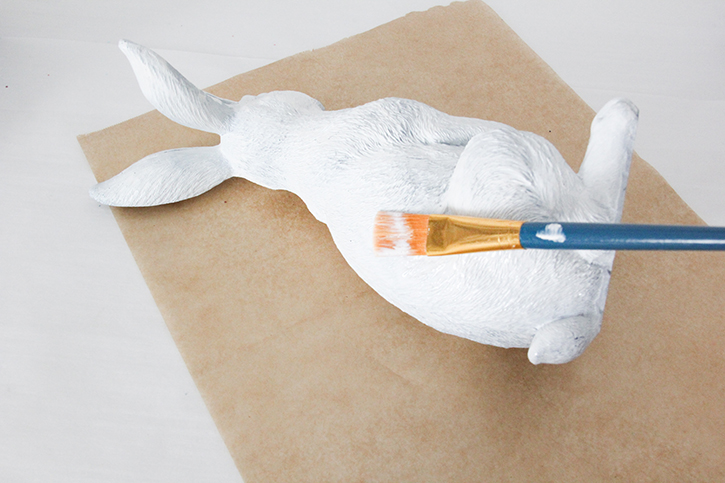
Before you start applying, fold two good sized pieces of wax paper in half, to form a crease in them. Smooth them out flat, and lay them next to each other on your work surface. Next, lay a bunny figurine on one of them, and apply the decoupage in a patch a few inches wide. Be sure to fill in textured surfaces and grooves in more sculpted areas.
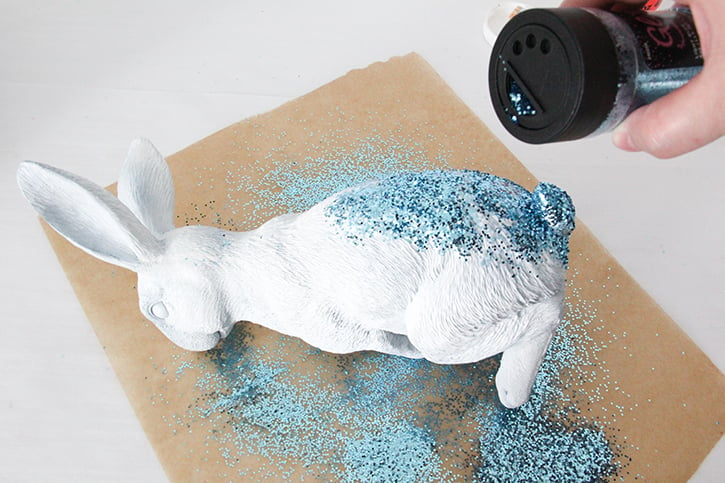
Shake on some sparkle.
I wanted the blue glitter on the bottom half of the bunnies, so that’s where I started.
Shake plenty of glitter on the area you just coated, until it is covered. Add more decoupage and coat in glitter an area a time, to make sure they get covered before the glue can dry.
Repeat this until all the area you want to be that color is covered. Let the figurine dry for at least two hours before continuing. Ideally, you should let decoupaged items cure overnight.
Set the glittered bunny on the other piece of wax paper to dry. Use the crease in the piece of wax paper you just used to channel the leftover glitter back into the container.
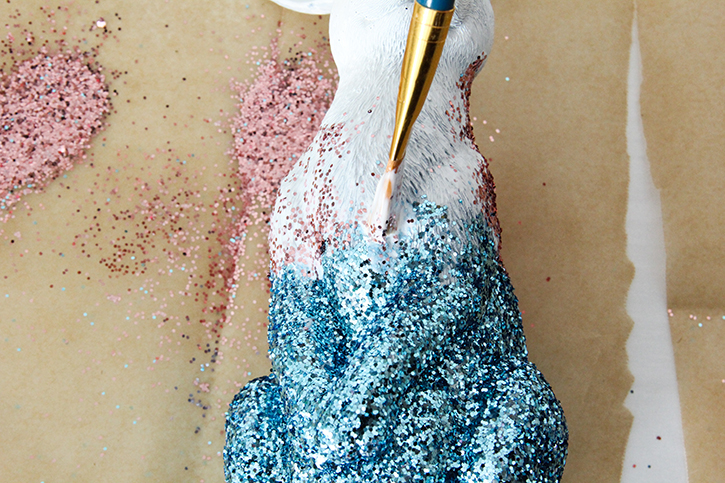
Color duo.
After one color of glitter is set, you’re ready to add other colors. You can create an ombre effect where the colors will come together. Paint some decoupage over the edge of the existing color in a zigzag pattern, using the side of your brush. Lightly sprinkle on some glitter in the next color, so that some of the bottom color layer still shows through. After this, you are ready to paint decoupage on the rest of the figurine and cover it in more glitter! If you like, you can repeat this process with multiple colors. Don’t be afraid to let a few pieces of different glitters mingle-it just adds to the effect.
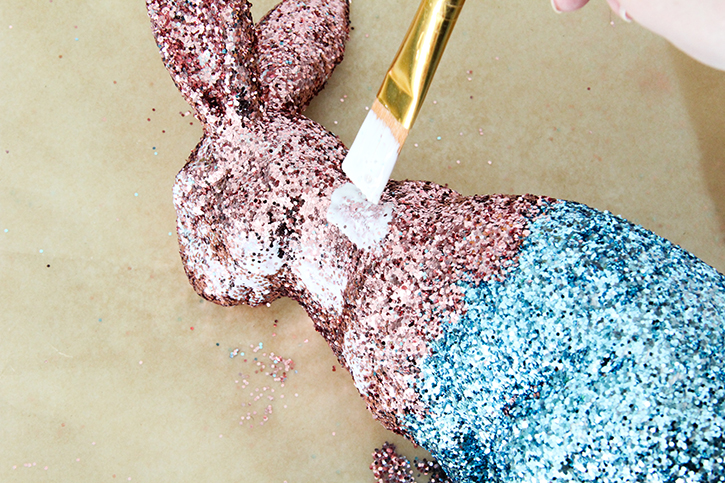
Fill in the gaps.
When the decoupage is dry enough, gently shake excess glitter off the bunny. If you see any areas where the glitter is sparse, you can touch those up by spot painting decoupage on them and sprinkling on more glitter.
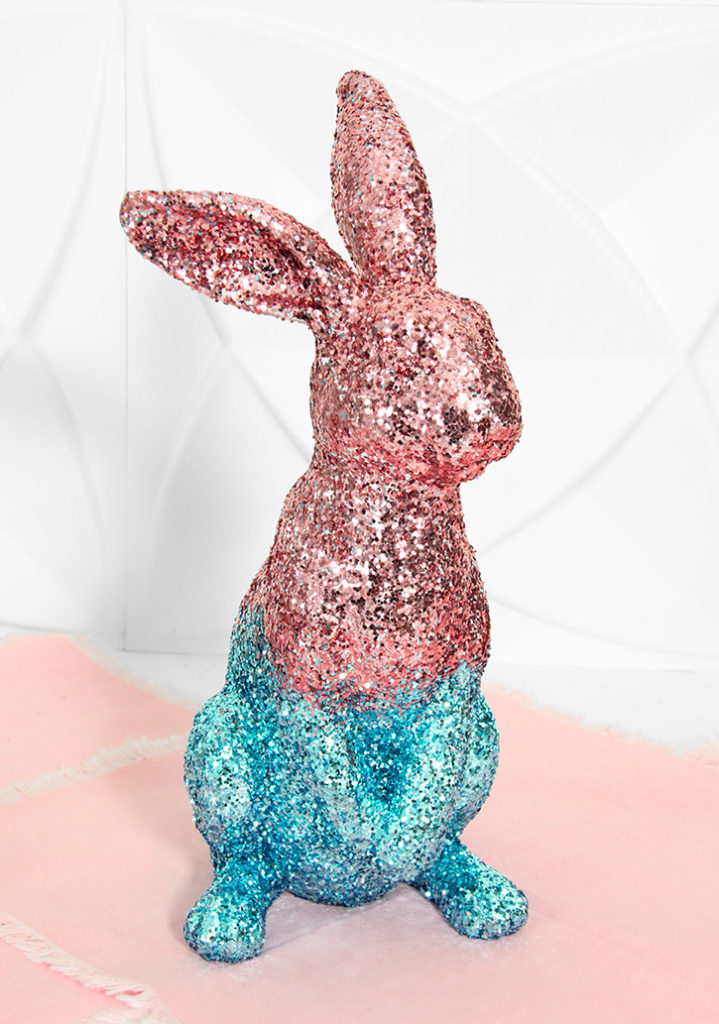
When the bunnies are completely covered and dried, add a couple of coats of a durable clear gloss spray paint like this Krylon Fusion. This will protect the sparkle of the glitter, and prevent the bunnies from shedding!
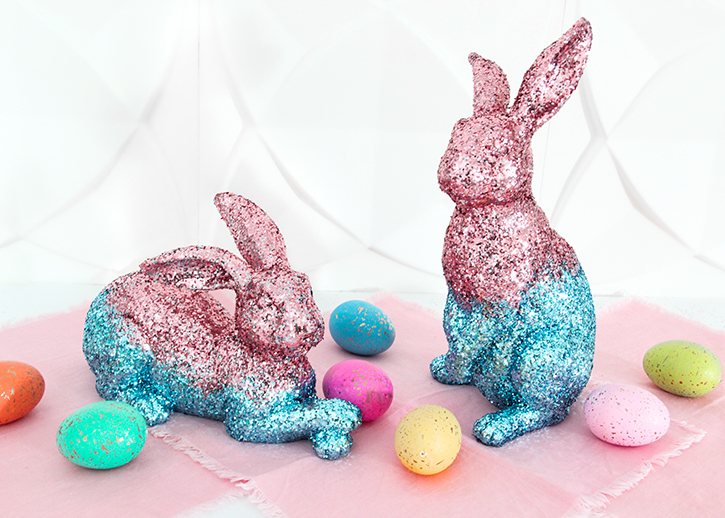
These glam bunnies really bring some bling to a tablescape or a sideboard! Style them with colored eggs for Easter, or with flowers for more of a Spring theme.
For a kid-friendly Easter craft project, take a look at these adorable Pom-Pom Bunny Pals!