
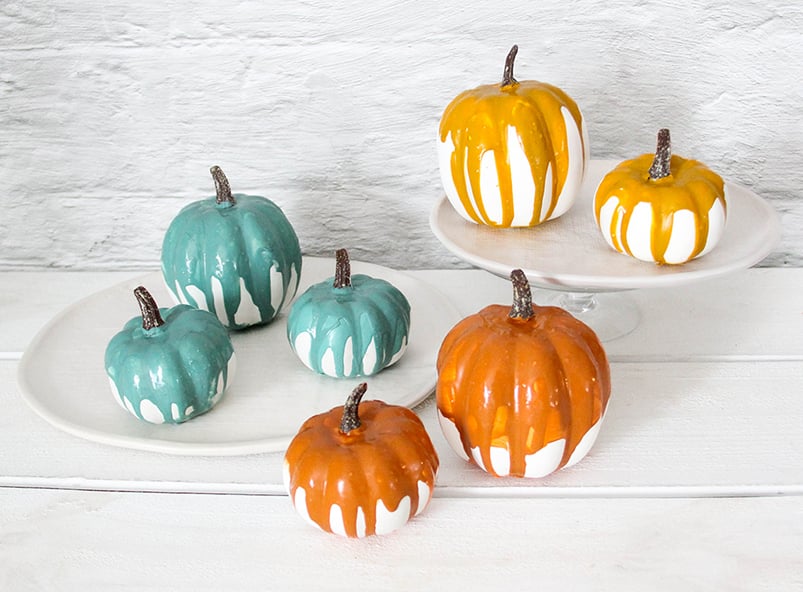
Drip Glaze Pumpkins have a handcrafted pottery look that fits in casual settings for Fall, from rustic to modern. Recreate the look of fired ceramic glaze without a kiln!
Vintage Inspiration
Use acrylic paint and a pourable gloss medium to make plain white decorative pumpkins into a unique seasonal accent. Blend paints to make your own bespoke color palette. I found inspiration in cozy vintage décor colors like these soft turquoise, harvest gold, and rust tones. The combination of colors you can use is infinite-you can match a neutral decorating scheme, or you can add a pop of color.
The essentials.
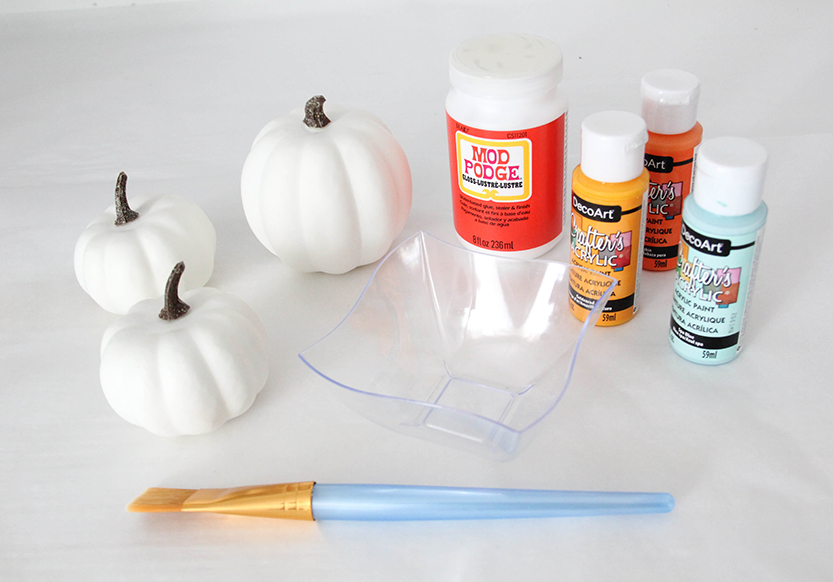
White foam decorative pumpkins like the ones I used are widely available in a variety of sizes and shapes, and have a paintable surface. Smaller sizes are usually sold in sets.
You can use pourable acrylic paints, or any liquid acrylic paints. I chose these Spa Blue, Goldenrod, and Pure Pumpkin craft paints as base colors for this project. Have on hand other acrylic paint colors to alter tint or hue in the mixing of your colors, if you don’t find the exact colors you want.
The ceramic look comes from Mod Podge gloss medium, which is a water based and non-toxic standby for crafting. It dries to a more satiny gloss finish that looks like a ceramic glaze. You could also use gloss acrylic paint pouring medium for this project, especially if you want a shinier finish.
Lightweight containers for mixing paints are also needed; something with corners for pouring are a plus. You will also need a craft brush or two for mixing and application. Also, you will need some non-stick material like wax paper or baking parchment to set the pumpkins on to dry. Paint could get on the bottoms of them, and they will peel right up from either of those after drying.
Color mixing.
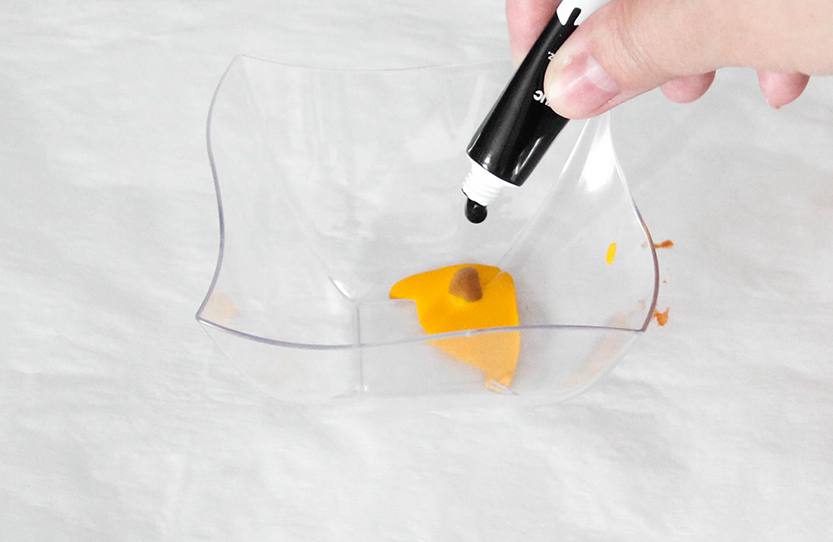
Use a color straight from the container, or mix in other colors to get the specific tones you want. White makes colors more opaque, as well as achieving a lighter tint. Just a drop of black paint will not only darken a color, it can soften the color and make it a shade or two cooler. Use black lightly though-a little goes a long way! Other colors added to a base tone can alter whether a color goes warmer or cooler, or into more subtle shades. I added a drop of black, as well as a couple of drops of yellow ochre to about a teaspoon of Goldenrod base paint. This added a cooler brown cast to it, to get a more harvest gold tone to my paint.
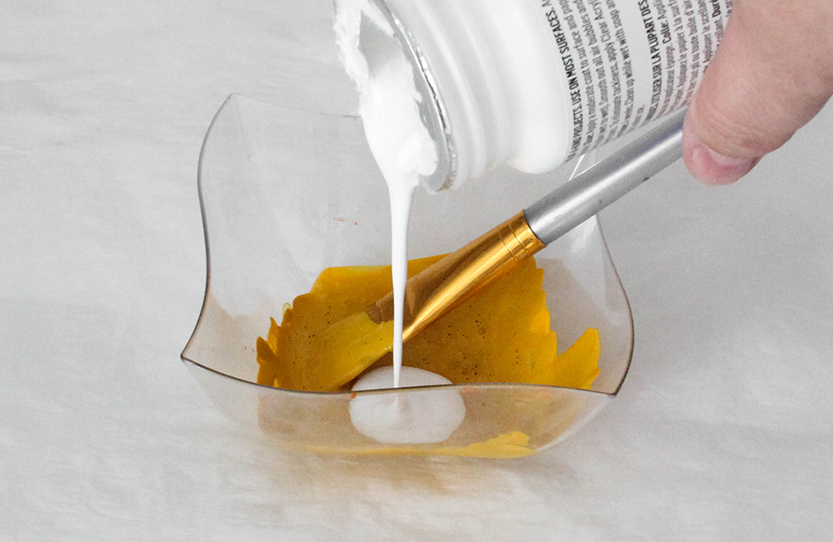
Add the drip medium.
Mix the paint until the color you want is achieved. Then pour in the glossy drip medium. About a tablespoon usually works to start. Add more if you want a more transparent paint. You can mix the gloss medium in until it is thoroughly blended, or you can leave it streaky for more of a marbled effect when it dries.
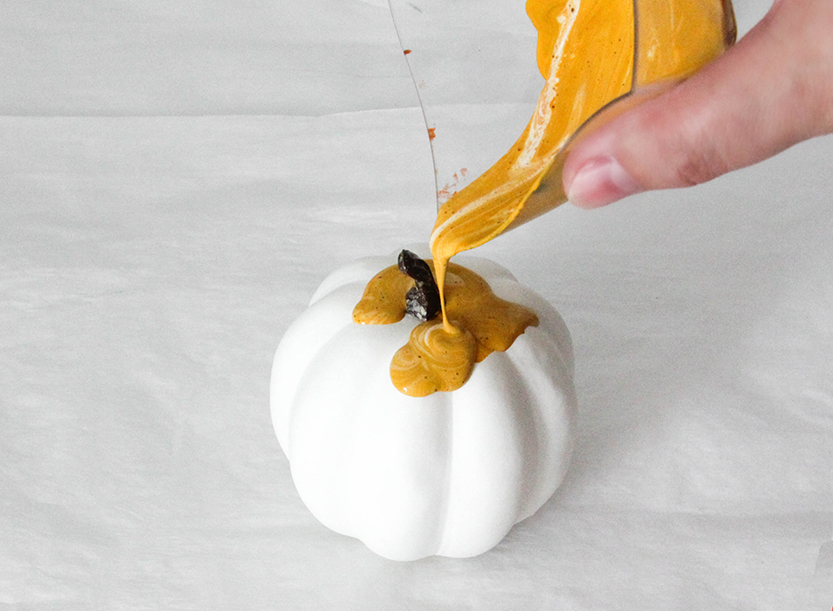
Pour and coax a drip.
Pour the paint onto the top of the pumpkin around the stem. If you like, you can use a brush to train a drip downward, or to spread color further down the sides of the pumpkin.
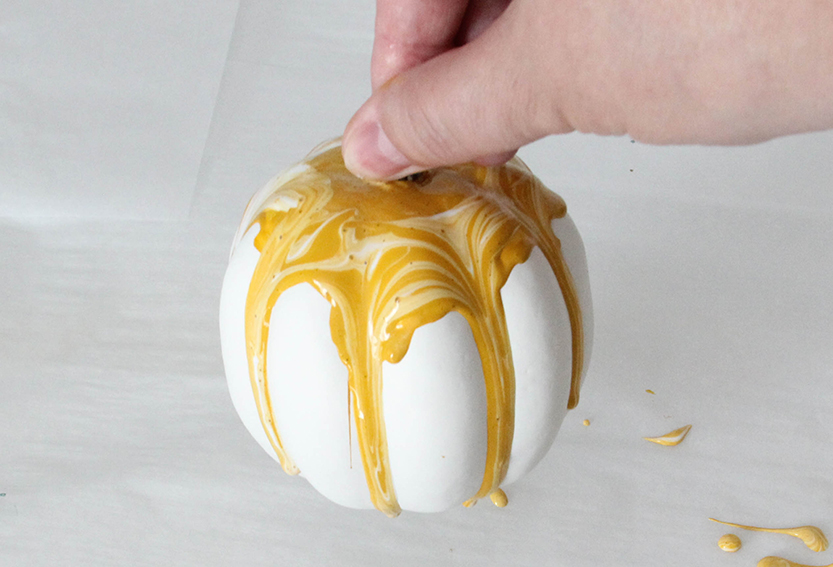
Pick the pumpkin up by its stem and gently shake it to spread the paint and work the drips down the sides. You can tap your wrist to burst any small air bubbles that will be in the paint. You can let the first coat dry a bit, but you don’t necessarily have to if you want to layer on more color. Add more paint to the remaining mixture for different a shade of the color. You can also add more gloss medium for a lighter, more transparent version of the color. Pour on a different color when the paint is wet to let paint colors run together. For a more clean layering of color, let each coat dry awhile before adding the next coat of paint. Set the drip glaze pumpkins on a piece of baking parchment or wax paper and let set overnight when you are through applying paint.
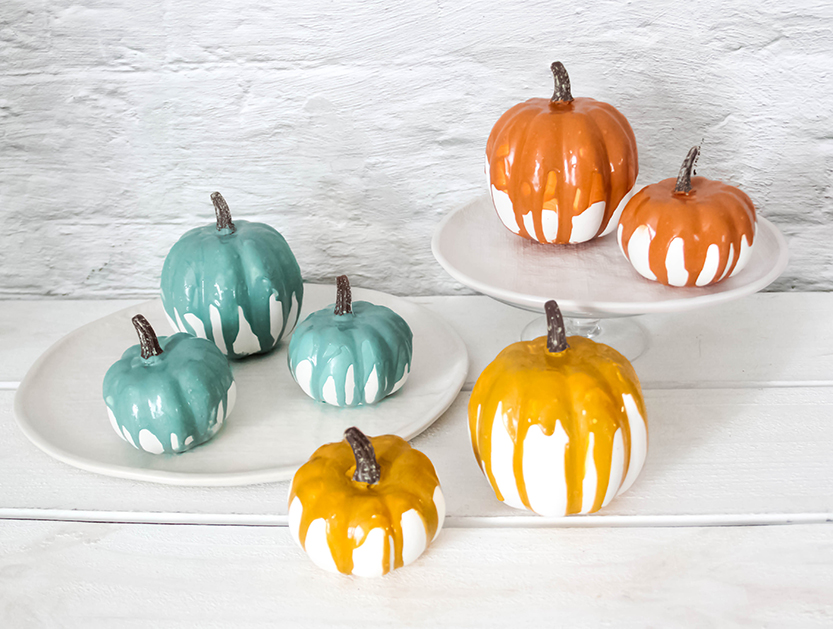
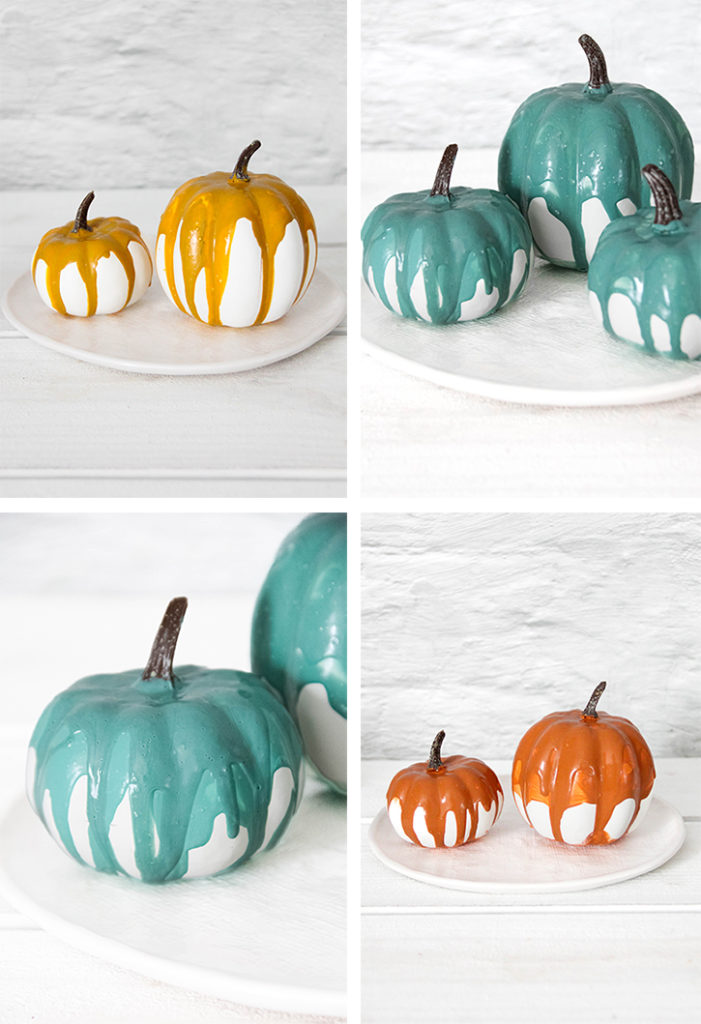
A gallery of pumpkins.
Drip glaze pumpkins are an affordable DIY Autumn accent that can liven up a table, sideboard, or kitchen counter. This is a messy process but the results look a lot like like glazed ceramic! These pumpkins are inspired by the artisan made look of retro decorative ceramics. However, the beauty of this project is that you can make your pumpkins in colors that are in keeping with your seasonal decorating scheme.
For more fall craft ideas, these Paper Napkin Decoupage Pumpkins are another unique and affordable DIY Autumn accent.