
Creating these cute little bunnies is quick and easy using craft store pom poms. Older kids can make these on their own, and younger kids will have fun making them with grown-ups.
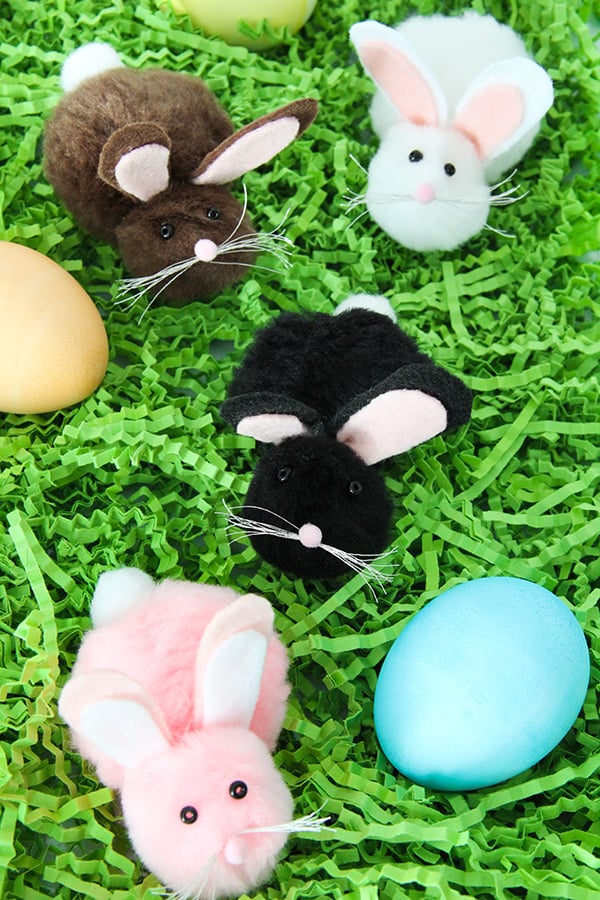
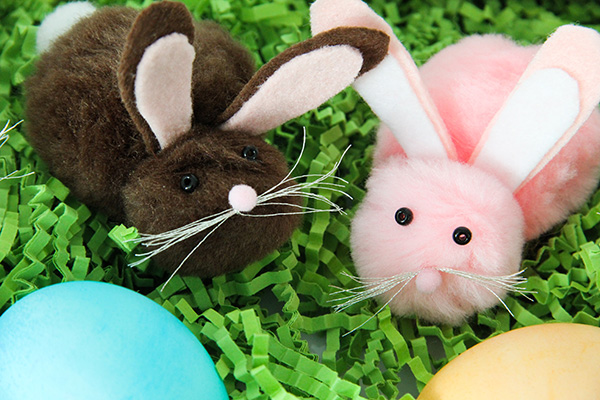
These bunnies make an adorable addition to any Easter basket. They can be any color, and as large or as small as you like, depending on the sizes of pom poms available. I used 2″, 1″ and 1/2″ pom-poms to form the bodies, and 5mm ones for noses, so these are 3 1/2″ little bunnies!
Supplies
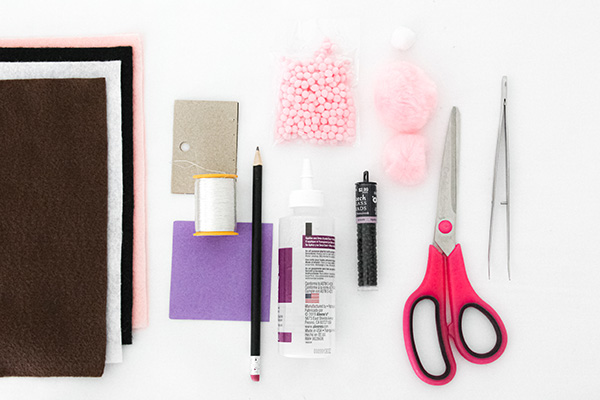
You will need the following supplies to make these pom-pom bunnies: craft scissors, felt sheets in assorted colors for ears, and a piece of paper and pencil are handy for making templates for cutting out the ears, especially if you are making multiple bunnies.
A spool of thread or fine fishing line, and a piece of cardstock to wrap it around to make whiskers, along with tiny pom-poms needed for noses. Small, medium and large pom poms are used to make up the body, and beads are used for the eyes. A pair of tweezers may be useful for handling smaller beads. An all-purpose craft glue is best for making this a kid-friendly project, but hot glue can be used by older children and adults.

Draw an outer ear and inner ear in an appropriate size on a piece of paper, and cut out the shapes. Cut out a square of felt for the outer ears, and use the shape as a guide to cut out the outer ears. Repeat this step to cut out the smaller inner ears.
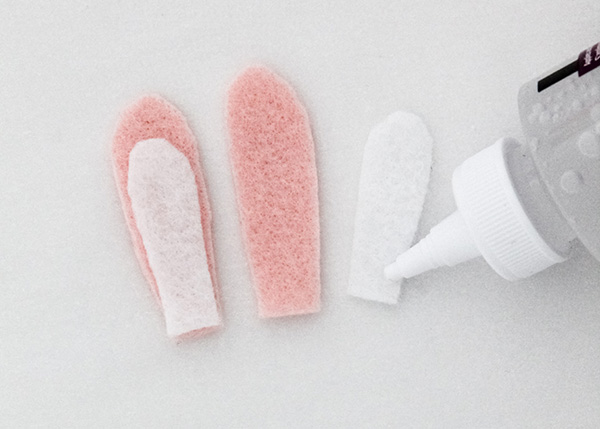
Glue the inner ear pieces to the outer ear pieces.
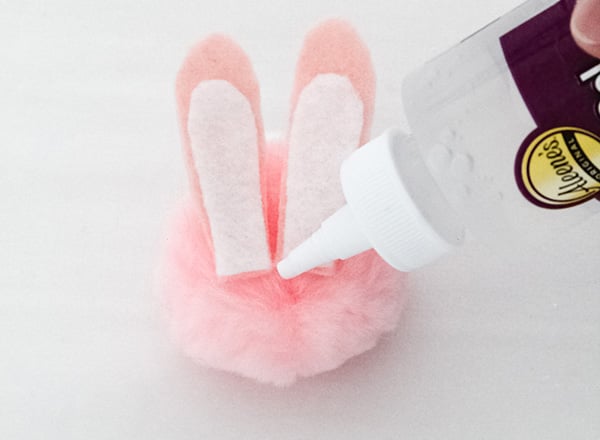
Using a generous amount of glue about halfway down the front of a large pom pom to attach the ears. Squeeze on another generous spot of glue to the base of the ears.
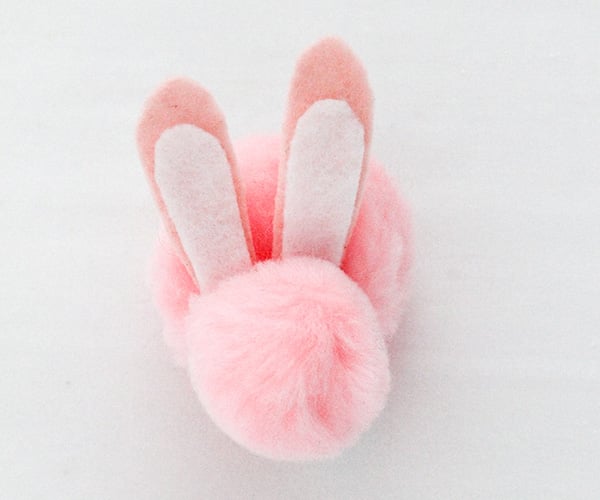
Stick the medium pom-pom onto the glue at the base of the ears to attach the head. Hold it in place until it stays put without falling off. If you’re using craft glue, you might want to let the bunny rest while the glue sets for a few minutes, before adding the face.
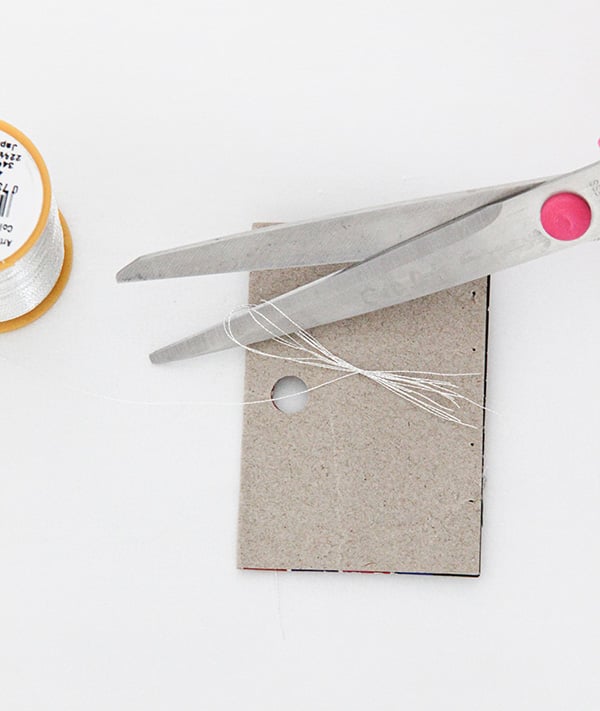
Wrap thread or fishing line in loops around a rectangular piece of cardstock four or five times, then bend the card slightly in the middle, making it easier to slide the looped thread off in a bundle. Tie the bundle off in the middle as tightly as you can with another piece of thread. Cut the loops open, and trim to form the whiskers. Dot some glue on about halfway down the front of the head pom-pom, and attach the whisker bundle. Add another dot of glue to the knot in the whiskers, and stick on the nose pom-pom.
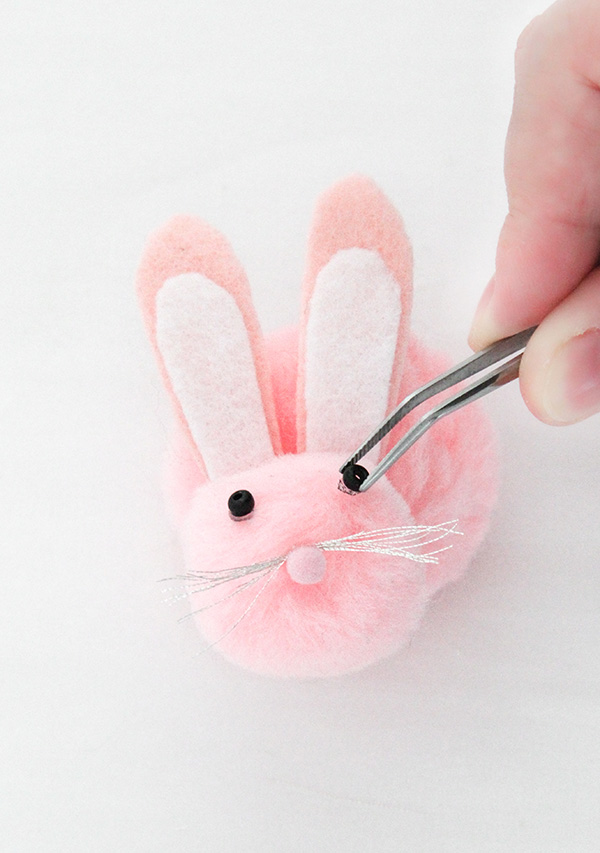
Dot glue on the head where the eyes should go, and stick on beads for eyes. Let the bunny rest for at least five minutes while the glue sets up.

Finally, squeeze on a generous spot of glue to the back of the bunny, and attach the smallest pom-pom for a little cotton tail!
Kids will love watching their very own fuzzy critters coming together!
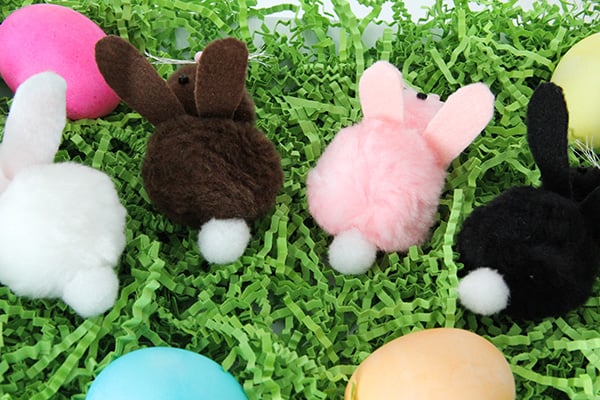
A bunny party could be a fun Easter activity along with dyeing eggs, or an alternative to the traditional outdoor Easter egg hunt.
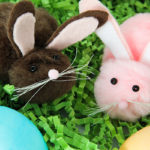
Pom Pom Bunnies
Equipment
- Pair of scissors
- craft glue or glue gun/low temperature glue sticks
- Pencil
- Paper
- Tweezers
Materials
- felt sheets for ears any color
- pom poms, assorted sizes any color
- thread or fishing line for whiskers any color
- beads for eyes, any size black
Instructions
- To make the ears, draw an outer ear and inner ear in an appropriate size on a piece of paper, and cut out the shapes. Cut out a square of felt for the outer ears, and use the shape as a guide to cut out the outer ears. Repeat this step to cut out the smaller inner ears. Glue the inner ear pieces to the outer ear pieces. Squeeze a generous amount of glue about halfway down the front of the largest pom pom to attach the ears.
- Squeeze on another generous spot of glue to the base of the ears. Stick the medium pom-pom onto the glue at the base of the ears to attach the head. Hold it in place until it stays put without falling off. If you're using craft glue, you might want to let the bunny rest while the glue sets for a few minutes, before adding the face.
- To make whiskers, wrap thread or fishing line in loops around a rectangular piece of cardstock four or five times, then bend the card slightly in the middle, making it easier to slide the looped thread off in a bundle. Tie the bundle off in the middle as tightly as you can with another piece of thread. Cut the loops open, and trim to form the whiskers. Dot some glue on about halfway down the front of the head pom-pom, and attach the whisker bundle.
- Add another dot of glue to the knot in the whiskers, and stick on the nose pom-pom.
- Dot spots of glue on the head where the eyes should go, and stick on beads for eyes. Let the bunny rest for at least five minutes while the glue sets up.
- Squeeze on a generous spot of glue to the back of the bunny, and attach the smallest pom pom for the tail.