
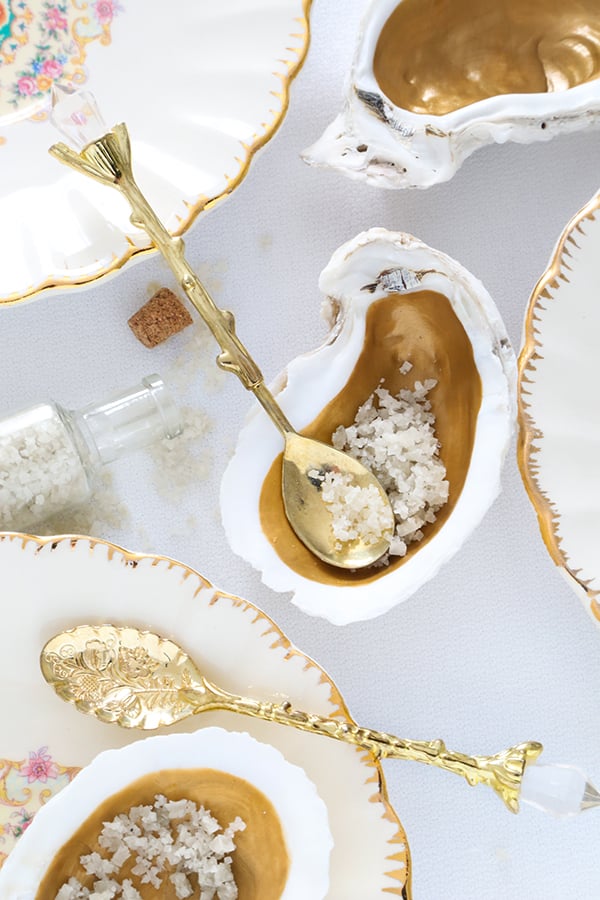
Add some coastal charm to your table with gilded oyster shell salt cellars!
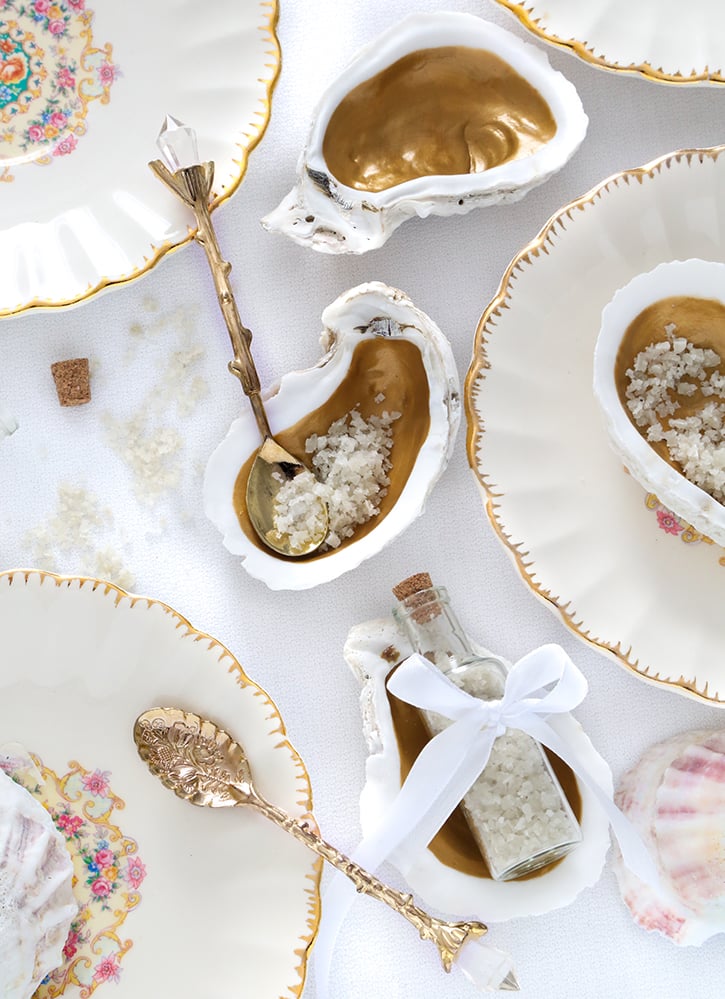
One of my favorite things to do in life is to style a pretty dinner table. I’m obsessed with vintage dishes and flatware, and I’ll try to fit as many fancy accessories as I can at a place setting. This includes place card holders, knife rests, butter pats, and – you guessed it – salt cellars! These naturally beautiful oyster shell salt cellars are an apropos way to offer artisan sea salts to dinner guests.

Salt cellars have been around for ages, but they fell out of fashion when salt was processed with anti-caking agents and became free-flowing. Salt shakers immediately took their place. Now salt cellars are coming back into fashion as people discover the health benefits (and flavor!) of artisan sea salts. I love using these salts in my cooking and baking!
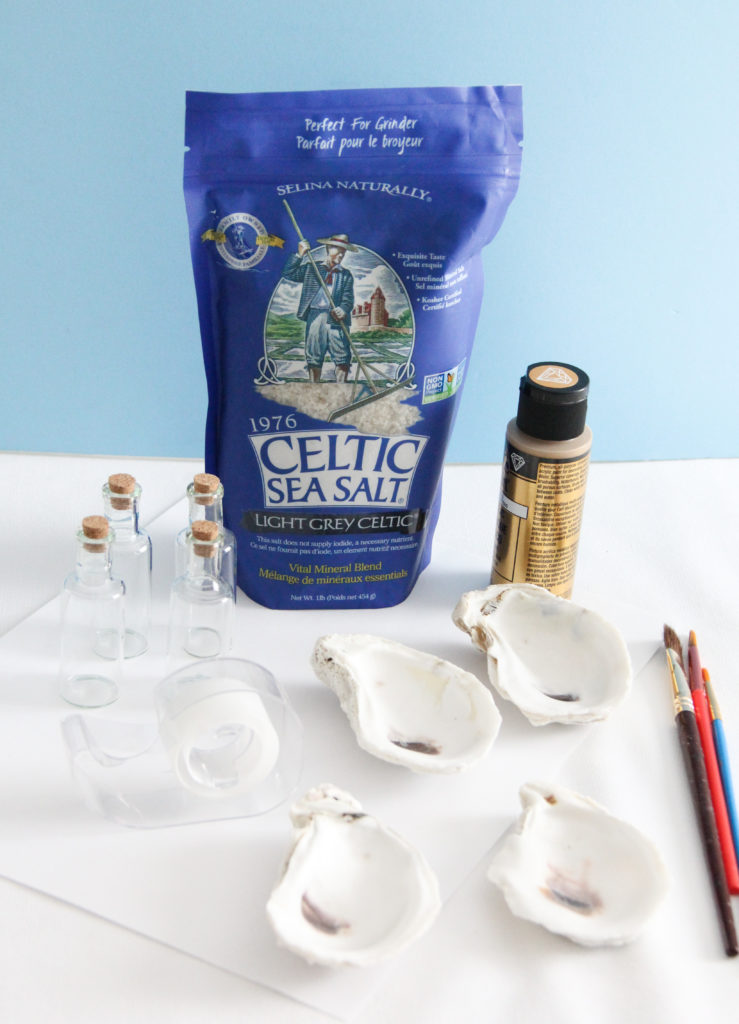
To make the cellars, you’ll need clean, sanitized, 3-5″ oyster shells that naturally sit flat when turned bowl-side-up. I purchased shells pre-scrubbed, but you can also do this at home. The best way to clean the shells is to wash them in a sink full of warm water with a cap of bleach added (approximately 1 tablespoon). Wear gloves and use a stiff bristle brush to scrub away any loose debris. Rinse them well and lay them on a soft towel to dry completely.
You’ll also need nontoxic acrylic metallic paint to paint the shell interiors. This is sold at most well-stocked discount stores and all craft stores. Choose your favorite hue – copper and silver are lovely, but gold was our clear favorite.
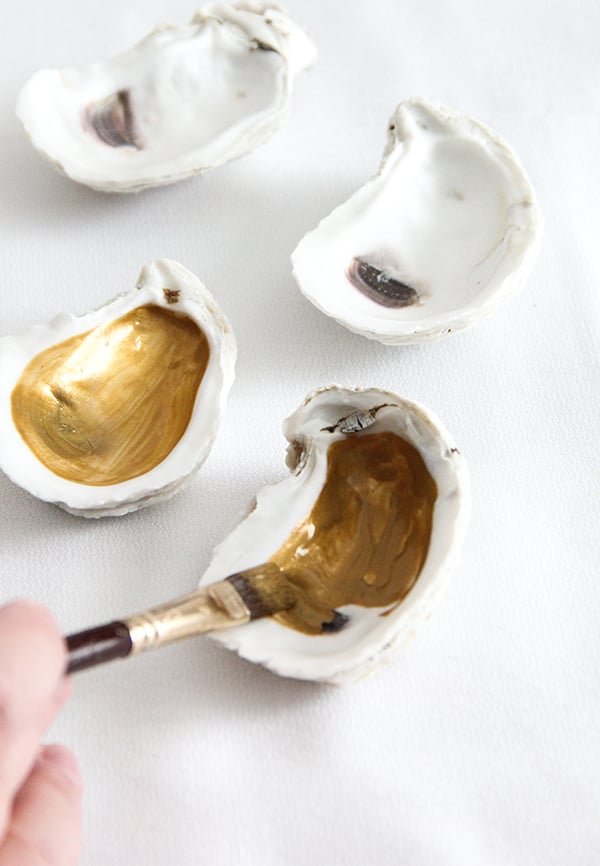
A square head soft-bristle brush makes easy work of painting the oyster shell’s interior, as it easily follows the natural contours of the shell. Allow the paint to cure for 24 hours. When dry, it should not feel tacky to touch. The paint should feel smooth and dry, and part of the shell’s naturally porous surface.

A party favor can be made by adding a small corked bottle of sea salt (bottles can be found here). My favorite salt is coarse Celtic sea salt, which can be damp and cling to itself. You may find a paper cone is useful to funnel the salt into the small bottles. A spoon will also work.
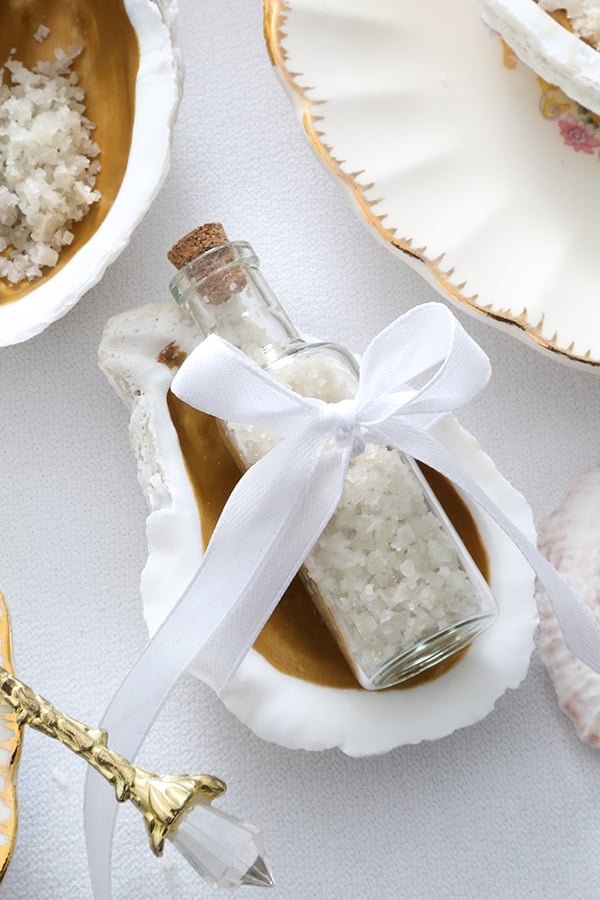
Cork the bottle and tie it in the bowl of the shell with ribbon for a thoughtful hostess gift, wedding favor, or party favor.
These are so naturally beautiful, and they would be perfect at a seafood feast, which we’ve been known to arrange for special occasions. I also plan to gift some with my favorite sea salts at Christmas!
Oyster Shell Salt Cellars
Equipment
- 1/2 inch flat head paint brush
- small paint cup or paint palette
- Small cup of water for brush cleaning
- 1 sheet of paper
- cellophane tape
- paper towels
Materials
- 4 sanitized oyster shells
- 3 tablespoons nontoxic metallic paint gold, silver, or copper
- 4 mini glass bottles with corks
- 8 tablespoons artisan sea salt such as grey Celtic sea salt, red Alaea, or pink Himalayan
- 1 1/2 yards satin ribbon any color, or to match a theme
Instructions
- Rinse the sanitized oyster shells under warm water and lay them on a soft towel to dry completely. (See notes for sanitizing instructions.)
- Place the paint on a palette or in a small disposable paint cup. Dip the dry, square head brush in the paint and cover the inside of the oyster shell, following its natural contours. Avoid painting the rim of the shell. Clean the brush in the cup of water between painting shells and pat dry with paper towels before using again.
- Allow the paint to cure for 24 hours. When dry, it should not feel tacky to touch. The paint should feel smooth and dry, and part of the shell’s naturally porous surface. To use during dining, place sea salt inside the bowl of the oyster shells. Add a small spoon or allow dinner guests to pinch salt from them.
- To make favors, wash and thoroughly dry the mini glass bottles with corks. Make a paper cone using the sheet of paper and cellophane tape. Funnel salt into the bottles using the cone. A spoon will also work, but takes a little more effort. Cork the bottles tightly and tie it inside the bowl of the oyster shell using the ribbon.