
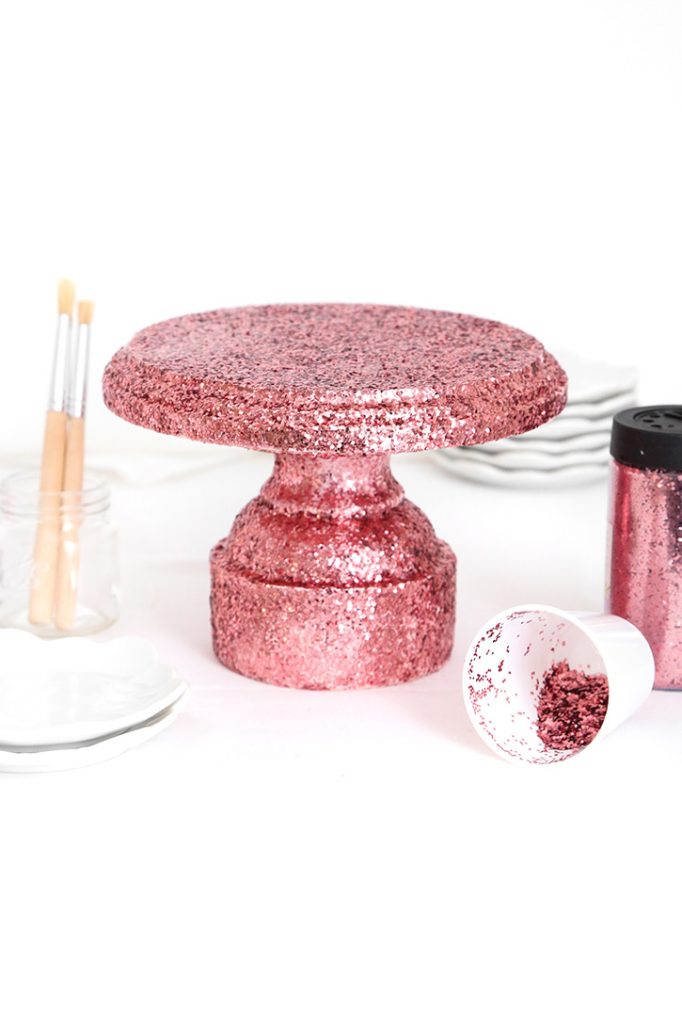
It’s easy to make a beautiful sparkling cake stand with just a few items from the craft store. An inexpensive round wooden plaque provides a level surface that is perfect for displaying sweets, and a thrift store candle holder acts as a sturdy pedestal base.
Sometimes the thing you’re looking for just doesn’t exist for purchase, so you have no choice but to DIY it – which was the case with this cake stand! I wanted a sparkling pedestal to bring a little bling to my cakes. It seems like that would be easy to find, but – no luck! Ann, my crafty friend and fellow artist, was eager to take the reins on this project. You can follow her guide with tips and tricks to achieve a sturdy cake stand that is well-sealed and won’t shed glitter on your baked goods.
Take it away, Ann!
Hi everyone! This is a fun way to make a glitzy cake stand for a special cake. It can easily be made from found wood elements or craft supplies. It doesn’t take much more than some patience (drying time) and a whole lot of glitter in your favorite color! Here’s a complete list of materials used, and you’ll probably already have some of them in your crafting closet.
- Sturdy base piece (we used a 4×3 candle holder)
- Flat top piece (we used a wooden craft store plaque)
- Rubbing alcohol
- Paper towels or shop towels
- Dust mask
- Drop cloth or cardboard box (to catch overspray and glitter)
- Sandpaper
- Pencil
- Wood glue
- Mod Podge or clear acrylic paint, gloss finish
- Paint or craft brushes
- Coarse glitter (at least 4 oz.) in your choice of color (we used Nicole Pink from AC Moore)
- Spray paint that matches glitter color (we used Krylon in the color ‘Ballet Slipper’)
- Clear polyurethane spray or liquid, gloss finish
1. 
2. 
3. 
4. 
5. 
6.
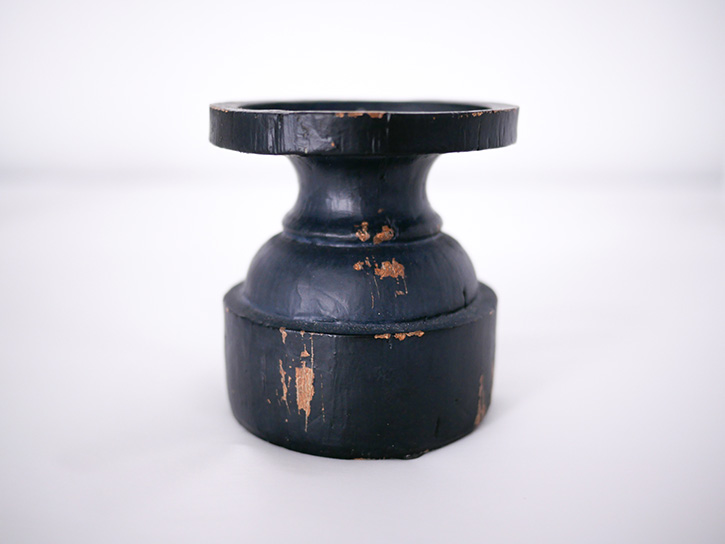
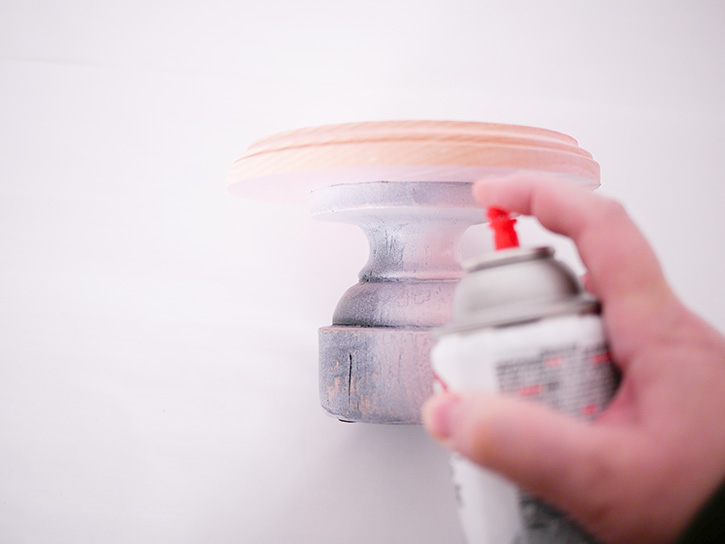
1. Choose a sturdy base that isn’t too tall or thin. This base is actually a 4″ tall, 3″ diameter pillar candle holder.
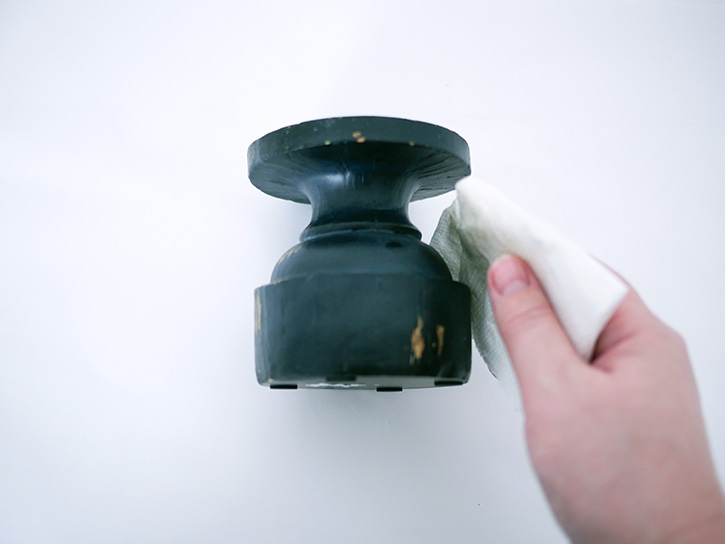
2. Peel off any stickers that may be on your wood base or stand. Rub off any residue with rubbing alcohol or adhesive remover, if necessary.
3. Wear a dust mask for this step! Lightly sand surface of any painted pieces. Don’t worry about any dents, dings or scratches or rough areas – these won’t be noticeable in the finished product! Wipe any dust from entire surface of top and base pieces, and remove any protective finish that may be on a painted piece that you’re going to use. Rubbing alcohol on a paper towel works well. This will make the surfaces easier to cover with your paint.
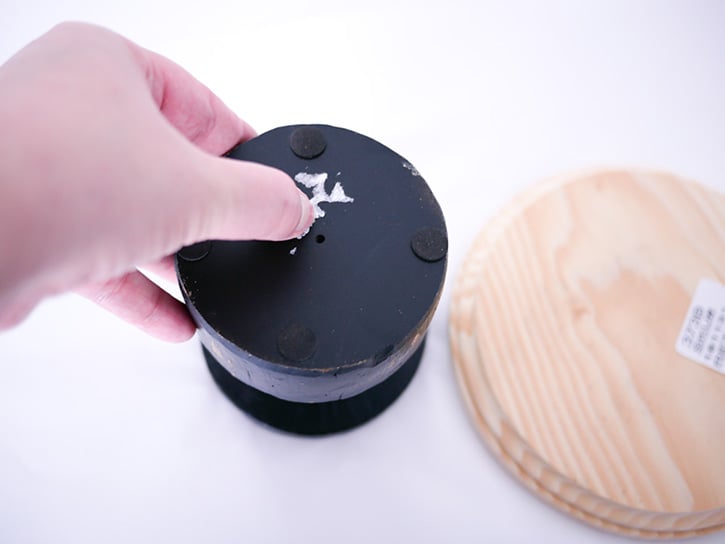
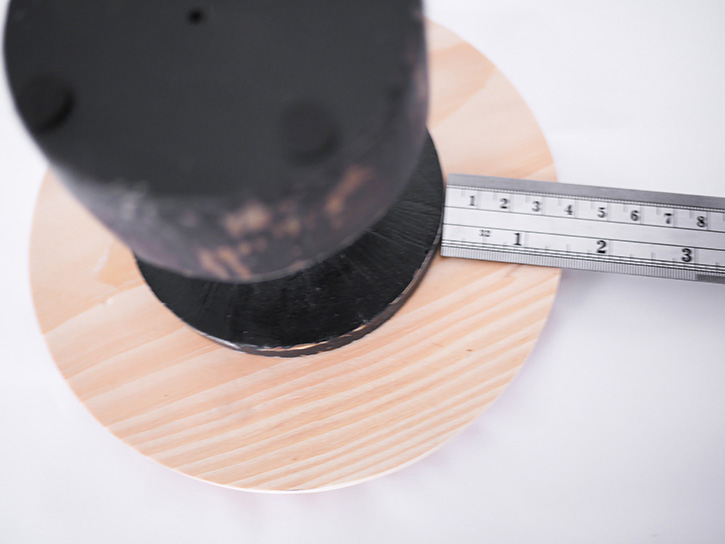
4. Lay the top of the cake stand face down on a flat surface. Next, stand the top of the base face down on the back of the cake stand topper. Center the top of the base as closely as possible on the back side of the cake stand top. You can use your own judgement for centering, but you can use a ruler around the sides to make sure it’s as evenly spaced as possible. Trace the outline of the base with a pencil.
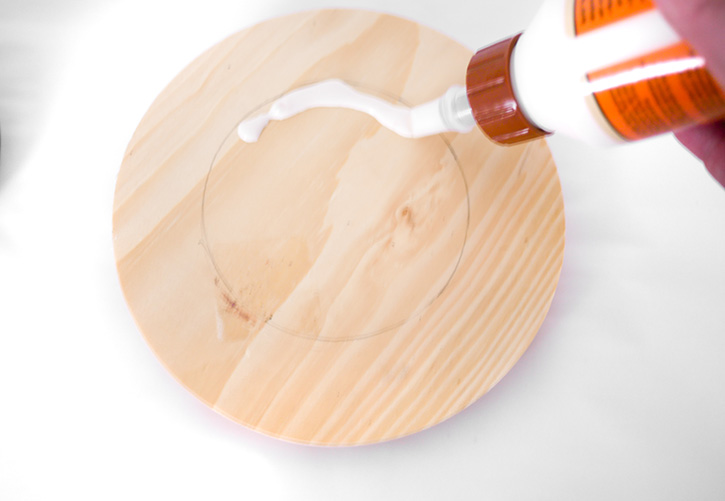
5. Remove the cake stand base, and go around the inside of the traced outline with wood glue.
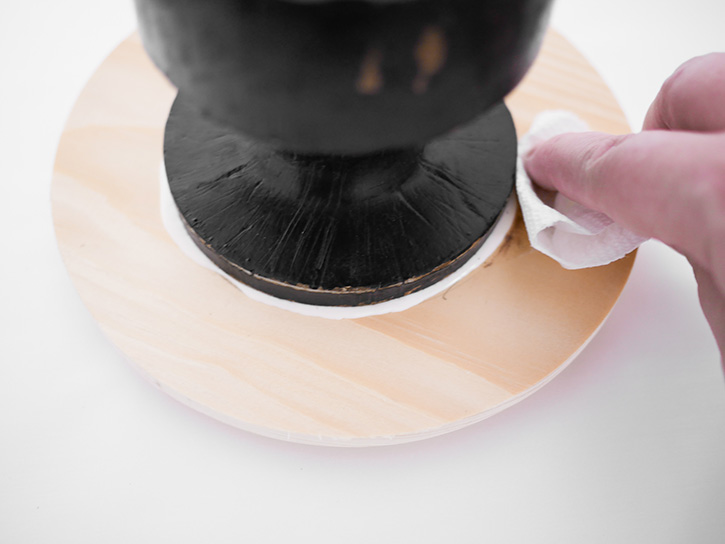
6. Press down top of base onto glued surface, and carefully wipe away excess glue. Make sure the base stays within the outline you traced. Let stand 24 hours, or at least overnight for the best bond.
7. 
8. 
9. 
10. 
11. 
12.
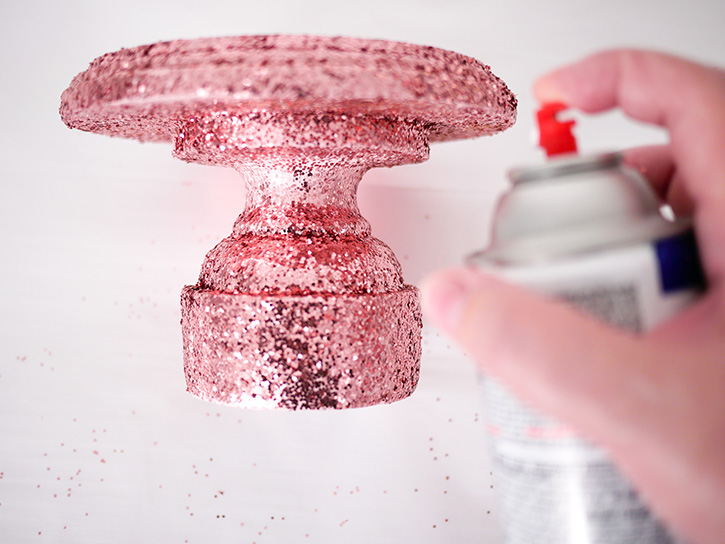
7. Once more – wear a dust mask for any kind of spraying! Be sure to put down a drop cloth, or set the cake stand in a cardboard box. In a well-ventilated area, preferably outdoors, spray paint cake stand with a base coat of your paint color. Thoroughly cover the entire surface with your paint. Let this set at least 4 hours before adding any more coatings.
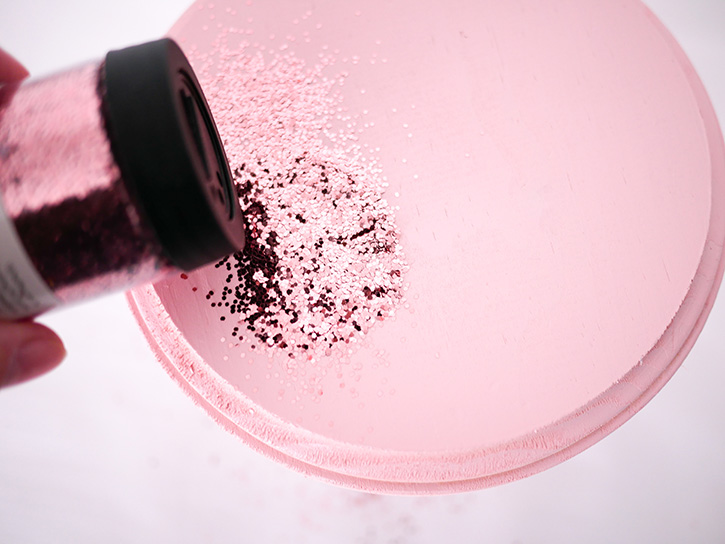
8. Use the same well-ventilated area, and wear your dust mask again to protect you from paint fumes for this step also. Gradually add a second coating of spray paint to the cake stand, area by area. Sprinkle glitter on each area while the paint is still good and wet, until the entire cake stand is as covered as possible. Let this set at least four hours, preferably overnight.
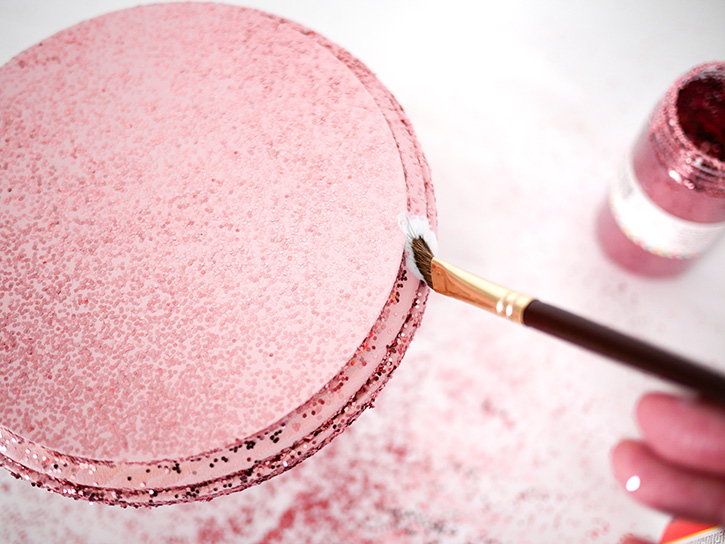
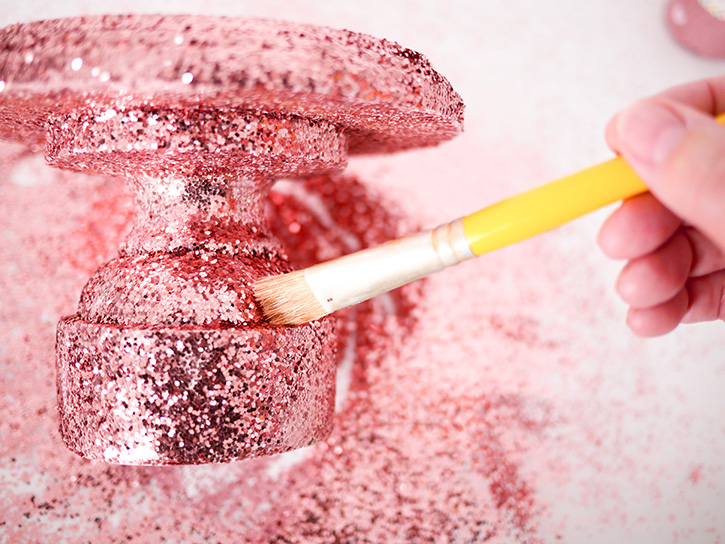
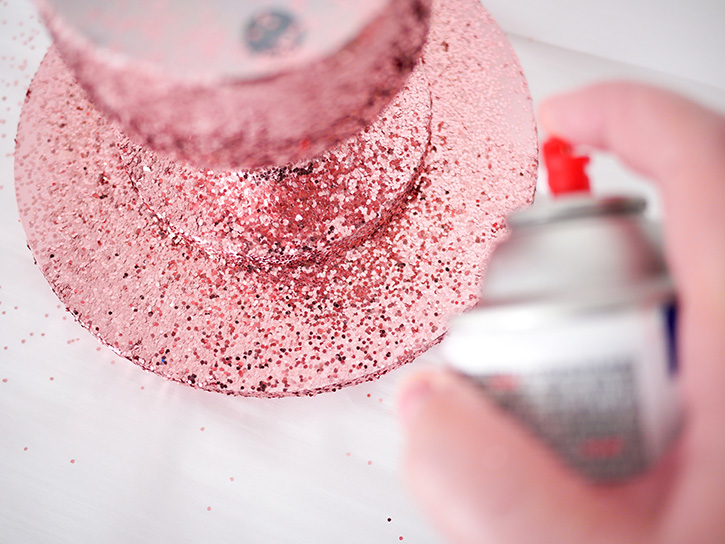
9. Shake and brush off any loose glitter from the cake stand. Brush any un-glittered or over sprayed areas with Mod Podge or clear acrylic, and sprinkle with glitter so the whole cake stand surface is sparkling! Let set at least an hour.
10. Once again, shake or brush off any loose glitter. This might be a good time to pour some of that loose glitter back into its container if you want to save it, and to clean up in general.
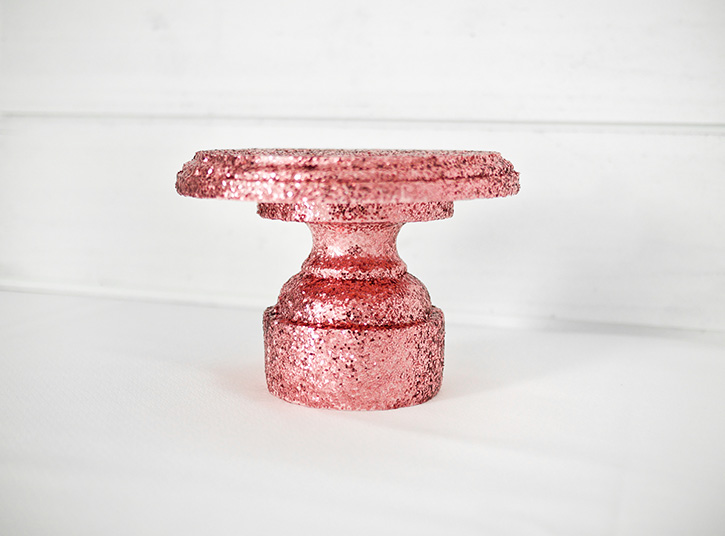
11. Back to our well-ventilated area with our dust mask again! Thoroughly spray entire surface of the cake stand with clear polyurethane so that glitter is sealed.
12. Even spray the bottom of the top of the cake stand with clear polyurethane, so that the glitter is sealed and won’t come loose. After about 4 hours, also spray or brush on another coat on the top, for an extra layer of protection. Allow the sealed cake stand to set at least 24 hours. You should wait until the surface is completely dried before using. Completely cured polyurethane is considered food safe, but you should use a cake board on the top to protect the finish from knife marks and other damage.
13.
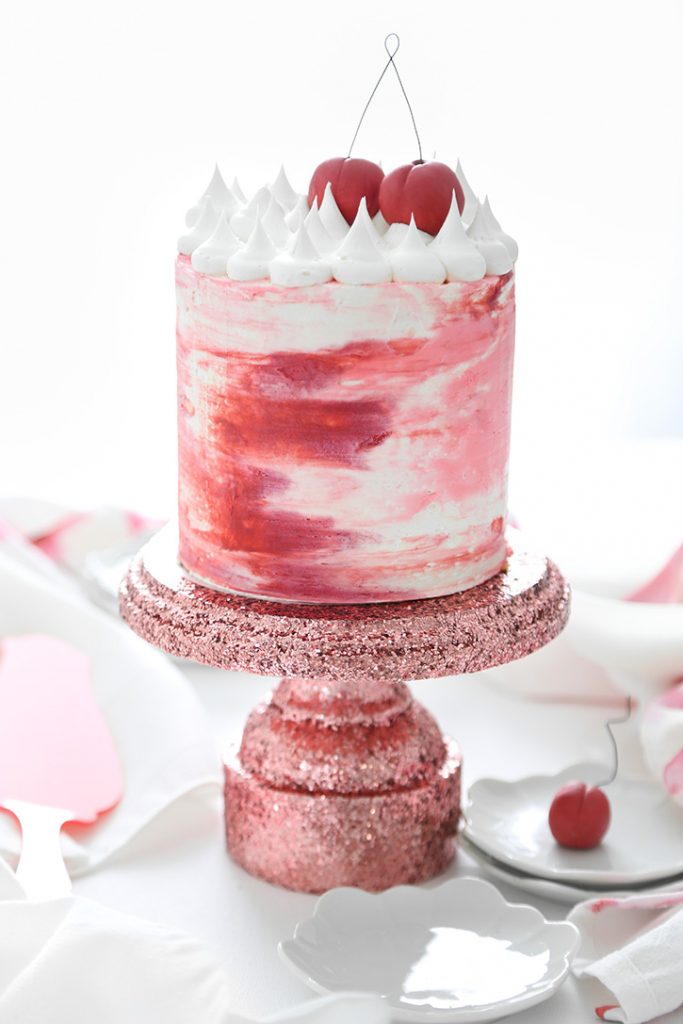
13. The finished cake stand, all ready to present your special cake!
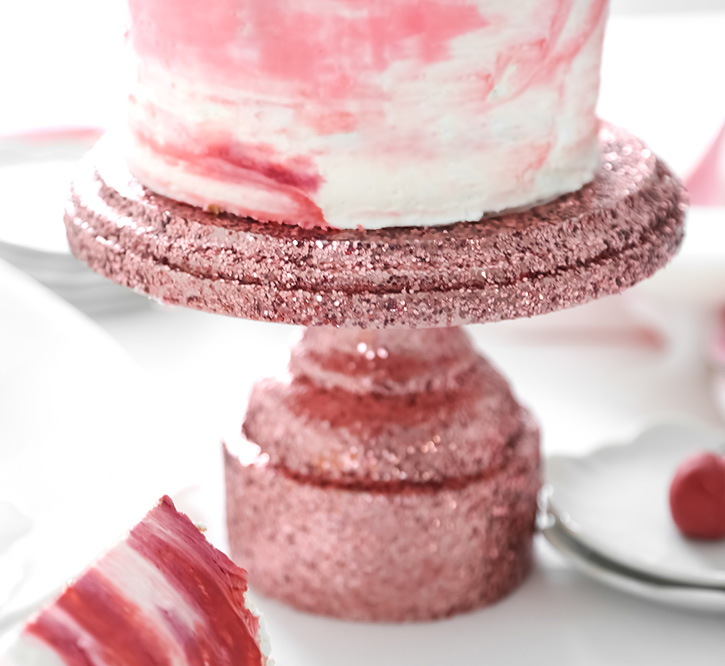
Find the recipe for Morello Cherry Layer Cake on our sister site Sprinkle Bakes!
This is so pretty. I love it!
Great idea ! Will share right now with the awesome @justhascakery !
Thank you! xo