
Try the season’s hottest fashion trend at home!
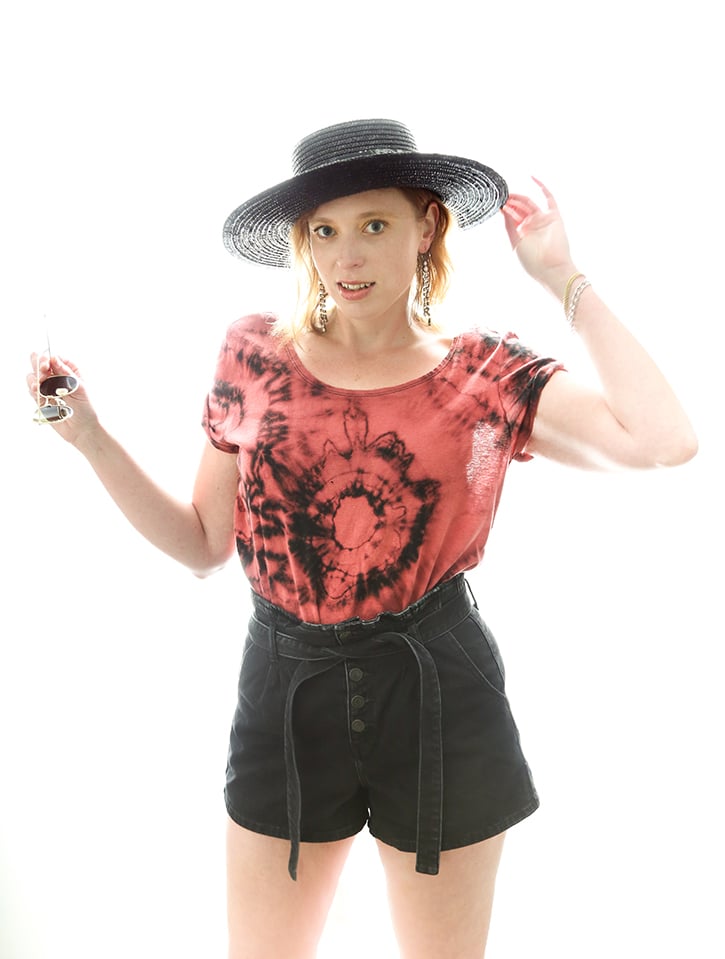
Do you have too many black tee shirts in your closet? Maybe ripped a hole in your favorite black tank top? Want to add some dimension to your wardrobe without breaking the bank? Introducing the Bleach Burn Tie-Dye Technique! You may already have a bottle of bleach and a black tee shirt on hand, so why not try it?!
If you’re nervous about trying the technique on a favorite shirt, opt for a thrifted black top. I shopped my local dollar thrift store for different styles of black cotton and cotton-blended shirts ($5 for all!). Black and dark hued garments work best because they will give you amazing, vivid results! Below are the techniques that I used and the results that followed.
Gather:
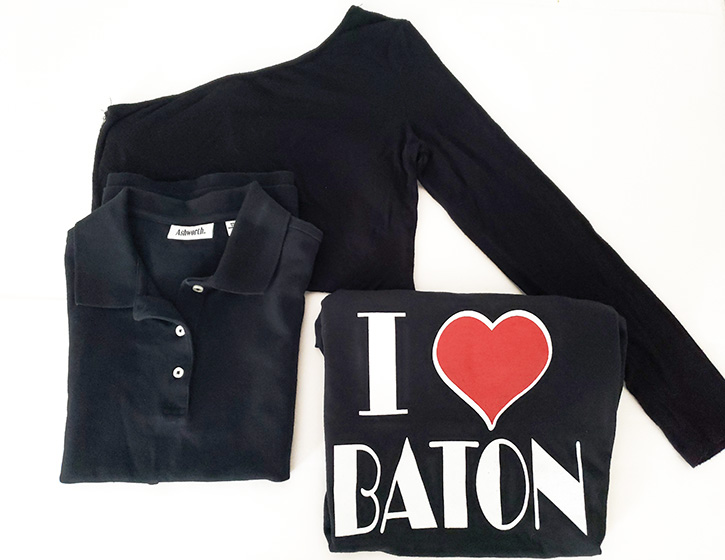
- Black Cotton (or Cotton Blend) Shirt
- Bleach
- Rubberbands
- Condiment Squirt Bottles (2)
- Small Plastic Tub
- Gloves
- Tongs
- Measuring Cup
- Garbage Bags
- Scissors
Process for Tie-Dye:
- Place garbage bags down on any surface that you would like to protect during the bleaching process.
- Choose a pattern you like! Search for Tie-Dye Patterns on Google for results (47 Different Tie Dye Techniques and How to Transform an Old Black Shirt.) Check Pinterest for infinite inspiration!
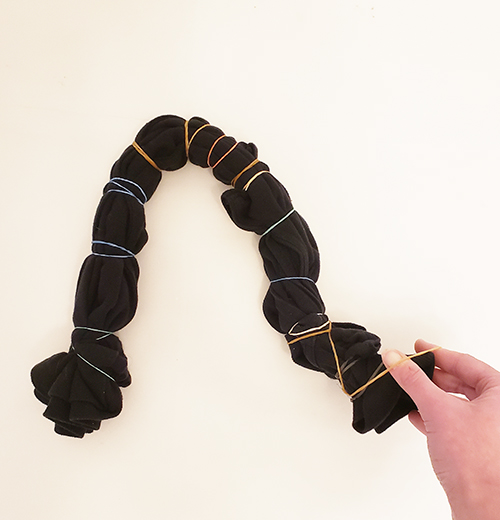
- Twist shirt and use rubber bands according to your chosen pattern.
- Make the bleach solution: One batch = 1/3 cup bleach to 2/3 cup water. Mix in a measuring cup with a pour spout. If you have more than one shirt to dye, make enough of the solution to do your project (double or triple solution amounts if necessary). I made six batches to have enough to make 3 shirts.
- Pour bleach solution into plastic tub. (The tub should be deep enough so that a shirt can be fully submerged in the solution.)
- Put gloves on.
- Take tongs and place twisted shirt into bleach solution.
- Wait 10 minutes and check with the tongs. Continue to check at 10 minute intervals until the desired color is reached.
- Remove shirt from solution.
- Remove rubber bands carefully with scissors.
- Wash shirt on gentle cycle.

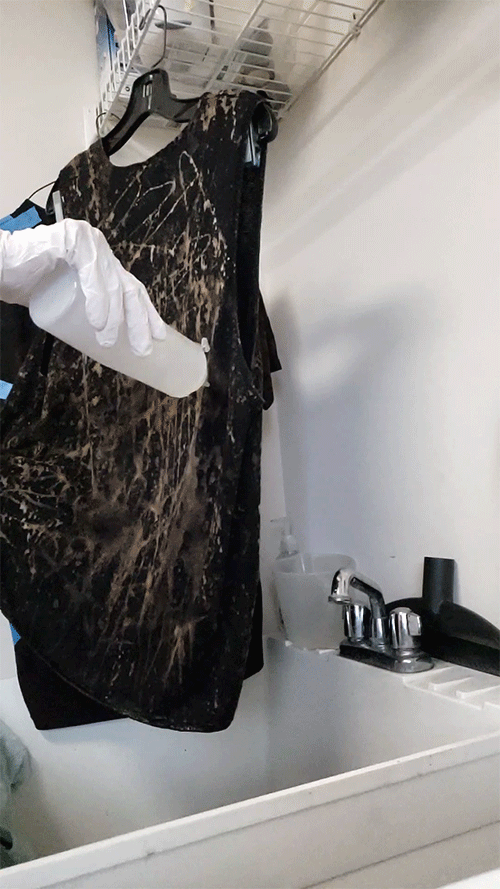
Process for Drippy/Splatter Effect:

- Get an area ready for bleach splattering. I used the plastic sink area in my laundry room.
- Use painter’s tape to tape over anything you do not want bleached.
- Put on gloves.
- Make bleach solution (⅓ cup bleach to ⅔ cup water) and pour into a condiment bottle.
- Mix another bleach solution of (⅔ cup bleach to 1 cup water) and pour into a condiment bottle.
- Splatter or drip the bleach solution in step 2.
- Next, splatter/drip the bleach solution in step 3.
- Once you are happy with the look, let stand for about 10 minutes.
- Wash shirt on gentle cycle.


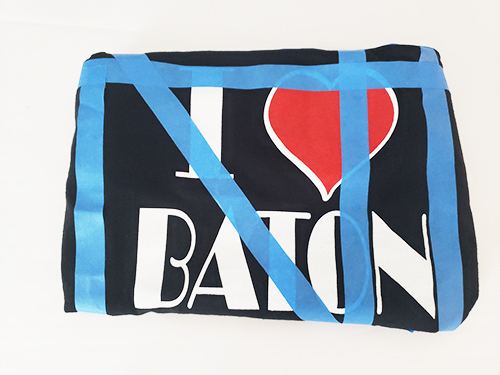
Process for Painter’s Tape Design (I HEART BATON Shirt):
- Tape designs onto shirt with painter’s tape.
- Put on gloves.
- Make bleach solution (⅓ cup bleach to ⅔ cup water) and pour into a condiment bottle.
- Mix another bleach solution of (⅔ cup bleach to 1 cup water) and pour into a condiment bottle.
- Take a rag and liberally squirt the bleach solution (from step 3) onto it. Take the rag and dab the solution onto shirt. This creates a “sponge painted” look.
- Repeat this step with the bleach solution from step 4.
- Splatter or drip designs using the condiment bottles of different bleach solutions.
- Remove the tape.
- Add more splatters or drips into the painter’s tape lines if desired.
- Let shirt stand for about 10 minutes.
- Wash shirt on gentle cycle.
Tips:
- Mix different sized rubber bands to get different patterns and shapes!
- Make different strengths of bleach solutions to create different “colors”. A strong solution of bleach to water will yield a lighter color.
- Choose a cotton shirt. Cotton accepts bleach and dye easier. Some handmade fabrics are impervious to bleach like polyester, rayon, and modal.
- Remember that if you use a cotton blend, the color will change depending on what the shirt is blended with! This also means that other fabrics break down more easily than other fabrics. To ensure stability check the shirt every 10 minutes (or less!) I stayed right there with the garment as it transformed, and you should too!
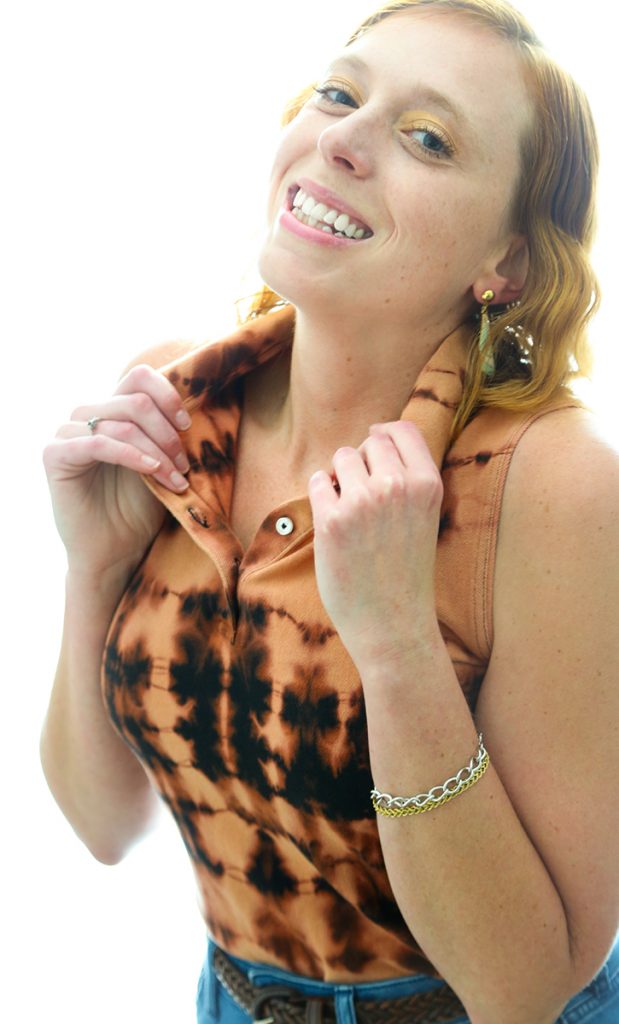
- Choose different shapes of shirts to tie-dye! It does not have to be a standard tee shirt. My favorite piece to wear came from this project: the one-shouldered top and garden vest!
- Have fun and be creative!