
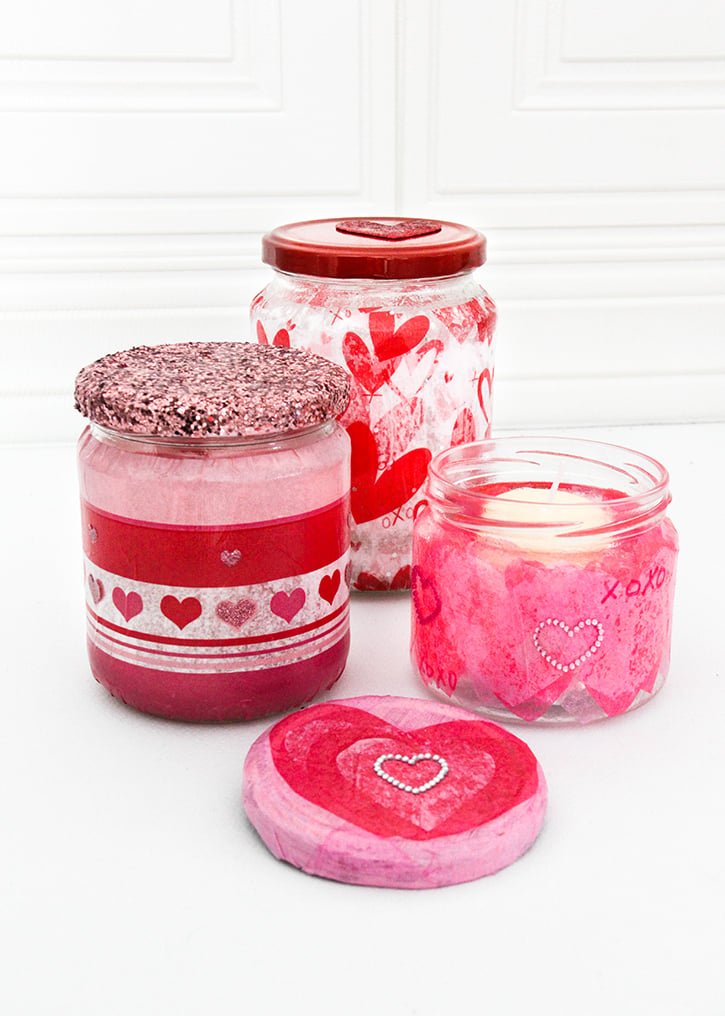
Tissue paper votives are a beautiful way to decorate for Valentine’s Day. They’re also a special handmade gift to give to your friends and loved ones.
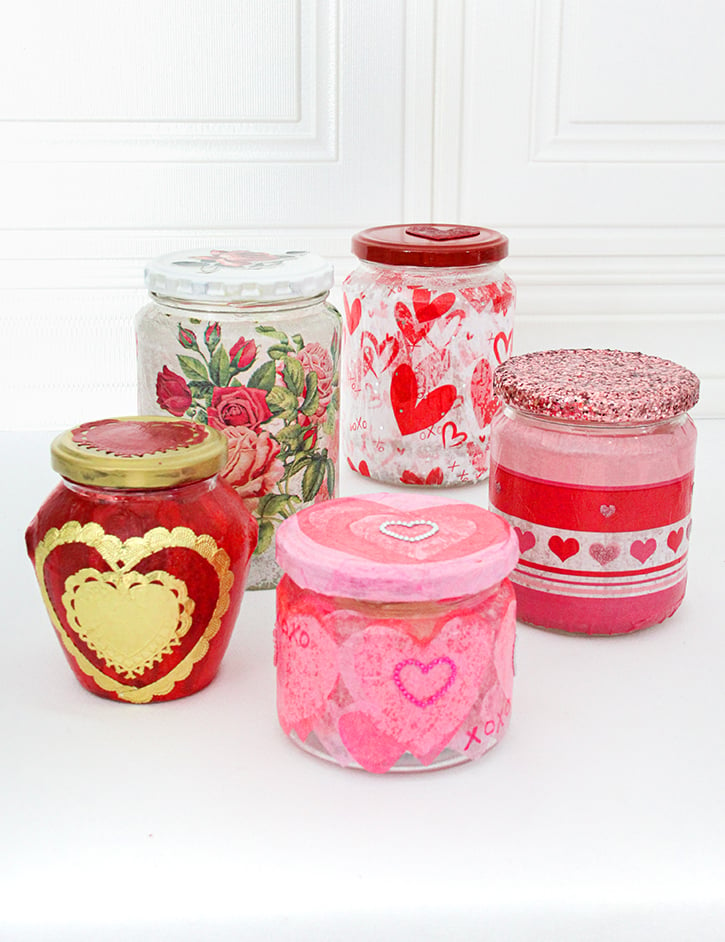
These are so easy to make using upcycled jars and decorative gift tissue! If you like, you can decorate the lids to go with them. Also, this can be a kid-friendly craft that littles can help make with some supervision.
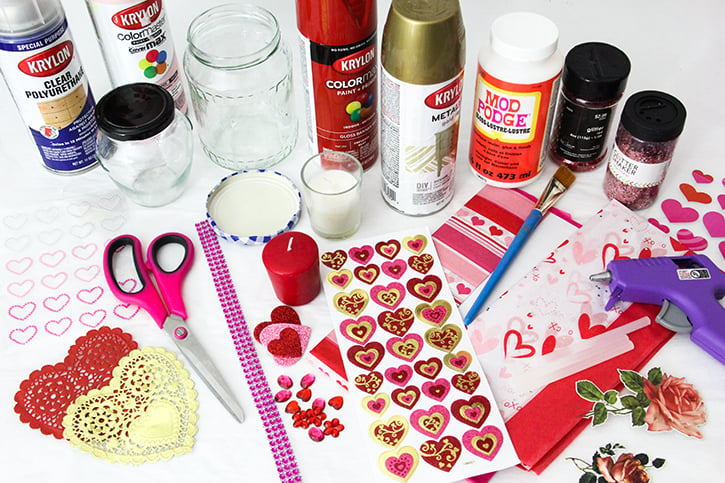
Gather all your supplies.
A project like this calls for raiding your craft supplies for fun embellishments like doilies, glitter, stickers and scrapbooking elements! Gather any supplies you have that fit the colors or design with a Valentine’s theme. Especially if you will be decorating more than one jar.
The basic supplies you need for tissue paper votives, will be a glass jars, decoupage glue, a craft brush, gift tissue and scissors. You can use spray paint to paint the lids, as well as having a glue gun on hand for adding trims or other embellishments.
Getting started.
First of all, remove the labels from the jar you will be using, and make sure they are super clean. Please use glass jars for this project if you plan on using a real candle in these, for safety reasons. You could use new Mason jars for this, but upcycling other jars is more fun! Any of those salsa, nacho cheese, pickle, pepper or jam jars in your recycling bin offer a wide variety of interesting shapes and sizes to choose from. But they can retain some pungent odors too. A good soak and a thorough scrub in some soapy water, or a run through the dishwasher usually removes smells.
Start simple.
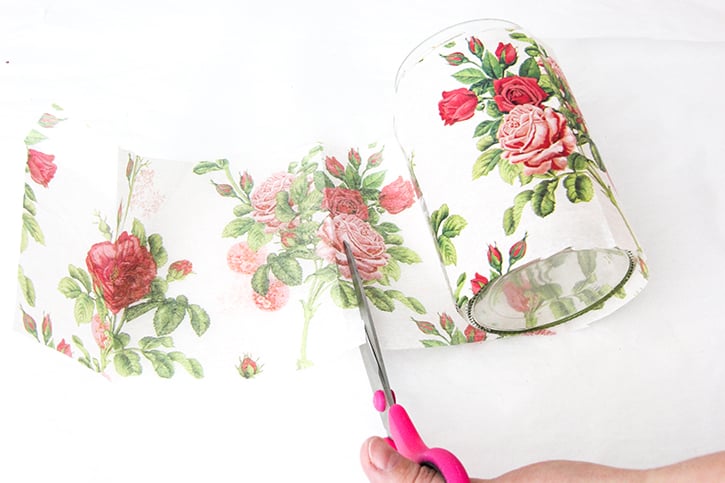
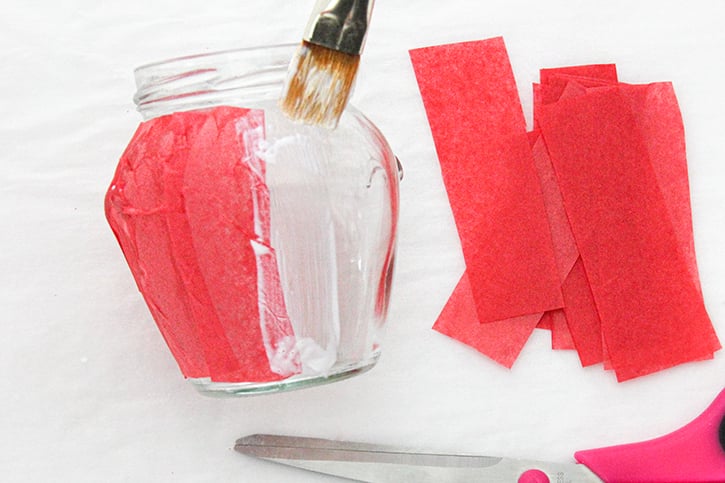
For the simplest all over design, start by cutting a piece of gift tissue to fit your jar. You can use the measurements of the height and circumference of the jar to cut out a piece of gift tissue. Or you could just lay it on the paper and cut a strip to fit the height of the jar, then roll it around the jar and trim the paper strip to wrap around the jar. Allow just a little extra length in the strip so that it overlaps, and doesn’t leave a gap on the side of the jar.
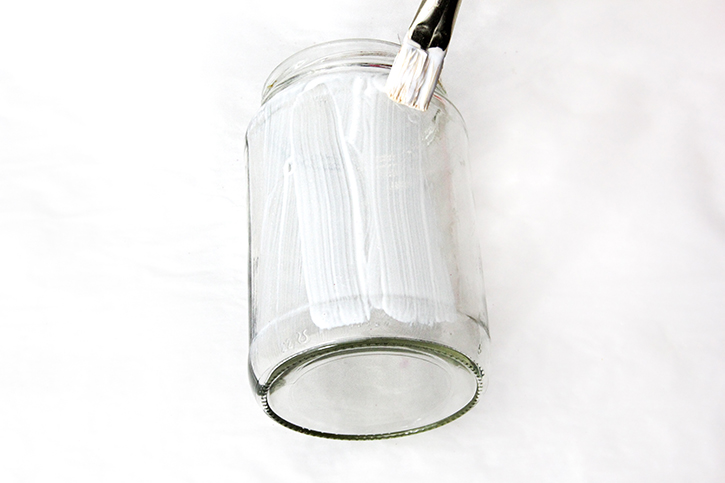
Next, coat the sides of the jar with decoupage glue by painting it on in vertical strokes. Mod Podge is the best brand of decoupage glue, and it’s available in matte and gloss finishes. Use whichever finish suits your personal taste for this project.
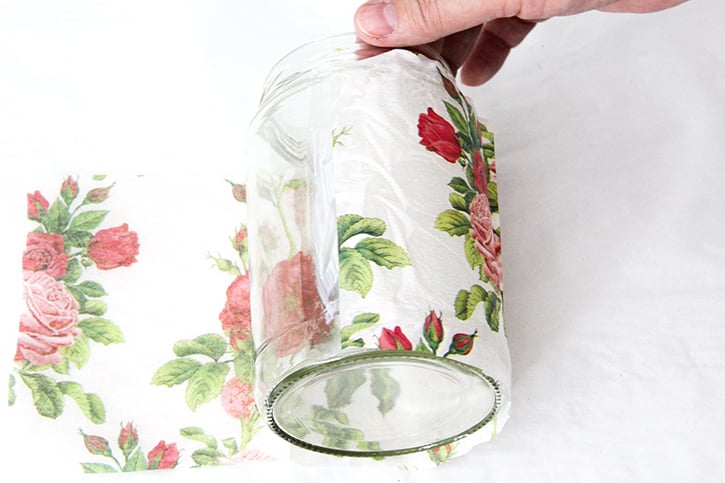
Wrap the still wet, coated jar by laying it against the inside of the gift tissue paper and rolling against the strip until it covers the sides of the jar. Seal down the overlapping piece of the strip by painting the back of it with a little decoupage glue, and smoothing it down.
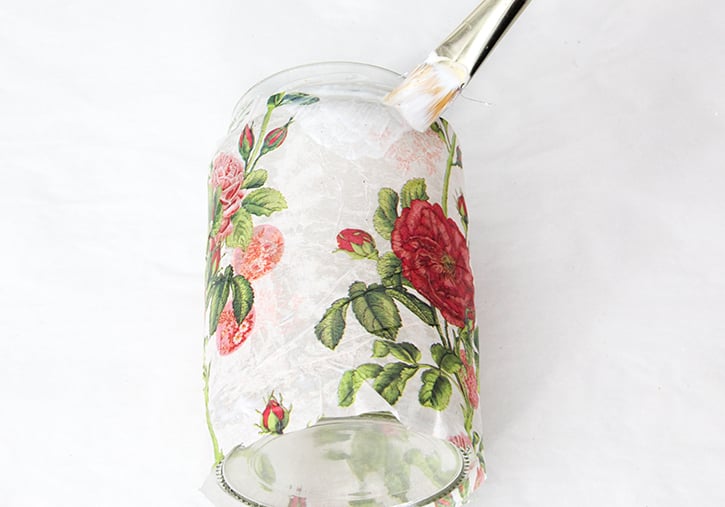
Next, evenly coat the paper covering with more Mod Podge. Let the coating set up and dry for 15-20 minutes before adding any embellishments.

Other snazzy, easy designs.
Another easy design idea is the same as the first, but adding an extra layer of gift tissue. This looks really good if the paper has an all-over design, or with two papers in complimentary designs. Gift tissue is usually transparent, and the design or color on the bottom layer will show through. Adding the decoupage glue will make it even more transparent, and it’s a neat effect with a lit candle inside!
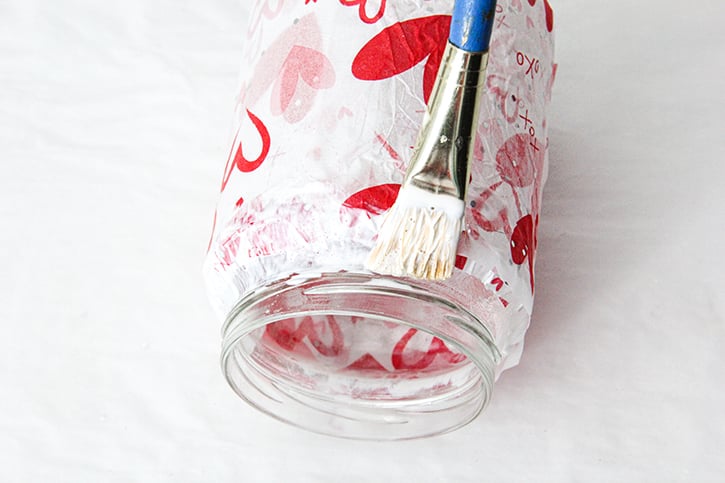
Loose top and bottom edges of the paper covering can be glued down to the jar by brushing the backs of them with the decoupage glue, then smoothing them down to the jar by brushing more onto the front.
The jars dry best sitting upside down, so that they don’t stick to your work surface!
Upcycle interesting jar shapes. And learn how to cover interesting shapes!
You might want to use a jar with an unusual shape for your tissue paper votives, which might not cover too neatly with the roll-on paper method. The best solution for covering a jar with more a rounded shape (or any jar that doesn’t have mostly flat sides) is to cut the gift tissue into strips. Cut several of them the height of the jar, by about an inch wide. Apply them so that they overlap, and conform to the shape of the jar.
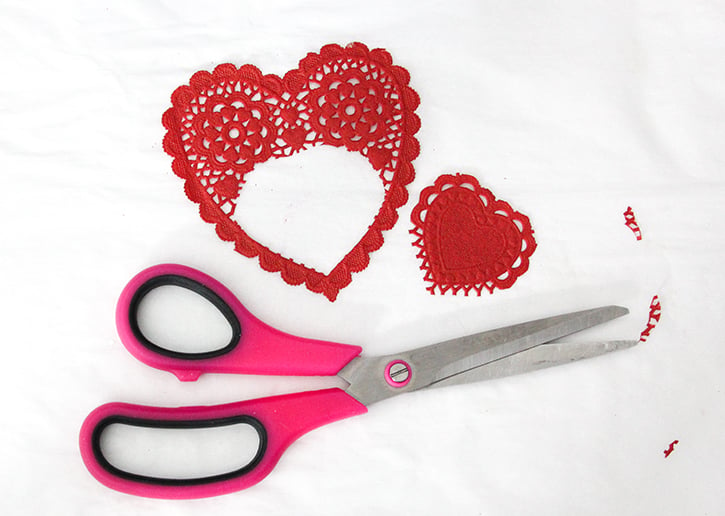
Doilies can make a charming design element for this project. If the doily you like is to large to fit, deconstruct it! You can carefully trim out pieces of it to fit on the side of your jar.
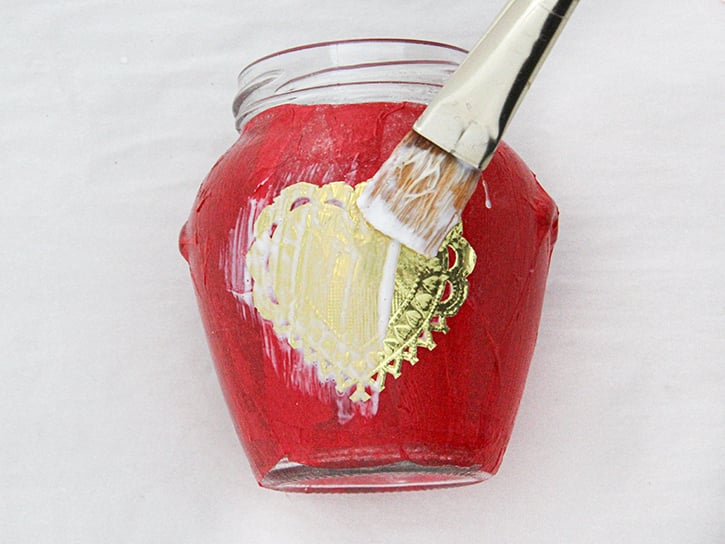
The pieces of doily can be applied to the jar with Mod podge. Paste on metallic details from a gold doily for a hammered brass or gold leaf look.
Experiment with layers of tissue hearts.
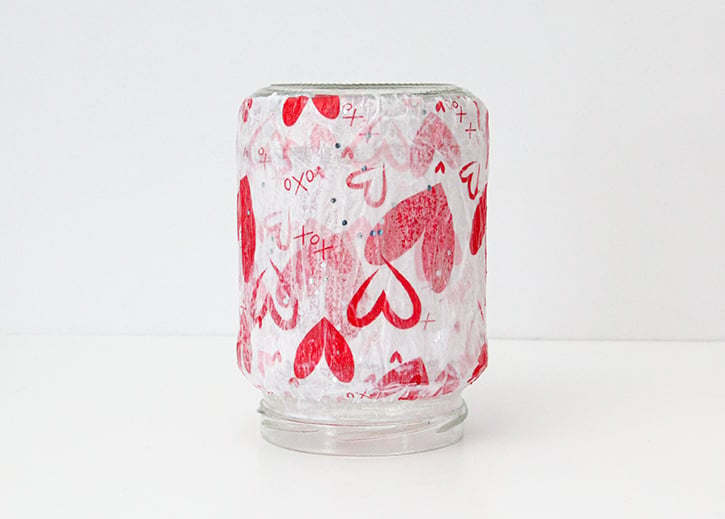
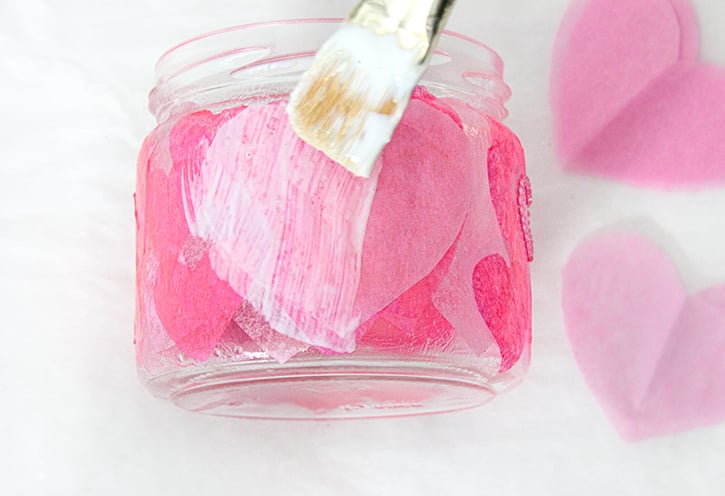
Another beautiful technique is to cut out various sized hearts in different colors of gift tissue, and to layer them on top of each other for a soft stained glass look. The colors of tissue paper will intensify as the coating of decoupage glue dries.
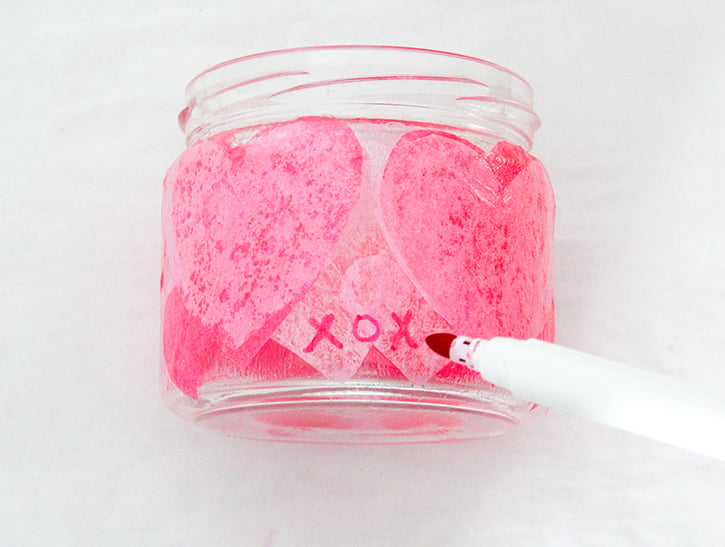
Glass paint markers can be used to personalize, outline or draw on top of the tissue layers, once the decoupage glue coating has cured up for about an hour. Stickers and other embellishments can also be added to the jar after drying time. Add a label to use as a special storage container!
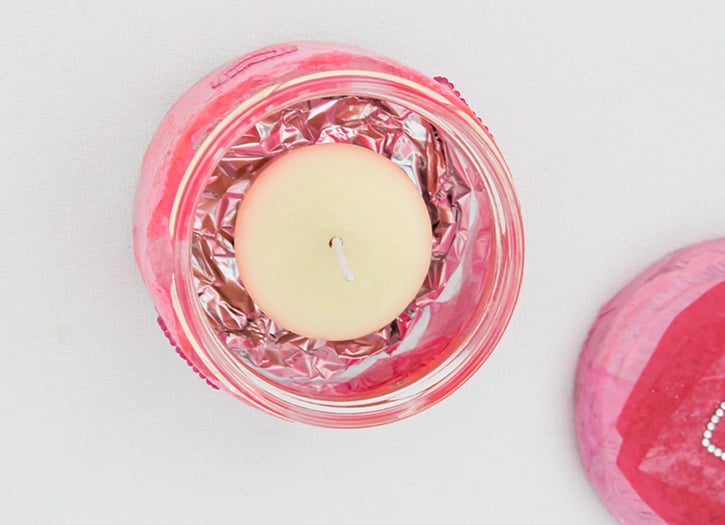
Add a piece of aluminum foil to the bottom of the tissue paper votives if you are using a wax votive candle inside it. This will make candle wax easier to remove later, and is reflective enough to make the candle light brighter!
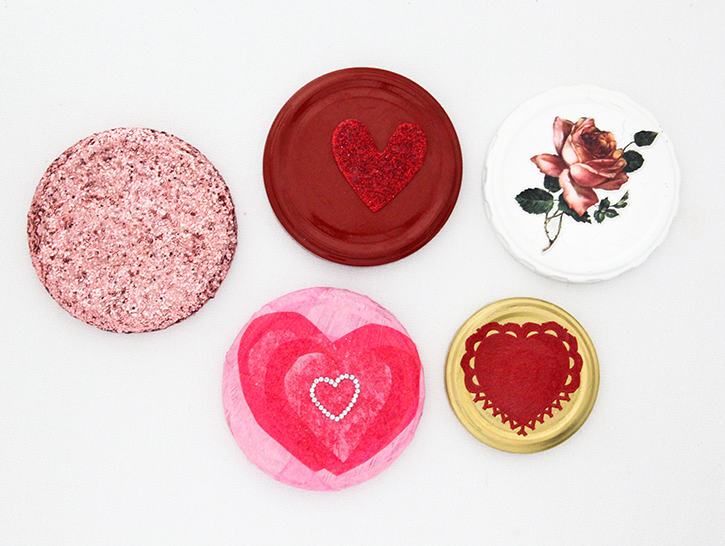
Add a lid for gifting.
You can decorate the lid of the jar by painting with a good enamel craft paint that covers branding and colors that you might not want. Krylon Colormaxx can be found in craft and hardware stores, or online. It’s a combination spray paint and primer that gives good coverage on most surfaces. It may take two or more coats to cover the markings on your jar lid. It’s also a good idea to add a base coat of paint before embellishing the jar lid with glitter, tissue, stickers, clip art or scrapbooking elements.
This is a fun project for kids to get into! You can paint the lids, and let them add the rest with some adult or older kid supervision. These decorated jars make a sweet handmade gift to present, and the jars can also be filled with candy or other items for gifting.
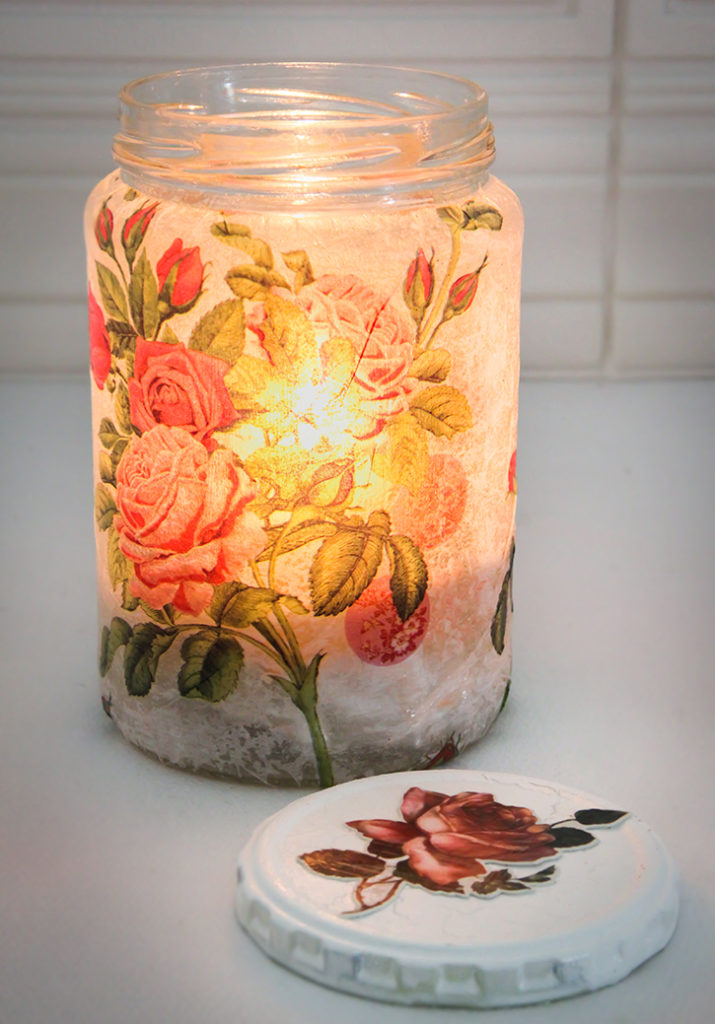
Simply magical when lit. A floral design on transparent tissue really stands out with soft light coming through. Choose a more botanical style floral print on the paper for a softer, more cottagecore look. If you can’t find a vintage style floral print on tissue paper, FLONZ papers can be found online. They offer a vast selection of Victorian style craft papers.
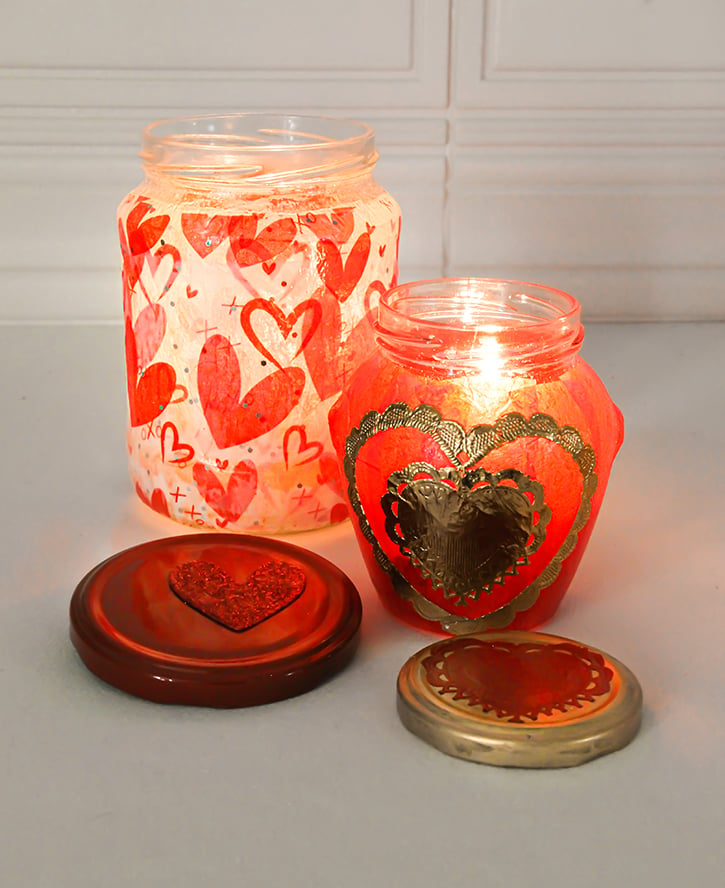
Candle light shining through red tones adds a warm, romantic glow. Use a flameless candle or a votive candle with a floral, vanilla or cinnamon scent to add to a romantic atmosphere.
Looking for more Valentine’s Day inspiration? Check out our sparkling Glitter Wine Bottles!
Tissue Paper Votive Holders
Equipment
- Pair of scissors
- Art brush
- aluminum foil
Materials
- 1 medium jar with lid about 4 x 5 1/2 inches
- 1 large sheet decorative tissue paper
- Mod Podge decoupage medium
- Spray paint or acrylic paint for lid
Instructions
- Wash and dry jar and lid thoroughly.
- Lay the jar on top of a sheet of tissue paper. Roll the jar into the paper to gauge how much you'll need to cover the jar. Cut the tissue paper to size.
- Coat the sides of the jar with decoupage glue by painting it on in vertical strokes.
- Wrap the still wet, coated jar by laying it against the inside of the gift tissue paper and rolling against the strip until it covers the sides of the jar. Seal down the overlapping piece of the strip by painting the back of it with a little decoupage glue, and smoothing it down.
- Next, evenly coat the paper covering with more Mod Podge. Let the coating set up and dry for 15-20 minutes.
- Decorate the lid of the jar by painting with a good enamel craft paint. Allow the jar and lid to dry thoroughly before using as a votive holder.
- To use, place a small crumpled piece of aluminum foil in the bottom of the jar. Nestle a votive candle inside the aluminum foil so that it is level and stable. When the candle is used up, remove the aluminum foil for easy clean-up.