
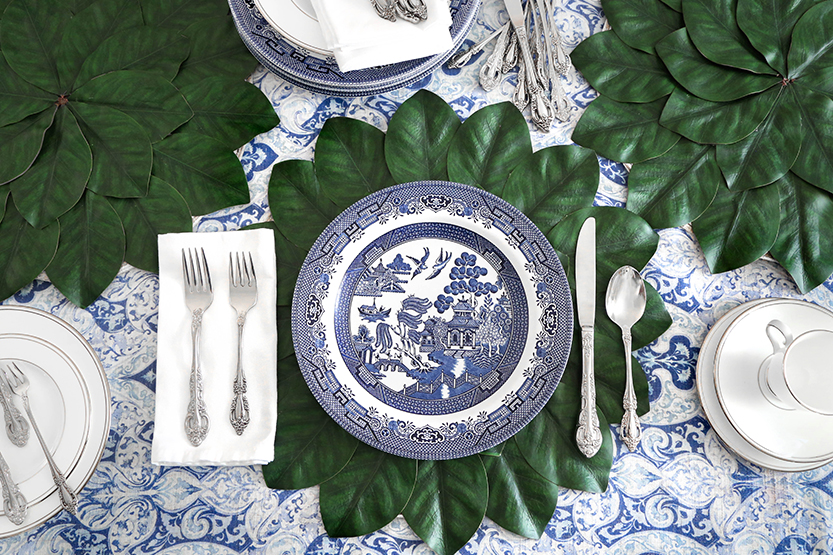
DIY Magnolia leaf placemats are a beautiful way to get a high-end look without the high-end price. Skip the expensive home goods stores and create these elegant, budget-friendly placemats yourself in no time!

In a world where everything seems to come with a hefty price tag, it’s always refreshing to find a way to create something just as beautiful and stylish without breaking the bank. These DIY Magnolia leaf placemats are a perfect example! A high-end home goods website might offer a similar look for a small fortune, but you can make these stunning placemats yourself for a fraction of the price. Not only do they add an elegant, high-end touch to your table, but they’re also affordable to DIY.
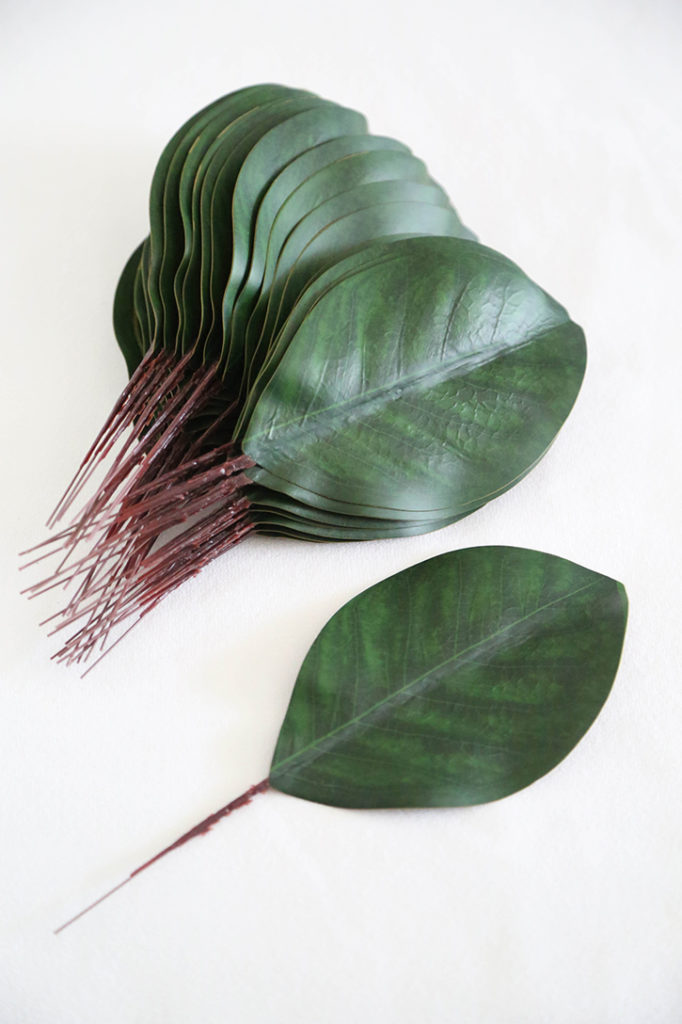
Plastic Magnolia Leaves
These realistic-looking magnolia leaves are how you get the look for these DIY dupes. They’re often used for wedding table place cards because they are easy to write on with a paint pen. But they’re also perfect for this project!. Find them right here in sets of 40 per per pack. It takes about 23 of the leaves to create one DIY Magnolia Leaf Placemat, so you would need three packs to create a set of four placemats. Three packs would have enough in it to cover one additional placemat. Be sure to order enough packs of the leaves to cover the number of placemats you would like to make.
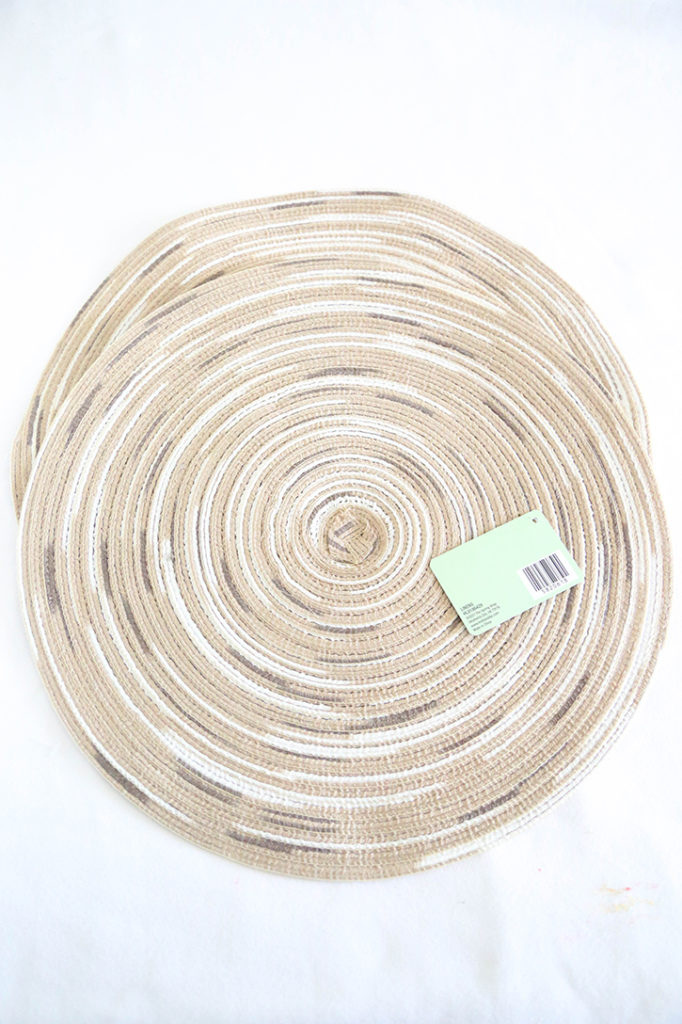
Round Placemats
Use inexpensive round placemats for the base to attach the magnolia leaves to. Check Dollar Tree stores and thrift stores for the least expensive options. They are also some good options available online in sets (link). Most are a 15″ diameter, which ends up making a large 17″ placemat. About the size of a charger once you add the leaves.
Placemats that are lightweight, smooth and made from a finely woven material will work best as a foundation. You could even cut out your own from a material like burlap. Parts of this bottom layer could show in the outer band of leaves, so use a shade of green or a neutral color for your foundation.

Figure out Placment
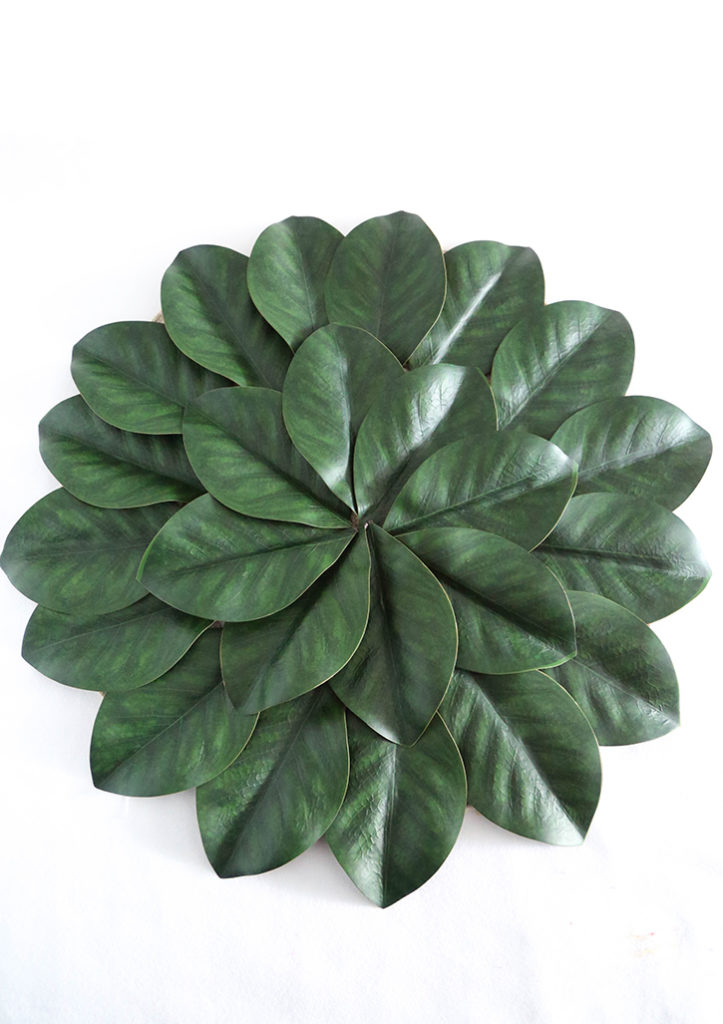
Before attaching any of the leaves to the placemat, figure out the placement of the leaves. Lay the outer, bottom layer down first. Be sure to follow the circular shape of the foundation. The top of each leaf should evenly overhang the edge of the bottom placemat 1.5″ to two inches. Each leaf should overlap the one next to it by about half an inch. It will take about 15 leaves to cover the outer edge of the bottom foundation. This will make the diameter of each DIY Magnolia Leaf Placemat around 17″.
One you have figured out the placement of this outer layer, repeat the process for the top inner layer. Lay the leaves out in the center in a flower formation. Overlap each leaf so that the foundation placemat does not show through. This should take about 8 leaves to do.
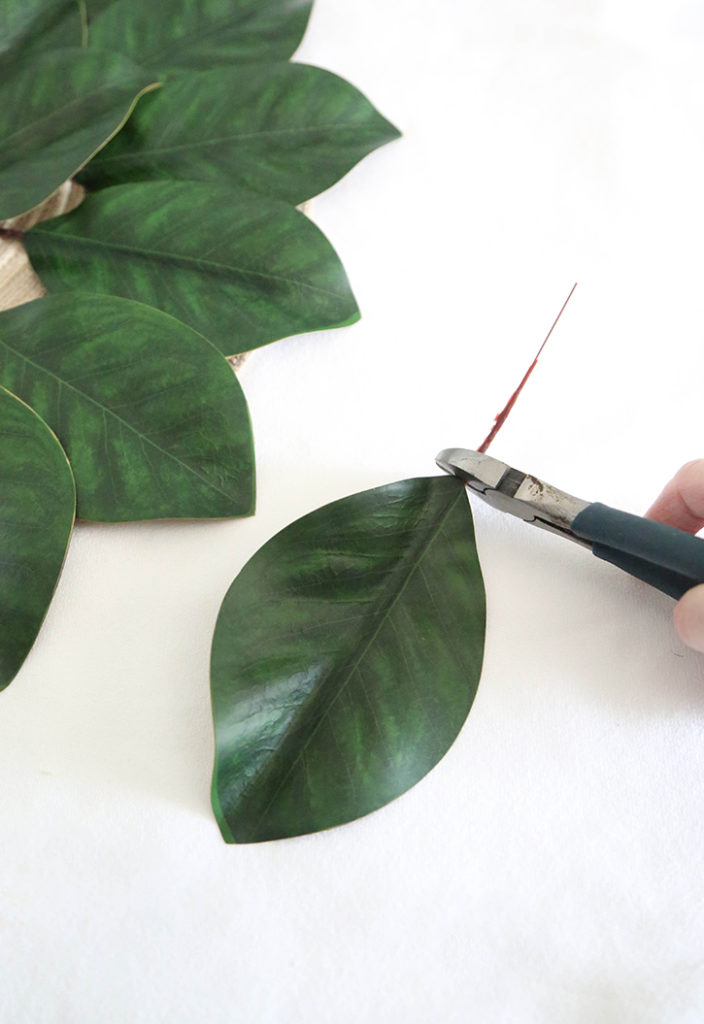
Cut the Wire Stems
Cut the long wire stems off the leaves with wire cutters or floral shears before attaching to the foundation placemat. This will make it easier to glue them into place.
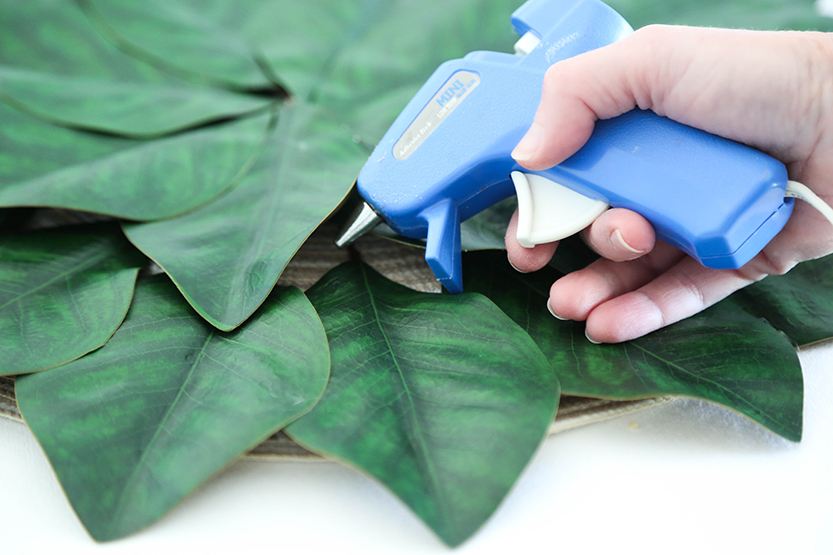
Affix with Hot Glue
The leaves could be attached with a strong adhesive like E6000 or a fabric glue if you like. But a low-temperature glue gun and glue sticks really work best for this project. Hot glue cools quickly and holds the leaves firmly in place. Plus it’s easy to do any quick repairs to your DIY Magnolia Leaf Placemats in the future.
The leaves can be left in place while you attach them. Simply hold up one side of each leaf and run a line of glue near the center. Then hold the leaf back down into place until you feel the glue cooling. Repeat until all the leaves are glued into place. After this, you can tack down any parts of the leaves that stick up.
Store Flat
The leaves will make an uneven surface, so store the placemats stacked under heavy books or something to flatten them slightly. It’s also best to store them flat when you are not using them.
The Look for Less
DIY Magnolia Leaf Placemats are easy to put together, and will give your table a gorgeous green touch. Best of all, they have the same handcrafted elegance as the original – at a reasonable price!
Related Project: DIY Spring Place Card Holders
DIY Magnolia Leaf Placemants
Equipment
- wire cutters or floral shears
- low temperature hot glue gun
- glue sticks
Materials
- 3 packs Magnolia leaves 23 per mat, totaling 92 leaves
- 4 round placemats 15" each
Instructions
Prepare your materials
- Purchase three packs of plastic magnolia leaves (typically sold in sets of 40), which will provide enough leaves for four placemats with some extra.
- Select four round placemats as the base. Inexpensive, smooth, and finely woven placemats work best. Opt for a green or neutral-colored base to blend seamlessly with the leaves.
Arrange the leaves for placement
- Outer Layer: Lay out the first layer of magnolia leaves around the edge of each round placemat. Each leaf should:Overhang the edge by 1.5" to 2"Overlap the adjacent leaf by 0.5"Require about 15 leaves for full coverage per placemat (totaling about 60 for four placemats).
- Inner Layer: Arrange approximately 8 leaves in the center in a flower formation, overlapping them to fully cover the base placemat (totaling about 32 for four placemats).
Trim the stems
- Use wire cutters or floral shears to remove the long wire stems from each magnolia leaf before gluing. This will allow for a smooth attachment to the base placemats.
Attach leaves with hot glue
- Using a low-temperature glue gun, lift one side of each leaf and apply a line of glue near the center.Press the leaf back into place and hold until the glue cools.Continue gluing all leaves, ensuring a secure attachment. Tack down any lifted edges for a polished look.Repeat for each of the four placemats.
Store properly
- Stack the placemats under heavy books to flatten them slightly.Always store them flat when not in use to maintain their shape and look.
Enjoy your DIY decor!
- Your set of four DIY Magnolia Leaf Placemats is now complete! These placemats add a handcrafted elegance to your table setting, all while being a cost-effective and stylish alternative to expensive store-bought options.