
Learn how to Block Print Fabric with Ombre Effect to create your own table linens. Create your own designer printed table napkins for Thanksgiving. Or choose your own motif or seasonal design to adorn your place settings. With a few tips and tricks, this can be a fun and relatively easy project!
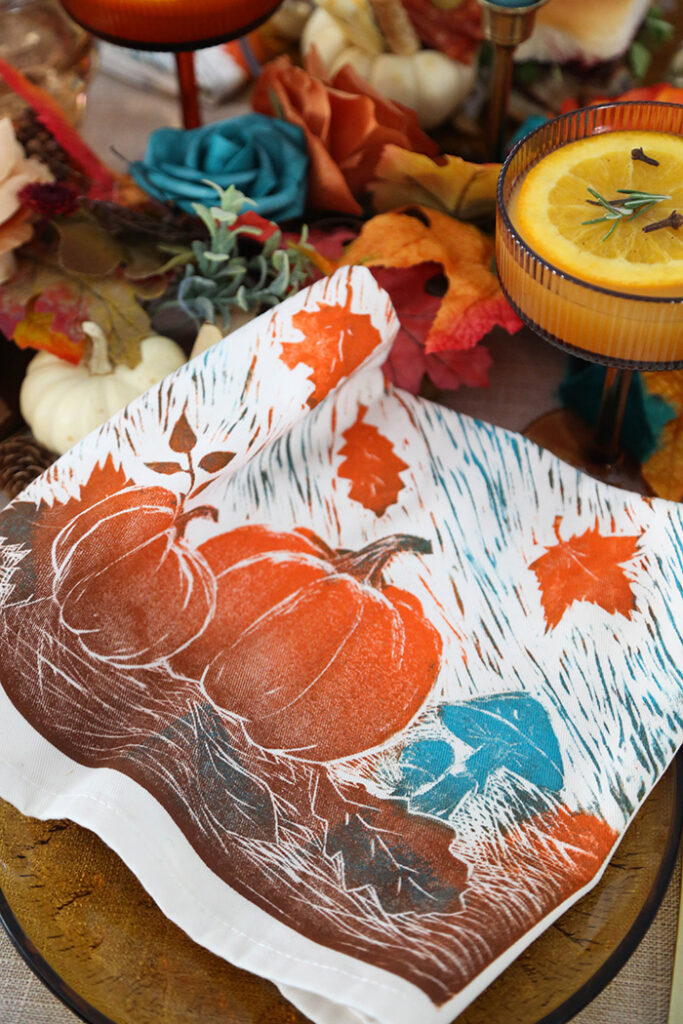
Create Your Own Custom Table Linens
A couple of years ago, I made a set of napkins and a table runner for a Christmas tablescape. The DIY Block Print post outlined the steps to make a style of table linens you might find for sale on boutique websites. Using linocut to achieve the handmade look is a more cost effective way to customize a set of plain table linens.
In this article I’ll go back over some of the basics of block printing on fabric so you can make your own set of designer table napkins. This time we’re making a set of napkins for a Thanksgiving tablescape. There will be some of the same steps, but mainly with a different inking technique for the printing block. We will be rolling out different fabric ink colors in an ombre effect. It’s an easy way to get multiple colors printed from one block, simplifying the printing process. This can allow more flexibility to match a color scheme or theme for a tablescape of your choice.
Tools and Materials
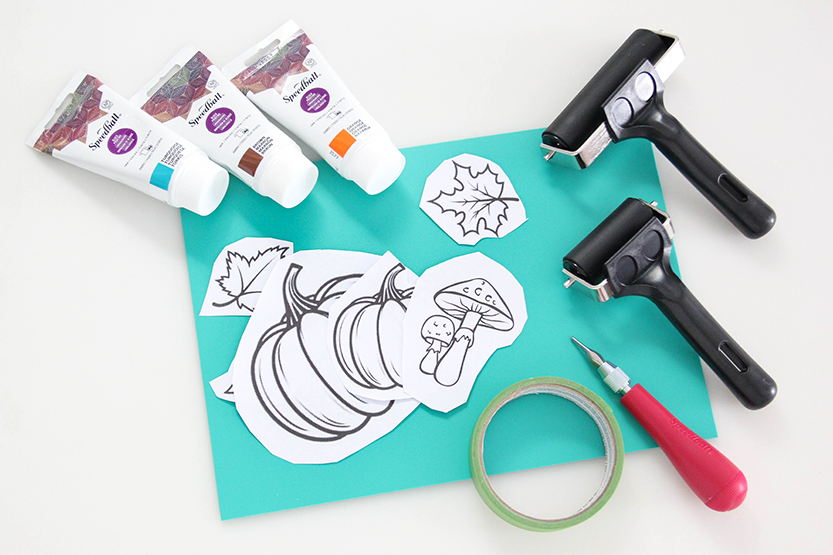
Once again, you will need some of the same basic tools and materials for this project. Sometimes you can find a good deal on a lino printing kit that will have most of these basic tools included.
A good lino cutting tool with a selection of different changeable blades, like this one works well. This time you will need a more than one ink roller or brayer, in different sizes. I found this set online, with three different sizes of roller. The largest one is 6″wide, which was a good maximum size for rolling out a wider strip of ombre ink.
It’s best to use a lino printing block made for art printing, like this 9″ x 11.75″ Speedball Speedy Carve block I used last time, or this one I also found online. This size range is a good fit for fabric table napkins, but you could use a larger size if you like. This type of printing block is much easier to carve for all skill levels, and safer to carve too.
Fabric Printing Inks to Block Print Fabric with Ombre Effect
I also used Speedball’s fabric printing inks, which are water soluble and easy to clean off the printing block and rollers. I used turquoise, orange, and brown. There are many different colors to choose from.
You will also need a bench hook, or a clean sheet of plexiglass or glass to use as an inking plate. A baren or a large flat spoon and a hard rubber roller will be needed for transferring the print to the fabric.
Some other basic tools you might need include painter’s tape, some earthquake putty or modelling clay, sharpened number 2 pencils, a permanent marker, and a plastic art eraser. You will need plenty of shop rags or paper towels. Also some pieces of newsprint or cheap sketchpad paper to proof prints on, before you print on fabric.
Printing Area Tips
A flat, clean, work area with plenty of space will make this project a lot easier. A glass top or a large sheet of plastic will make cleanup really easy. I used a large sheet of thin acrylic that came out of an old poster frame to cover the table I was working on. I anchored it in place with earthquake putty on the back of the corners to keep it from moving.
The slick surface can be marked to make an outline to lay your printing block and fabric on. You can create guide lines by laying your lino block down and making an outline of it with a permanent marker. Then draw the outline of a napkin around it, centered around the block, or spaced closer to an edge of the napkin. Use the measurements of a napkin, or by laying one down and tracing around it. This way you can line the napkins up the same way each time you print.
Some Notes on Fabric Choice
A smoother fabric weave will print the image more clearly. These 14×14-inch size white cotton napkins have a fine texture, and are available online, at this link. A coarser weave like linen will print with more texture. For the best results, it’s smarter to avoid printing on any fabric with too much texture or slubbing.
White as a background color works fine for most color schemes, but you might want to go with beiges or creams to go with warm ink colors. I actually coffee dyed these to get a more cream-colored tone to go with the color palette. It’s also best to print on lighter fabric colors. Inks can be transparent and not show up well on deeper colors.
Before you begin, make sure the fabric is clean, and there are no stickers or labels on it. For best results, prewash it. Iron the fabric flat and smooth as possible before printing on it. Lay the napkins out flat in a stack near your work space before you get started.
Choose Your Design
If you are hand drawing your own design on the lino block, skip the next two steps. Draw directly on the block with a number 2 pencil. You can erase lines if you need to.
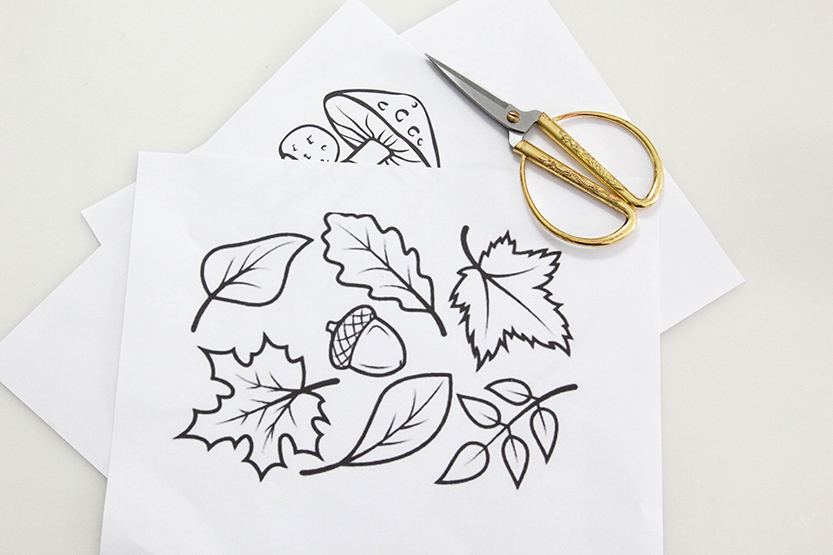
Free clip art design elements can be found online if you don’t want to draw a design freehand. It’s best to use simple design elements with images that will print areas of ink colors. Black and white images with sharp outlines are easiest to transfer to a lino printing block. Simple designs work best. If you are worried about the precision of printing, chose one bold image.
One key thing to keep in mind though, is that the image will print in reverse. This is especially important to remember if you want to print text, letters or numbers. I don’t recommend trying this unless you have some printmaking experience; that is for another lesson!
Lay Out Your Design
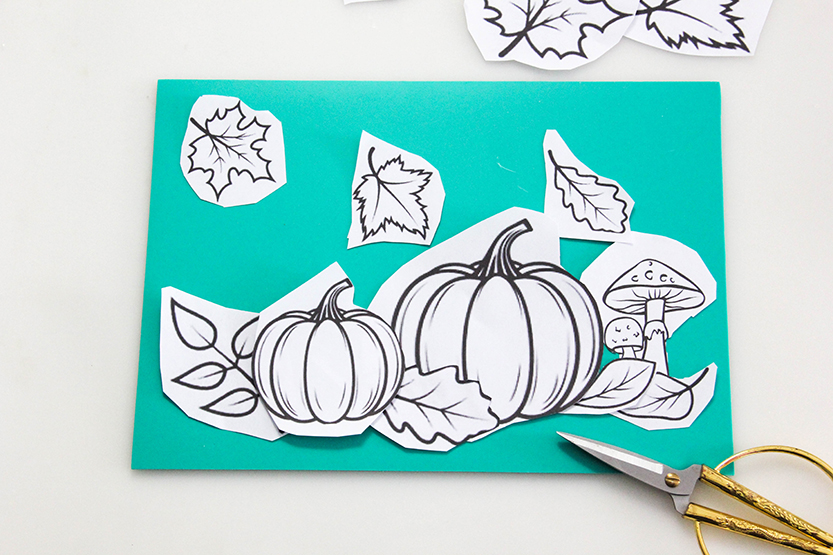
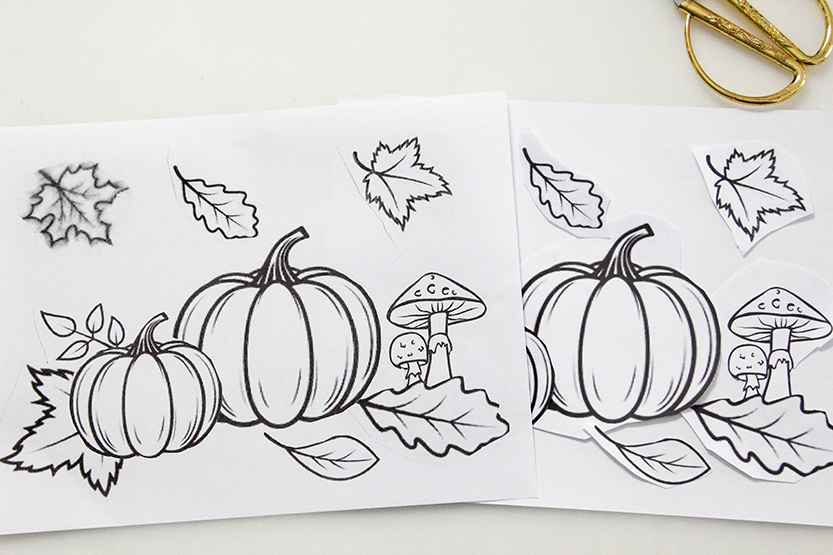
Print out more than one page of your design elements from a desktop printer. Print them out in at least one different size (slightly larger or smaller). Cut out and arrange the design elements until you get the layout you want. Next, lay the arrangement on a piece of paper and print a copy. Use this copy to transfer the design to the printing block.
Transfer Techniques
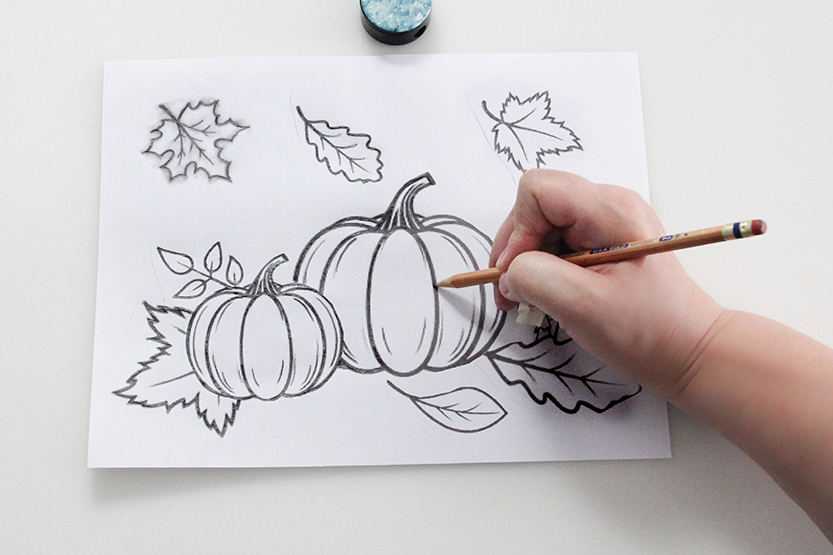
One transfer technique is to use the copy like an iron-on transfer. Anything printed with a regular inkjet or laser printer can be used as a kind of iron-on transfer to get the design on the block. There a few tutorials like this one that you can watch online if you want to see how this transfer process works.
Tape the paper down with painters tape to hold in place. This will keep design from shifting as you transfer it to the block. Make some small marks at the edges of each side of the paper with pencil as a registration to line the paper back into place if it comes loose. Iron the back of the copy on a medium setting without steam. Start by testing this in one corner to see if it works first; you can peel up the corner after a few passes to see if is transferring. If it works, tape it back down and keep ironing! It will take many passes, lots of patience and elbow grease, but the process will lightly transfer the image to the carving block.
Try not to iron directly on exposed block, it will leave a crumbly texture on the block as well as a residue on the iron. Cover the exposed block with tape if necessary.
This transfer technique worked fine on the Speedball Speedy Carve Block, but not at all on this brand of block. But, there is one transfer method that works on just about any printing block.
The Pencil Transfer Method
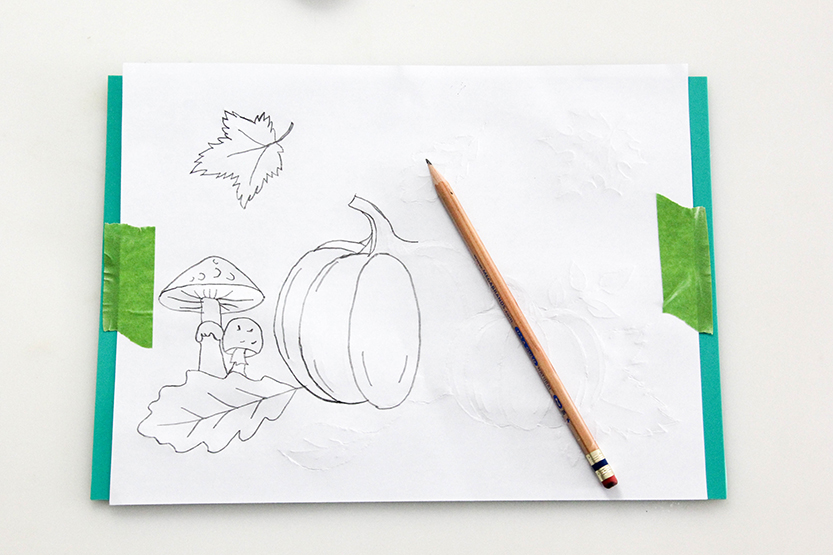
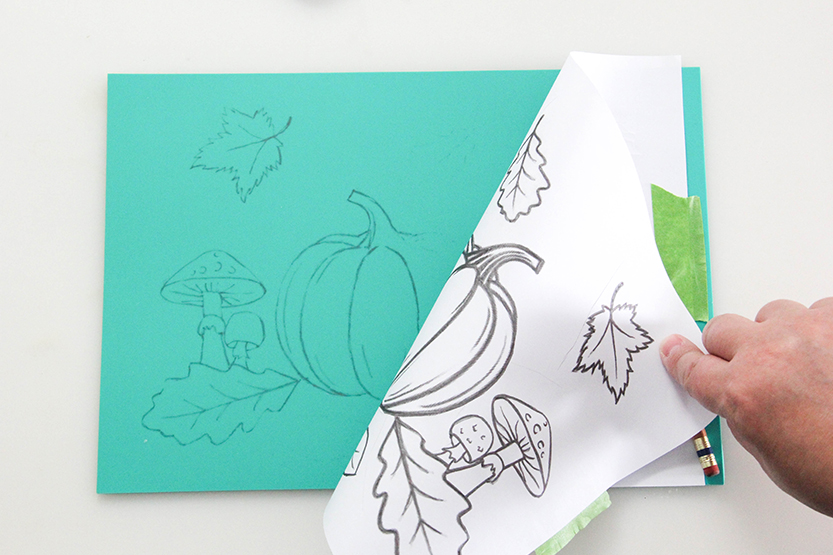
A surefire way to transfer the design onto a printing block is to trace the outlines of the image with a soft lead pencil, like a basic number 2 pencil. Then tape the copy in place to the block, and trace the outlines through the paper, with a little more pressure. Peel the copy off and you will see outlines of the image to use as a reference when you carve the block. In some ways it’s a more time-consuming method, but it works.
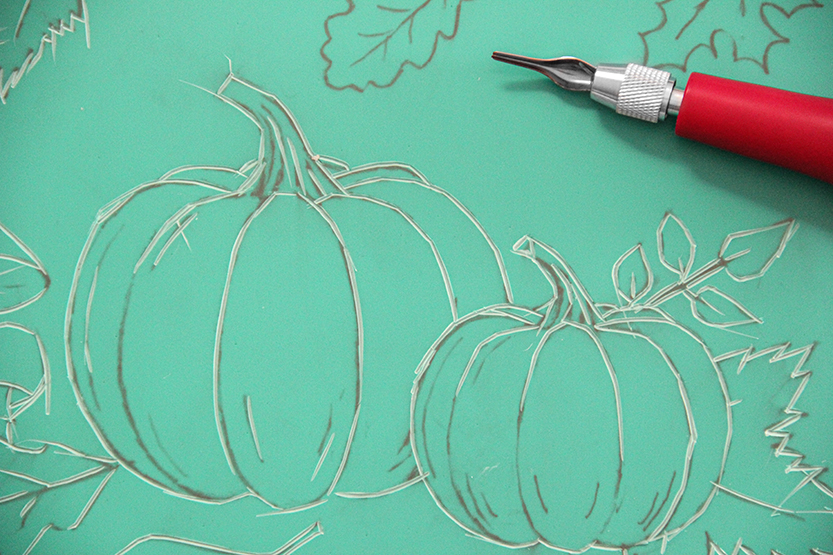
Start Carving
A basic lino cutting kit will include a handle that is hollow for storing different cutters. They are available online right here, or at most art and craft supply stores. It will have a hand adjustable chuck on it for easily replacing the carving blades.
There are different blades available from Speedball for cutting out different widths of line. The #1 small V blade is thinner for carving out fine detail, and the #2 large V cuts a bolder line. The #3 small U gouge cuts thicker lines, and is useful for carving out areas of the block to create negative space. These three blades are a good basic set for most linocut projects. The kit might also include additional types of blade.
Begin by carving the outlines of solid areas first. These will show the positive spaces of the image that will carry the colored inks. A #1 blade works well for precision cutting and carving out small areas of negative space. The cut areas are negative space, which does not carry the ink.
Carve out the negative space or the background area next. Using the #3 U gouge will leave raised lines to create “chatter” in the areas you carve out with it. This leaves a more organic texture in the background that is part of the distinctive look of relief printing. You can go back and carve down the raised lines for a cleaner look if you prefer.
Remember that any solid uncarved areas and raised surfaces left will print in color, creating the image you want to print. As a last step, carve out the details or highlights in these areas of your composition. Use a #1 blade for fine detail or small spaces, and a #2 V blade for larger, more bold white lines.
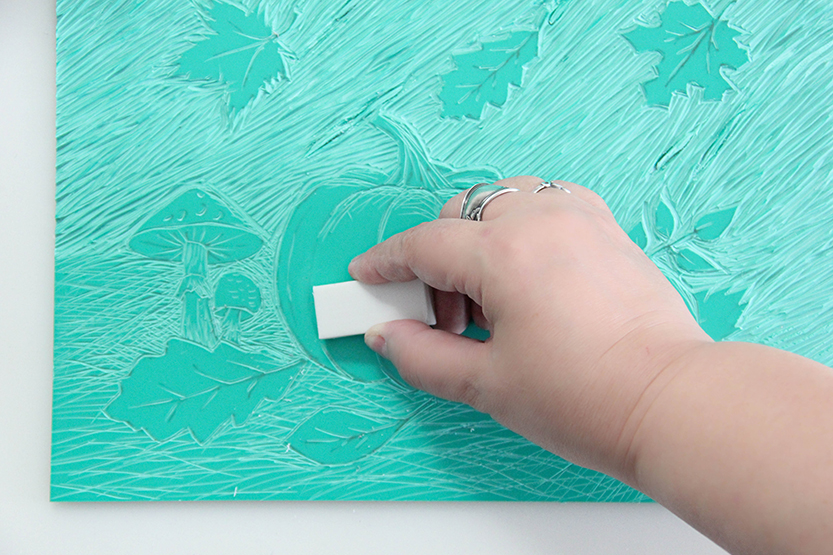
Clean Up the Block
After you are finished carving the block, use a white art eraser to get rid of the graphite from pencil marks. The graphite can transfer and discolor ink if you leave it on the printing block. I do not recommend using regular pencil erasers, because they can leave greasy marks or scratch the block. Be sure to shake off or brush off any eraser crumbs or fine pieces of block before you start printing.
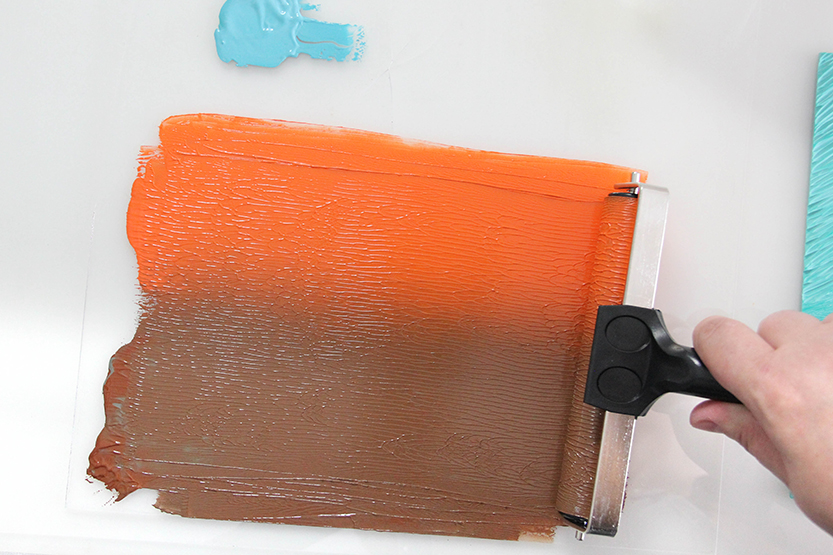
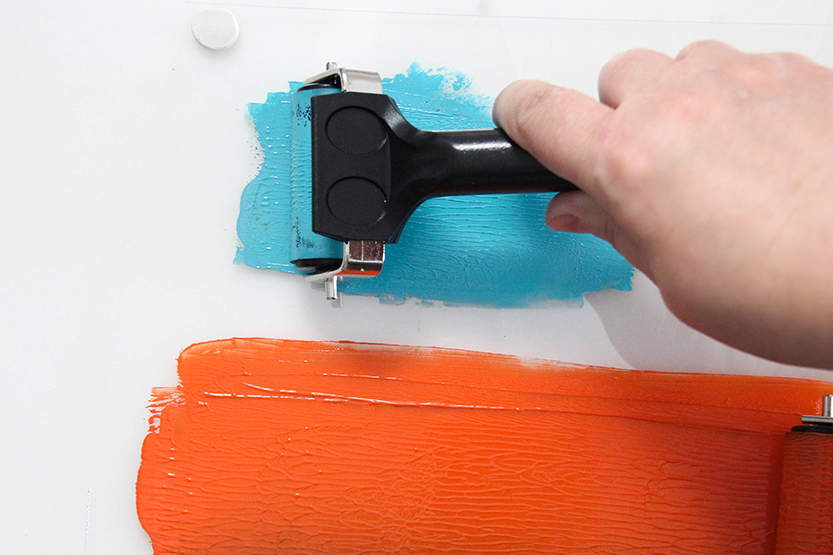
Rolling Out Ombre Ink to Block Print Fabric with Ombre Effect
If you are using a piece of glass or plexiglass as an inking plate, anchor it down with pieces of putty or modelling clay on the back corners. This will keep it from scooting around while you roll out the ink.
Squeeze out about an inch of ink onto your inking plate for any separate ink colors, like this turquoise I used in some small areas. Use a smaller brayer to roll out the ink into a strip. Roll it out until it has an thick, even layer to it.
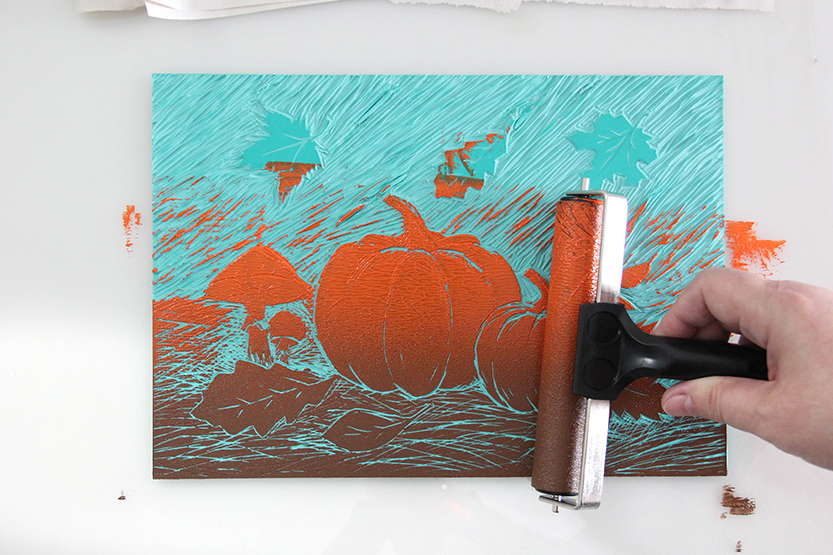
For the ombre effect ink, squeeze out a more generous strip of two colors one above the other. Use the wider 6″ brayer and roll the two colors out together. Work them into each other by rolling them out until they blend in the middle with a gradient effect. Repeat this process as needed to ink up the printing block.
Ink the Block to Block Print Fabric with Ombre Effect
Place the printing block into its space on the key you marked out on the work surface. Anchor the printing block down with putty to hold it in place. Roll the ink over the printing block from left to right until the block gets coverage of ink in raised areas. Be sure to roll the brayer in one direction over the block. It’s like using a roller to paint a wall-don’t roll the brayer back and forth over the block, because will remove a layer of ink from it! Apply the ombre ink in the area that you want printed in those colors.
Color Editing
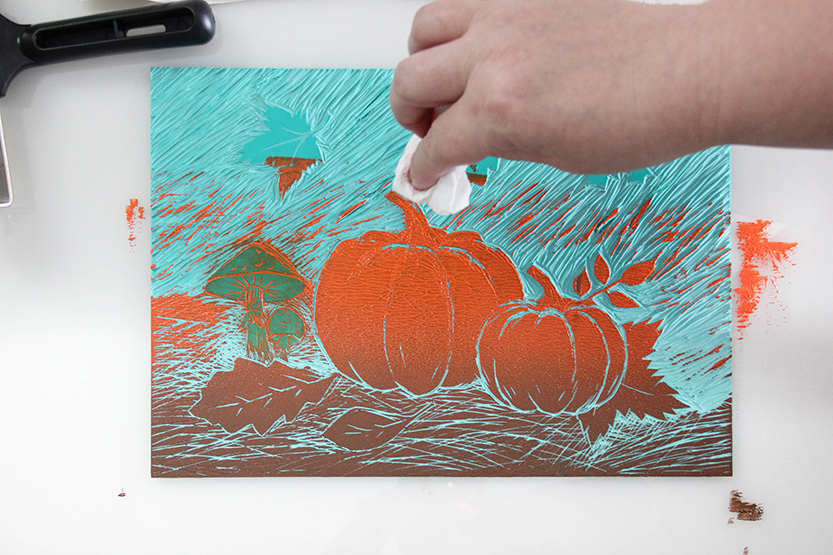
You can buff ink off the block with a damp towel for areas you want to be a different color, or for clean up. This actually works better than masking areas off.
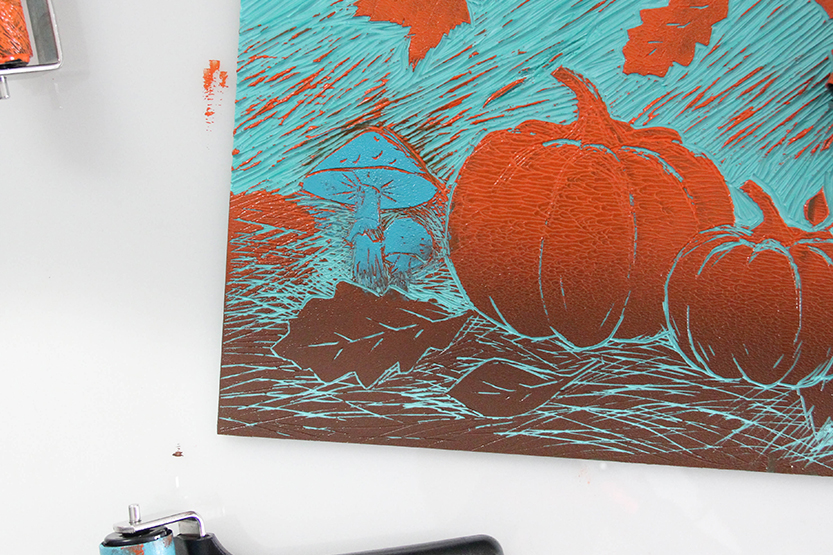
Use a small brayer to roll in smaller areas of a different color. I plugged some turquoise color into the mushrooms by rolling the ink into that and other areas. Roll the ink onto the block until all the raised areas have a uniform, orange peel like texture. Reload the roller with ink and repeat as necessary until the whole image is covered.
Ready, Set, Block Print Fabric with Ombre Effect
Clean the area around the printing block with a damp towel before you pull each print. The ink wipes and buffs away because fabric ink is water soluble.
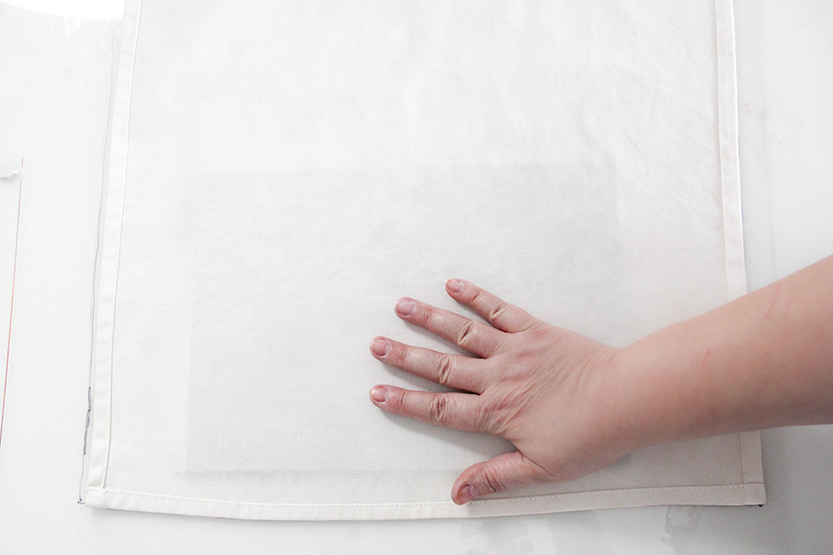
Print proofs on newsprint or sketchbook paper before you print on the fabric. This is also a good way get practice lining up the napkins over the printing block. Lay the piece of paper over the block, using the guide lines you made earlier for printing the napkins. Evenly smooth out the paper with your hands, then rub down over the block area with a baren or flat spoon to transfer the ink. You can also make a few passes over it with the hard roller.
Peel the paper off the block from one corner. This proof will allow you to see what the image looks like, and if there are details to refine or areas you might want to cut out. Don’t clean the block between pulling prints, just add another layer of ink so that it builds up on the block. A little snowy-ness is fine, but keep adding layers of ink to the block. Make proofs until the image prints more solid, and then charge the printing block up with ink.
Speedball fabric ink washes off with soap and water. Clean the block and let dry thoroughly after washing the ink off before making any changes to the image. I also recommend cleaning the block if you have a long break between printing, so that ink doesn’t dry on the block or trap lint.
Print Your Napkins
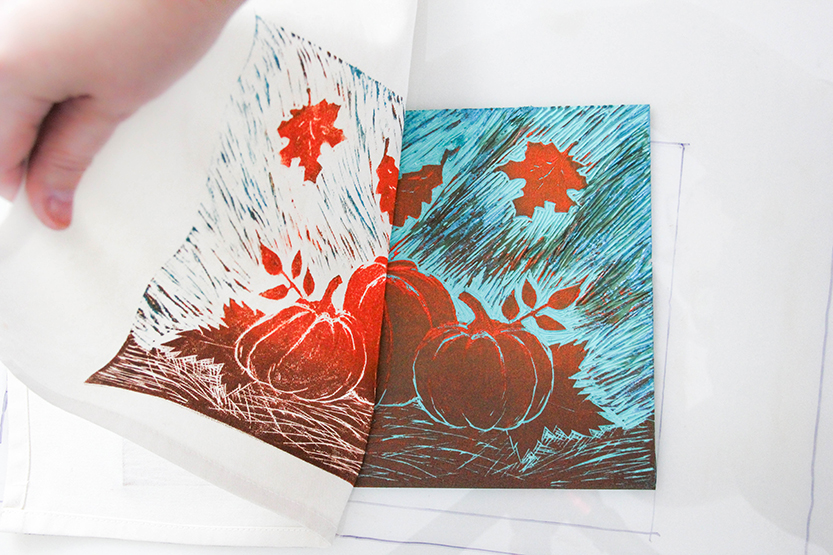
Now you are ready to print your napkins. Lay a napkin facedown into place onto the block, using the guide lines you made for them. Repeat the burnishing process you used to make the proofs. After a few passes, you can pull up a corner to have a peek at how the ink is sticking to the fabric. If it still needs work, carefully lay the corner of the napkin back down into place and burnish more until the ink transfers in a good saturation.
Peel up and ta-da! You have a custom printed, designer napkin.
Tack the linocut block back down with putty if it scoots out of place. Repeat the inking, cleaning and burnishing process for each napkin. Lay each printed napkin out face up and flat, or hang them up to let the ink dry.
Handle with Care
It’s best to let the napkins dry for at least 24 hours. This will allow the ink to cure up. Before washing, I would recommend heat setting the ink. Do this by turning the fabric facedown and ironing the back of it, with the iron on a hot setting for two minutes. It’s a good idea to lay a press cloth or paper under the fabric on the printed side to protect your ironing board. This will prevent the image from fading with repeated washing. Wash on a delicate setting with mild non-enzymatic soap, or hand wash. Avoid tumble-drying your block printed napkins after washing-let them air dry to preserve the design.
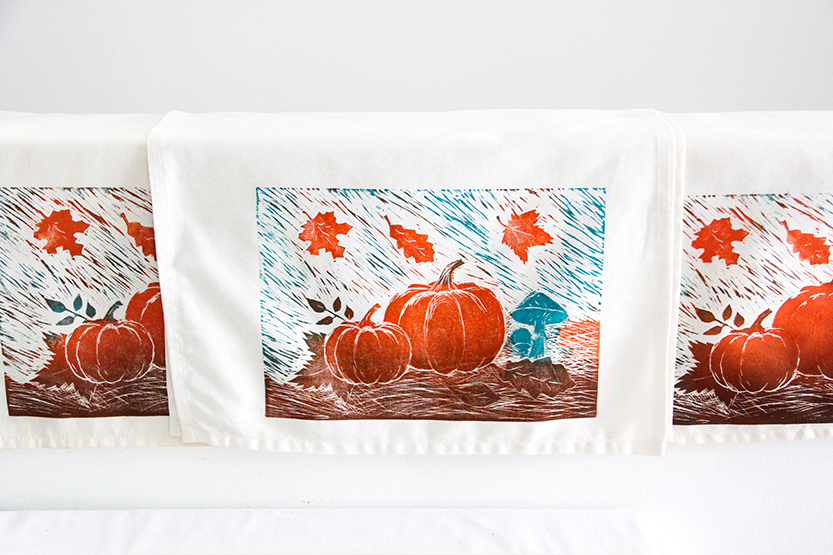
Now you have a collection of custom table napkins to wow your guests!
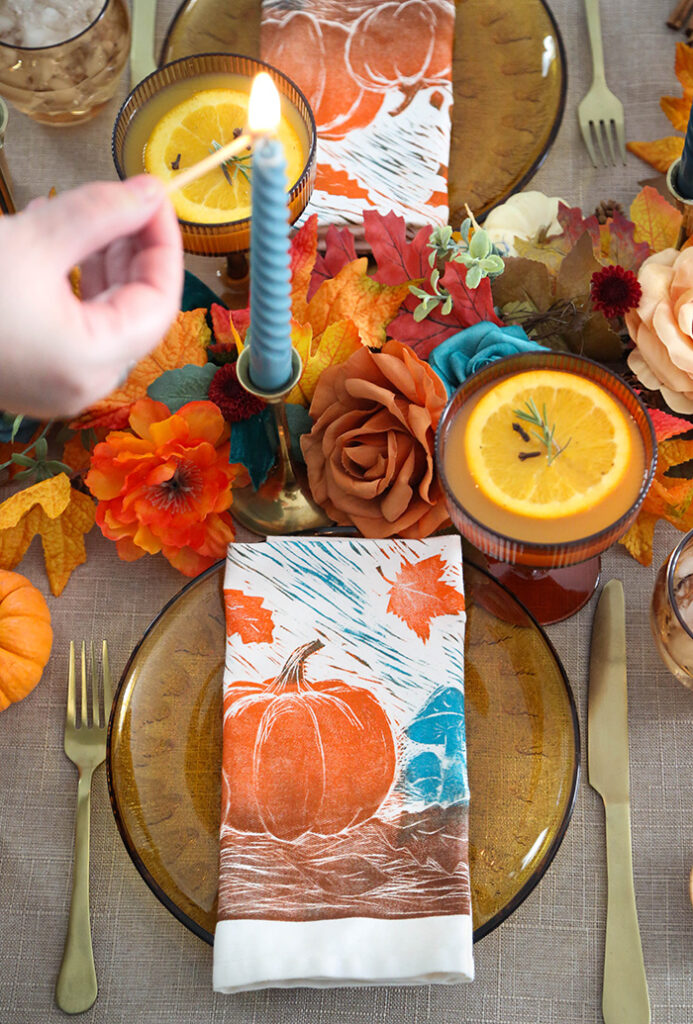
This DIY on how to Block Print Fabric with Ombre Effect is creative way to create your own designer table linens that you can use annually for any specific holiday or season. Or you can choose an evergreen design that can grace your tabletop for many special occasions through the years. You could also print a set to give as a very special gift to someone who appreciates handmade things!
For another DIY table linens idea, you might try making your own version of this DIY Block Print
Table Runner and napkins set.