
Bring the light and cheer of the holiday season to your table by creating your own elegant centerpiece on a budget!
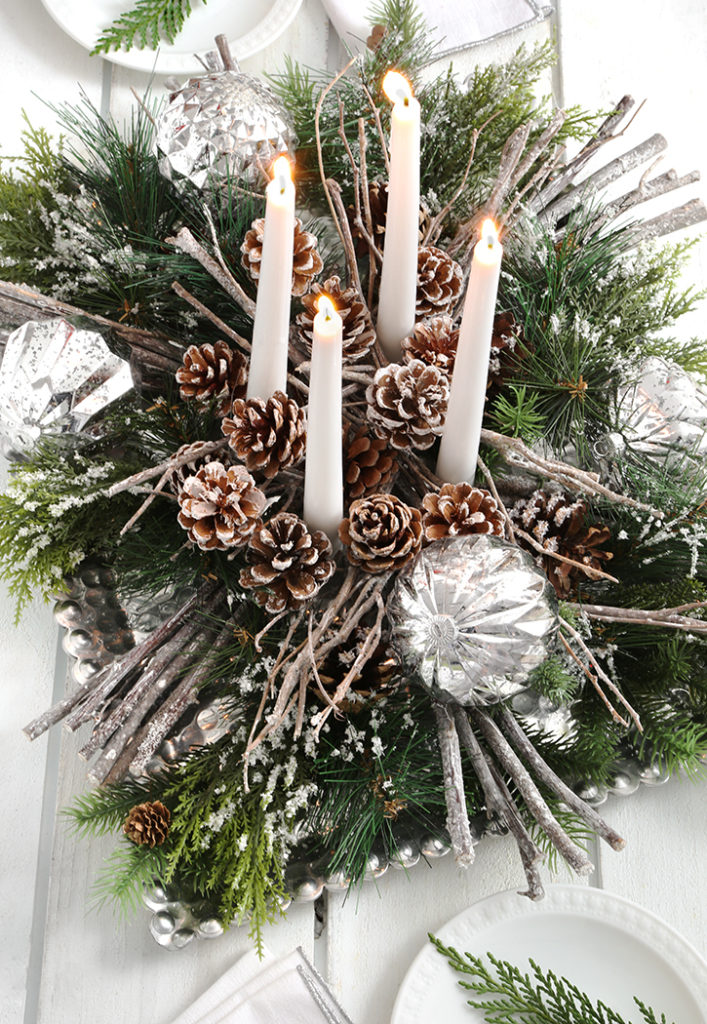
I found a lovely hammered, white brass tray and was inspired to make a winter themed centerpiece like the elegantly rustic ones that I had seen in some decorating magazines. It’s fairly easy to customize this project to fit your own style and budget!
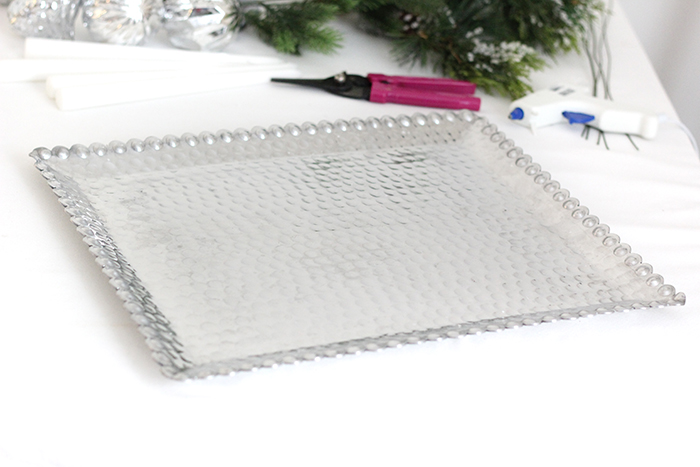
Since this tray is metal, it’s ideal to use for this project. You might even have a tray or platter around the house, or you could find an interesting one at a thrift store. If you want to use a painted tray, a natural wood platter, or anything else with a delicate finish, find a dish to place in the middle to attach candles and greenery to, in order to protect the character of the tray.
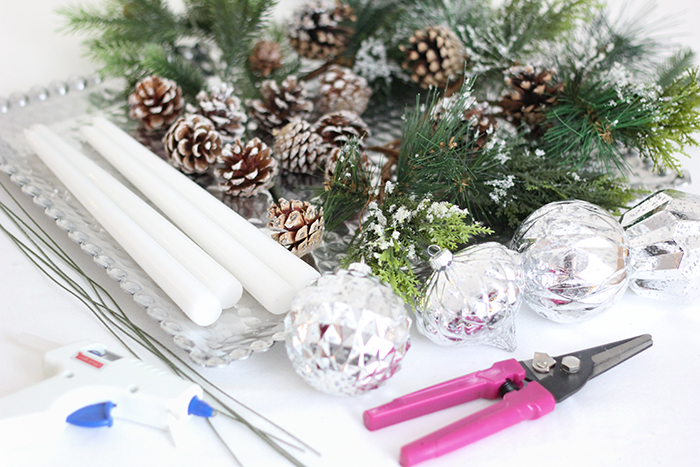
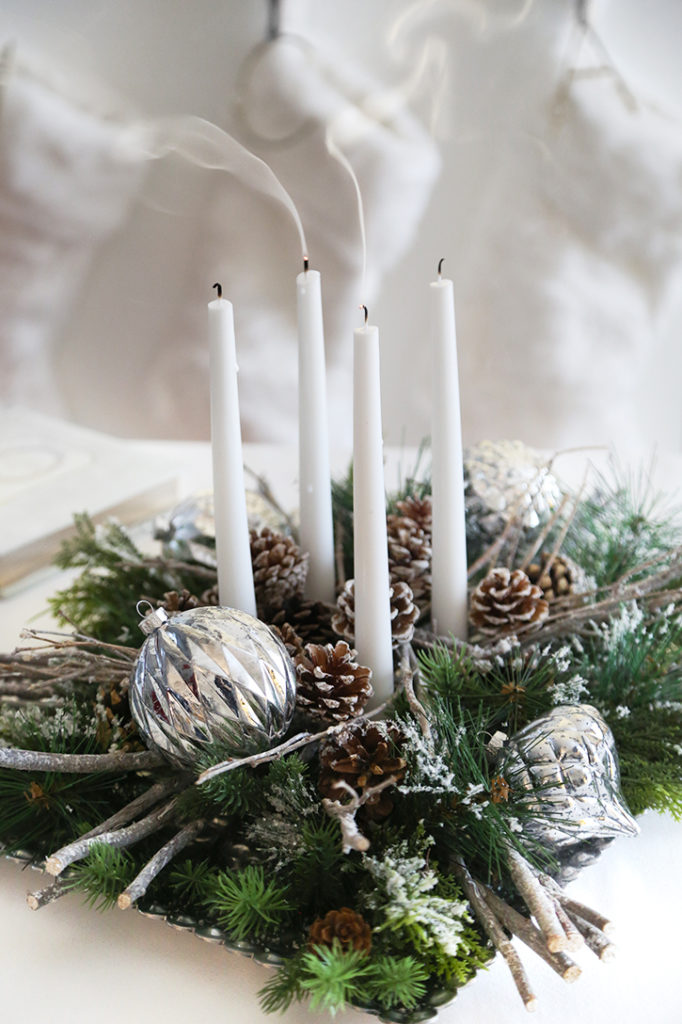
The supplies you may need include a glue gun, glue sticks, floral shears, and floral wire. I chose four white taper candles for the lighting element (you could use pillar candles if you like). There is a huge selection of seasonal decorations and greenery offered at all the craft stores and discount stores this time of year; decide on the overall look and color scheme you want for your centerpiece, and choose enough elements to fill your tray. I found some snowy-looking evergreen sprays and a bundle of wintry twigs at a craft store. I also found a pack of frosty-painted natural pine cones on sale at a discount store, as well as a set of inexpensive, mercury glass-style shatterproof ornaments to add extra glitter to the arrangement.
Play with the placement of candles, greenery and other elements on the tray just to decide where you want to place them before you attach anything to the tray. When you have your arrangement laid out, take a photo to refer to when you put it back together. Remove everything from the tray again before you rebuild your arrangement.
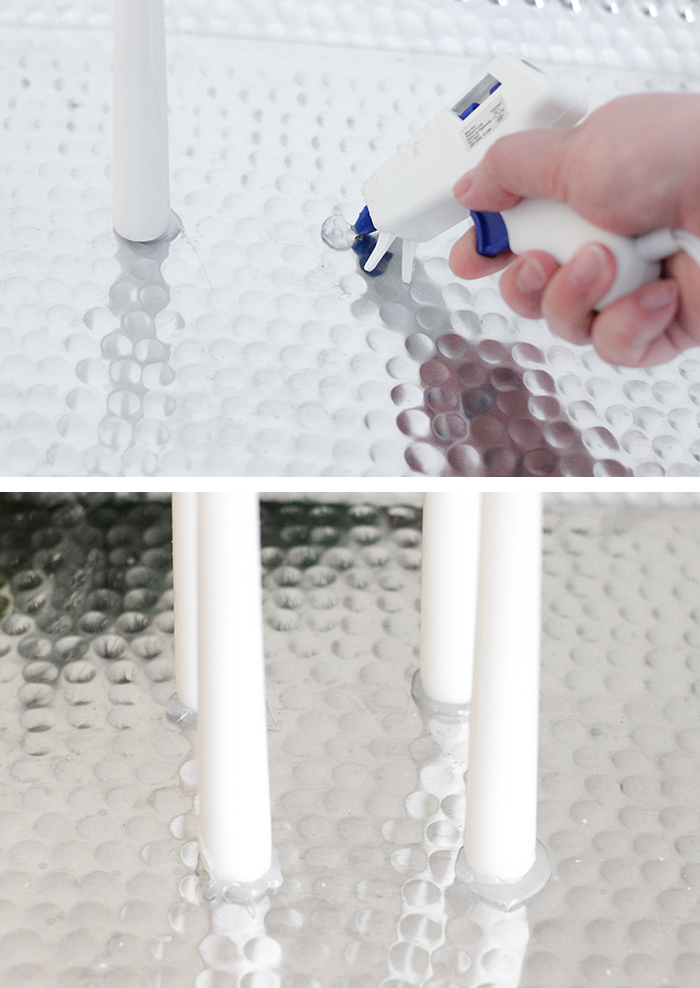
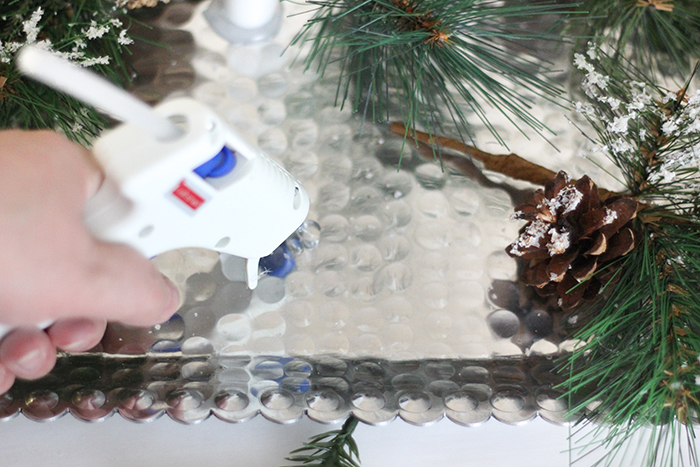
Start by attaching candles in the center of your tray. You can eyeball where you want the candles placed. I decided to leave about 3” between these taper candles, but you can space your candles however you like. Since this is a decorative metal tray, I decided to attach the taper candles directly to the surface. If you are worried about preserving the finish on your tray, attach the candles to something like a small dish, or even put them in candle holders, that you can place on the tray instead.
To attach candles, pool an area about the size of a quarter of hot glue in the spot that you want to place the candle in. Immediately press the base of the candle in the pool of glue, holding it upright for about a minute, until the glue cools enough to hold the candle in place. Repeat this process for all your candles, then let the hot glue set up and cool before you add any greenery.
Next, start filling in the space on the tray with the largest pieces of greenery as a base for the arrangement. In this case, I tacked pieces down with hot glue to keep them in place. You don’t have to glue anything down, you can just let things rest in place if you don’t want to attach them. Then add a layer of smaller pieces of greenery around this, to fill the tray up some more.
I used the floral shears to cut sprigs off one larger stem that I wanted to spread out in the arrangement. If you find some big sprays you’d like to use, you can get a lot out of them by cutting pieces off the main stem and using the parts throughout the arrangement. Twist floral wire around stems of smaller pieces to attach them to larger sprigs. Sometimes this works better than using hot glue for keeping the sprigs together, or for spreading them out.
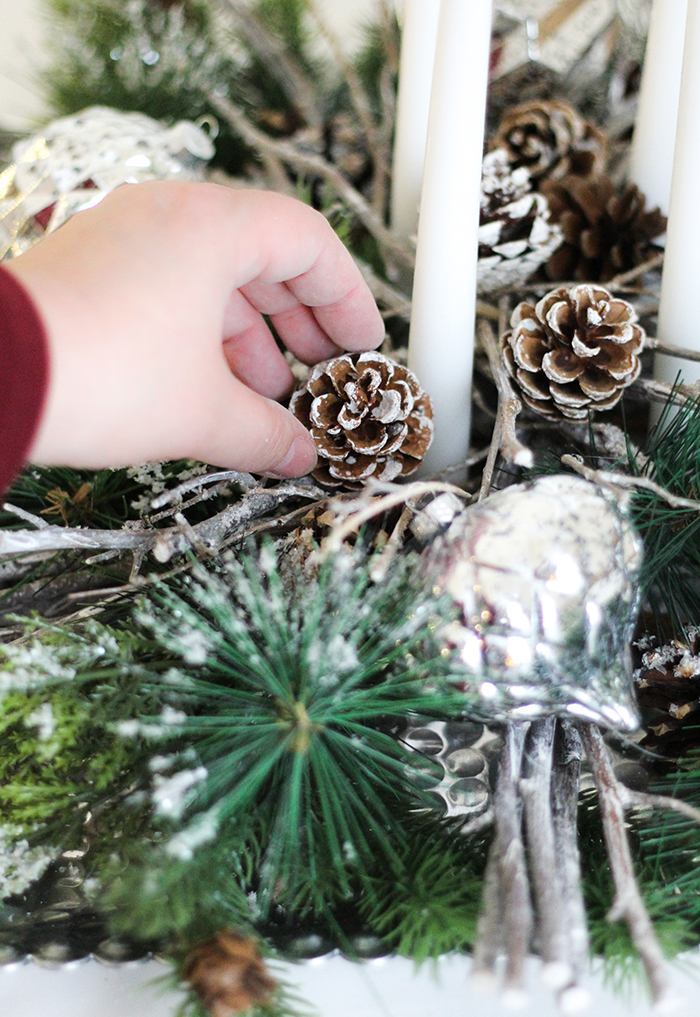
Be sure to fill in the space between the candles. I piled some frosted pine cones and twigs in the center around the candles to fill the arrangement up.
I also tied together bundles of the twigs with floral wire, and then placed them in some of the gaps in the greenery to make the arrangement look fuller.
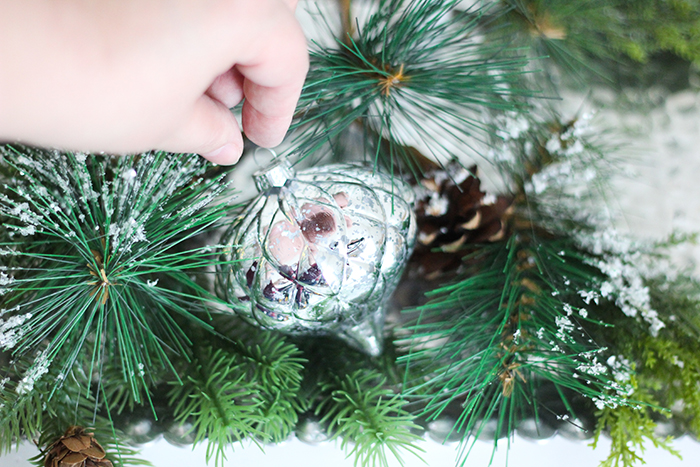
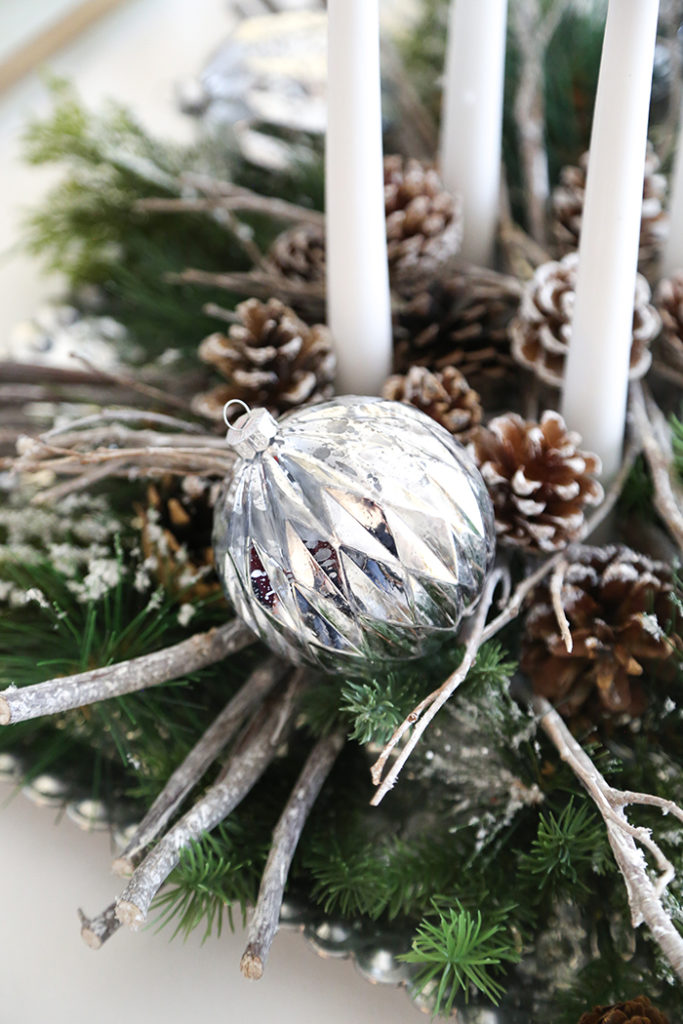
As a final touch, nestle ornaments in among the greenery to add another texture, and an element of sparkle to your centerpiece.
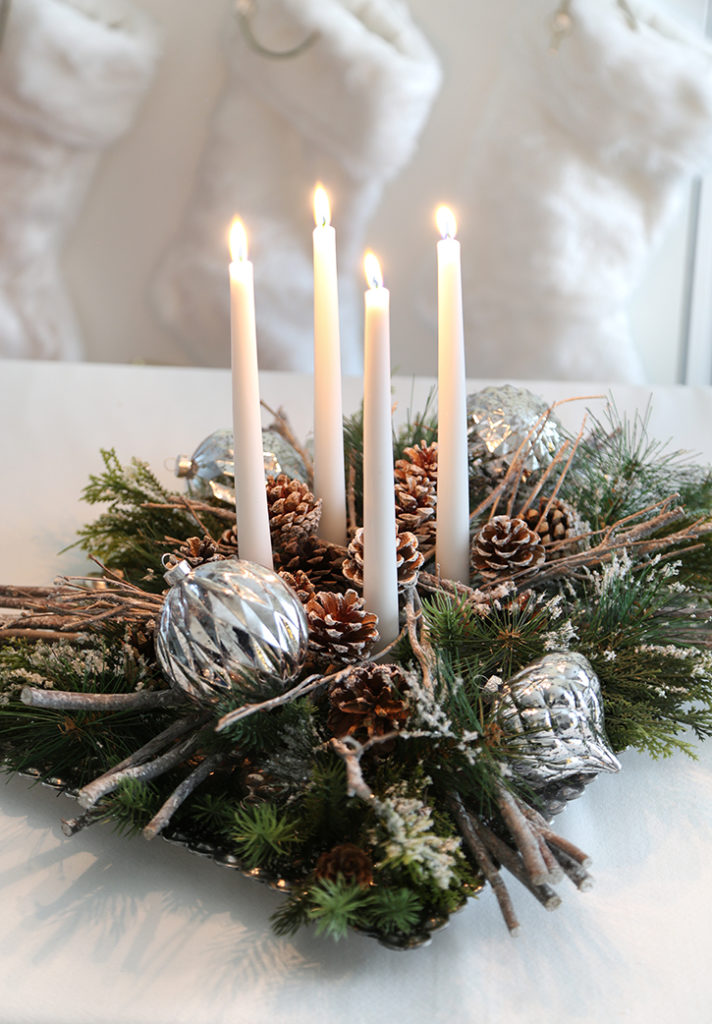
Adding some shiny ornaments not only makes your arrangement look more luxurious, they also add even more festive elegance. The finish on them reflects light, especially from the lit candles!
You can create a custom centerpiece for your holiday table that captures the beauty of the season in your own individual style.