
Create your own custom wall hanging with on-trend and maintenance-free succulents!
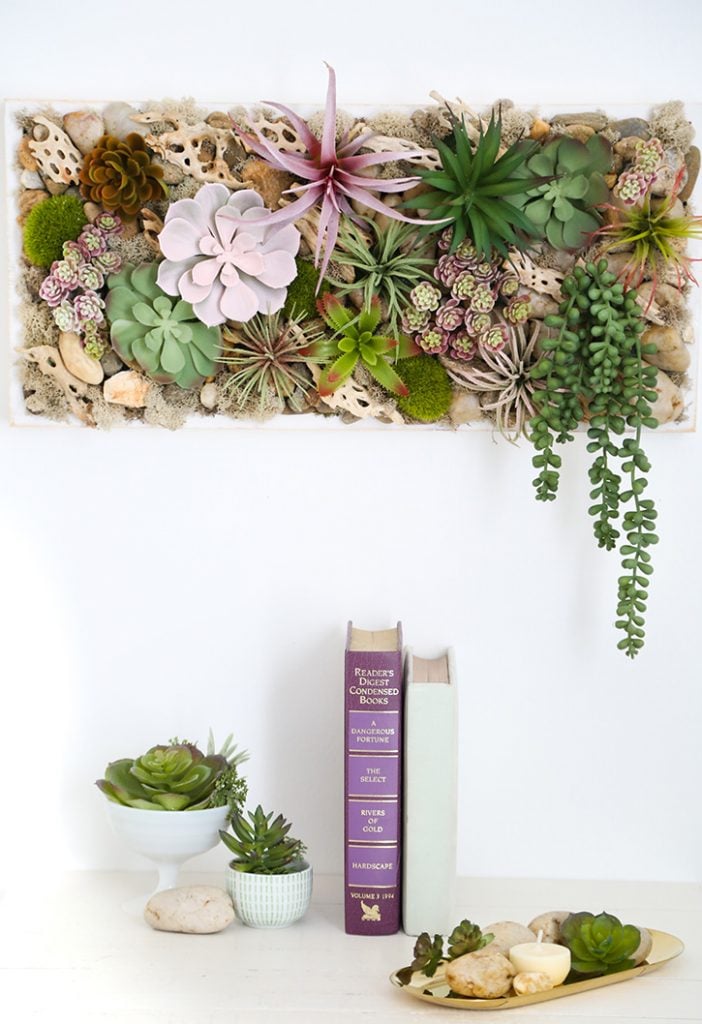
Yes, succulents are very popular now. They’re easy to care for and there are so many different types to choose from, each variety with it’s own unique beauty. The real ones are easy to maintain for those of us who don’t have a green thumb, and this idea could be used to make a centerpiece using live plants. But to make a wall hanging such as this, faux succulents work best!
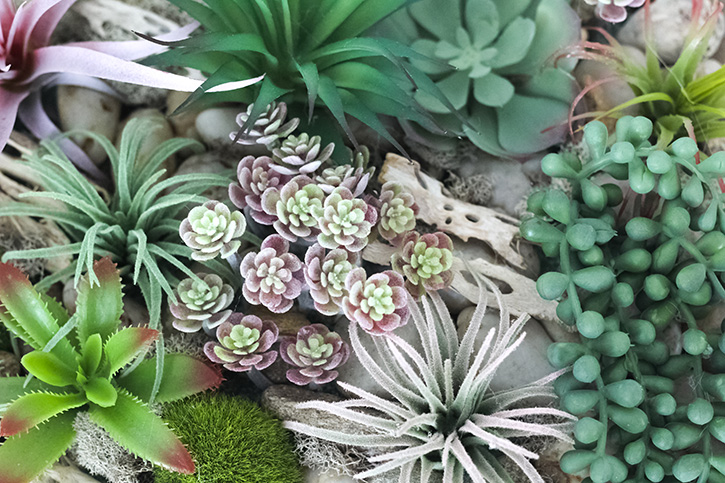
These days, a wide variety of faux succulents can be found at any craft store or discount store, and a lot of them are very realistic. Discount stores may even have them in little pots, but they can be easily removed. The floral department at a craft store will usually have a selection of them loose or in bunches.
Wall hangings made with artificial succulents can be found online or in home decor shops for hundreds of dollars, but you can create one that has your own style for a lot less than that! You might even already have a container, or a collection of interesting rocks or seashells that you could incorporate into your finished piece.
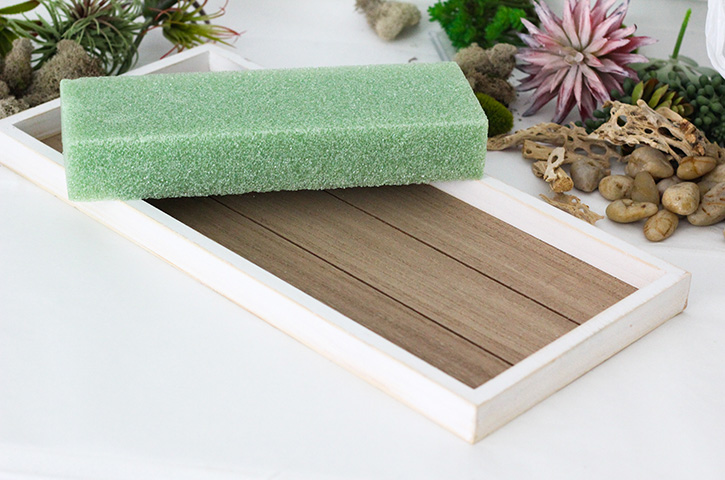
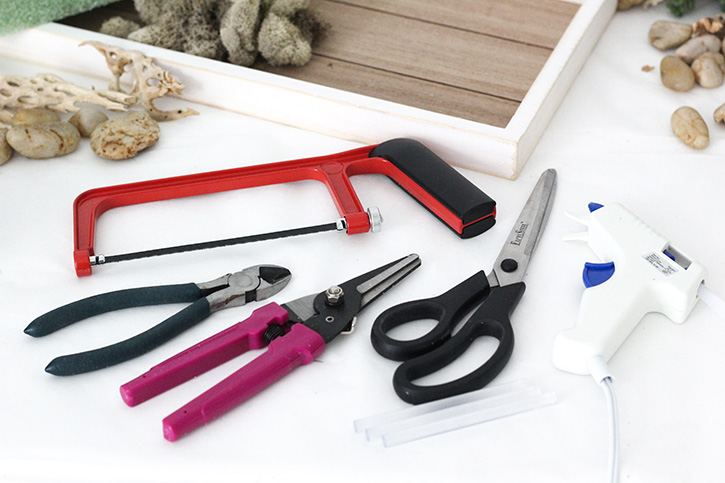
To get started, find a shallow tray, box or bowl that has the look you want. It can be just about any material, style or color that speaks to you. You will need hangers that work with the vessel you have chosen, and a way to firmly attach them, such as a suitable glue, nails or screws, depending on the material it’s made of. You will also need some styrofoam, a small hacksaw or large serrated knife, wire cutters, floral shears, scissors, and a low temperature glue gun. Low-temperature hot glue will bond nearly anything to styrofoam, but you might want to consider a more heavy-duty glue to stick on any weightier items (such as larger rocks).
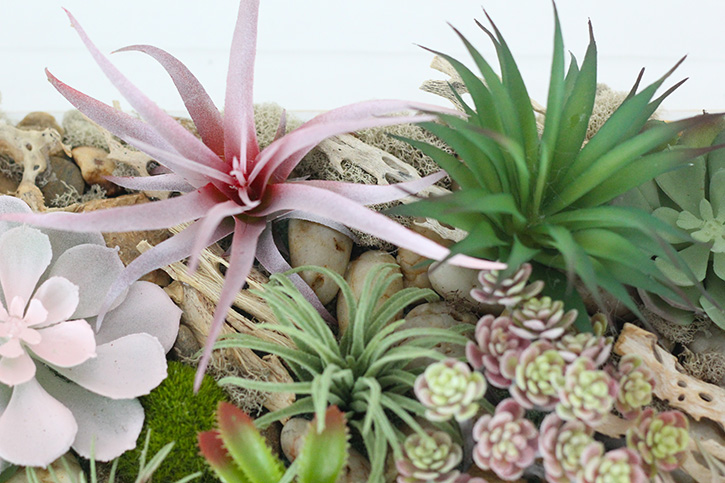
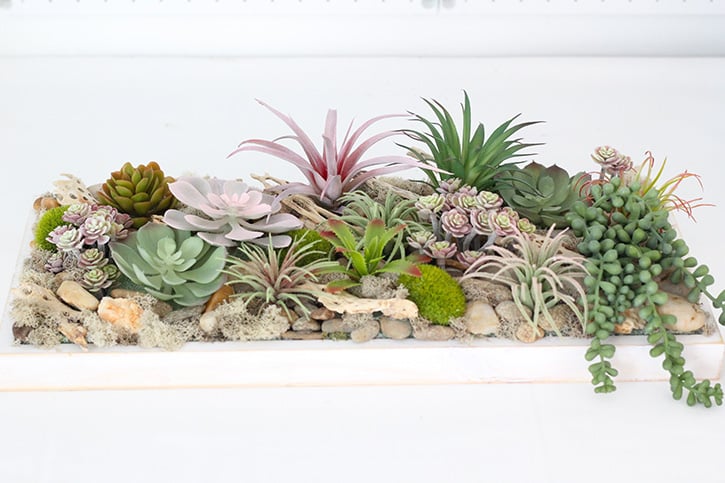
You will also want a selection of artificial succulents, maybe some pea gravel or river rocks, some mosses or pieces of wood. Whatever you choose, you want it to have an overall cast that will fit with your decor and taste. I wanted soft colors to go with a mostly white, neutral room, and a kind of desert feel to my arrangement, so I chose a white wood tray to put everything in, and some light colored reindeer moss and cholla wood fragments to add to that look.
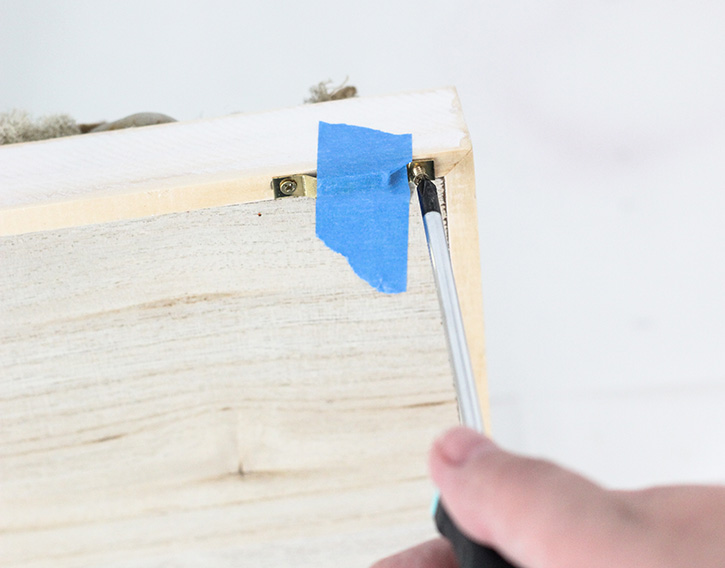
First off, add hanging rings or sawtooth hangers to the back or your tray or vessel, by gluing them onto surfaces that you can’t nail into such as metal or plaster, or with the hardware that comes with the hangers for things like wood. I measured in a couple of inches from each end, marked where I wanted the inner end of the hangers to go, and held them in place with some tape. Sawtooth hangers are ideal for wood, so I attached these with the tiny screws that came with them.
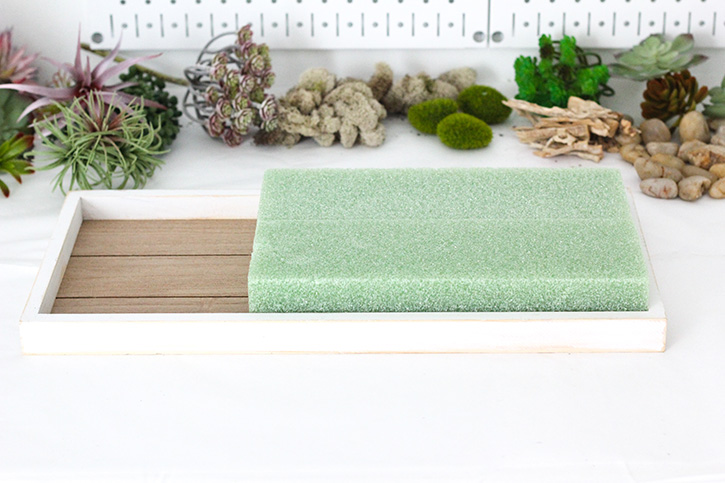
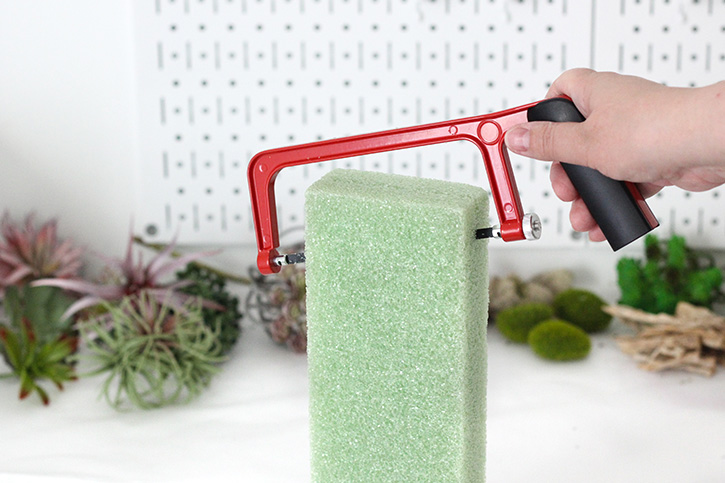
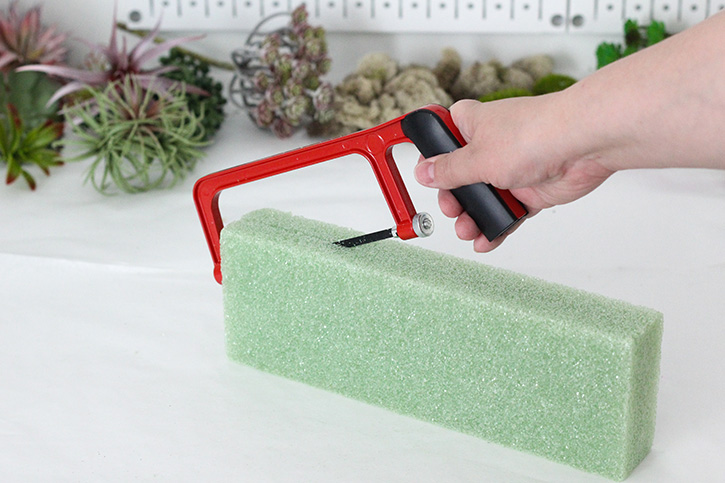
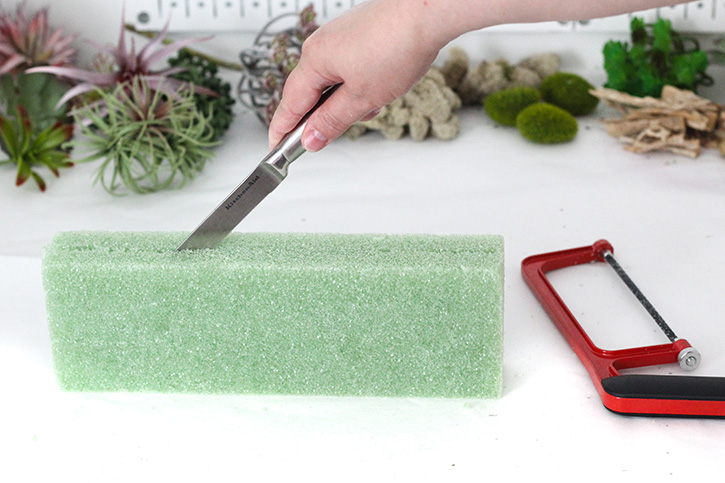
Next, lay the blocks of styrofoam in the tray to get an idea how it needs to be placed and how much of it you will need. You don’t want it sticking up too far beyond the top of the tray, so you might need to split the block to make more shallow pieces of it. Don’t worry about splitting them absolutely straight down the middle, a little unevenness to one side will add dimension.
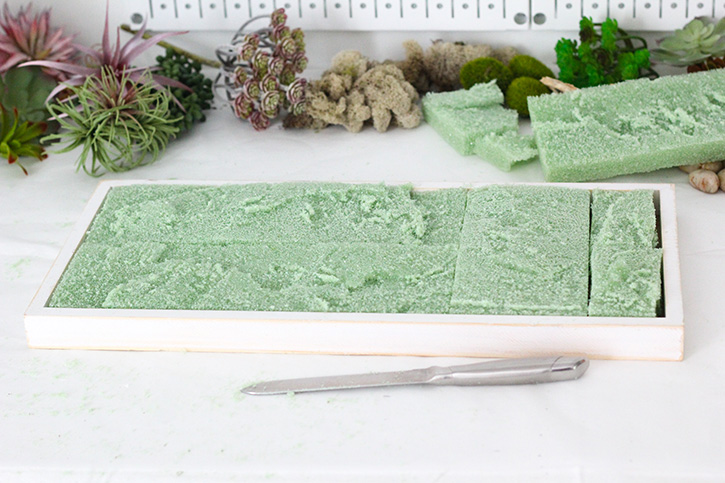
Lay the styrofoam out in the tray in a way that will fill it, cutting off excess from any blocks if you need to. Don’t worry about one side of these being uneven-lay them flat side down so they will glue on better. The uneven tops will just work with the organic feel of the finished hanging. Next, lift each foam block and add some hot glue to the tray underneath it, and press the flat side of the foam down onto the glue before it cools. Repeat this process until all the foam pieces are attached to the inside surface of the tray.
Before you begin to arrange all the elements in your wall hanging,
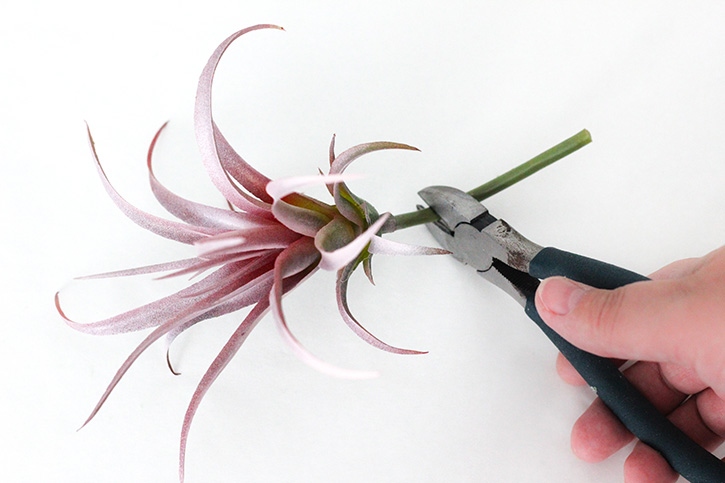
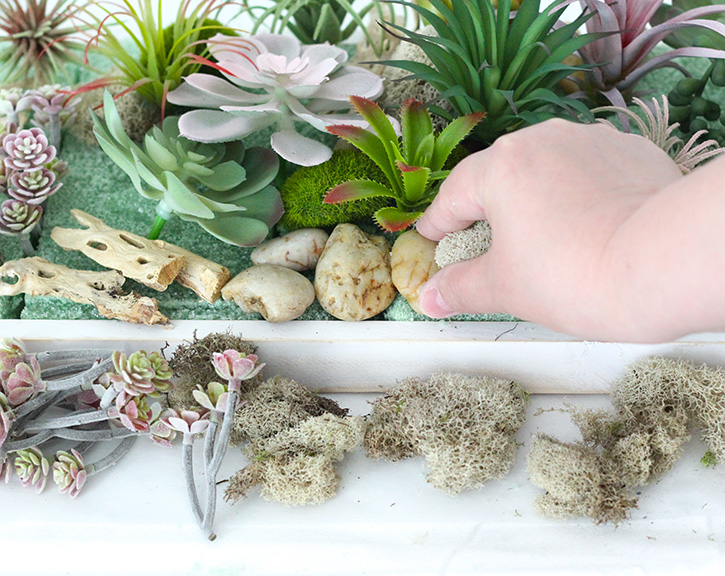
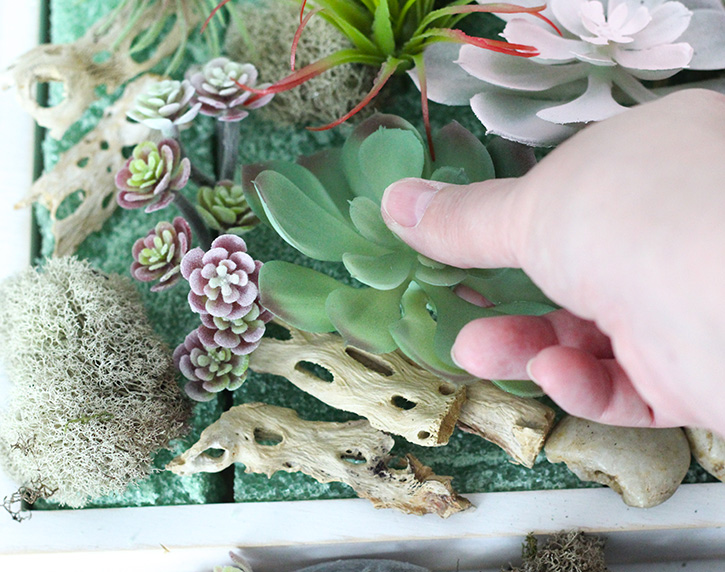
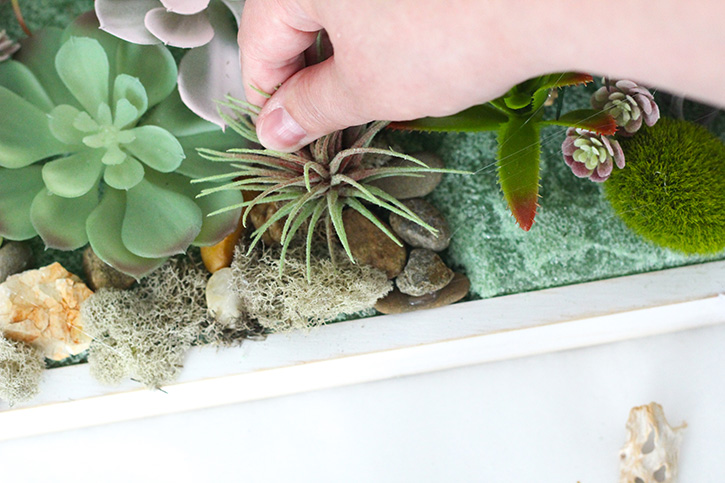
cut off any tags that might be on the succulents. Trim off any long stems from each succulent, using wire cutters for thicker stems, and floral shears for thinner ones. Leave 1” to 2” of stem, depending on the depth of the foam. Also, you can cut apart sprays or clusters of larger succulents to spread out. Even though your design might change a little, it’s usually a good idea to place each piece on the foam before you glue anything down. You can stick the succulents into the foam, and trim the stems off more if you need them to be shorter. Play with placing everything at this stage, starting with larger elements and working from the top down. Don’t worry about holes in the foam, they will get covered eventually. You will layer the succulents, and add a bottom layer of rocks, moss and other elements under them making sure no foam shows. You can even press into the foam to create recessed areas. When you have the overall composition you want, you can start gluing things into place.
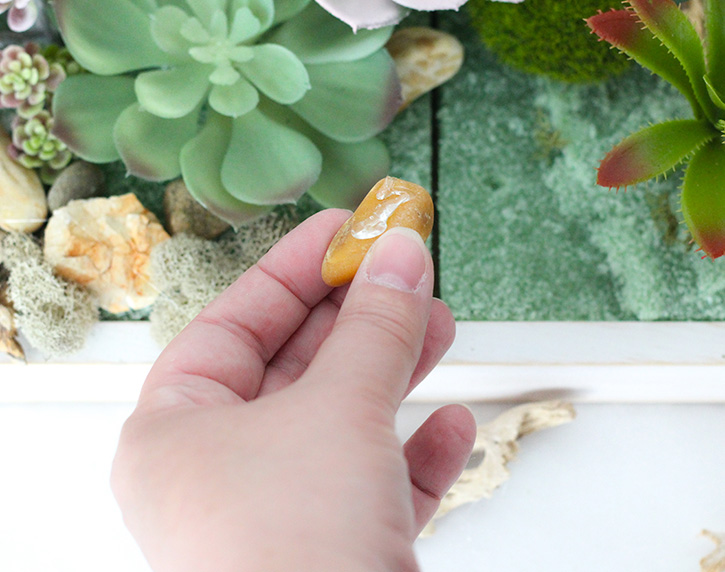


Add hot glue to the bottoms of rocks to attach them to the foam, and also to the stems on the succulents to anchor them into place. Start in one area such as a corner, and work your way over the whole surface an area at a time, until everything is firmly glued down.
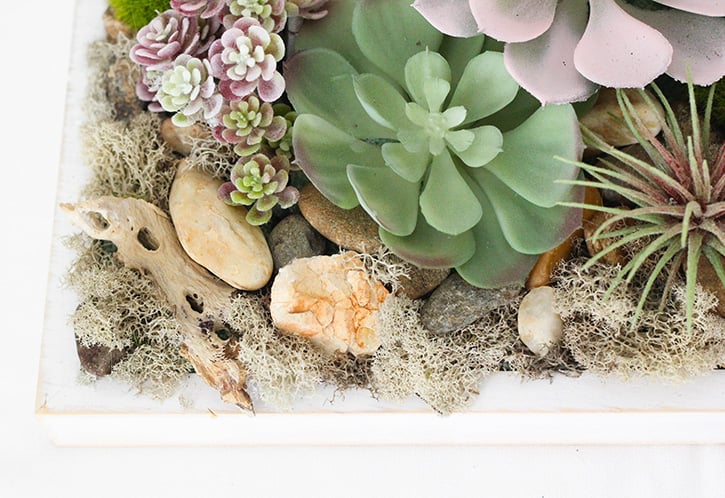
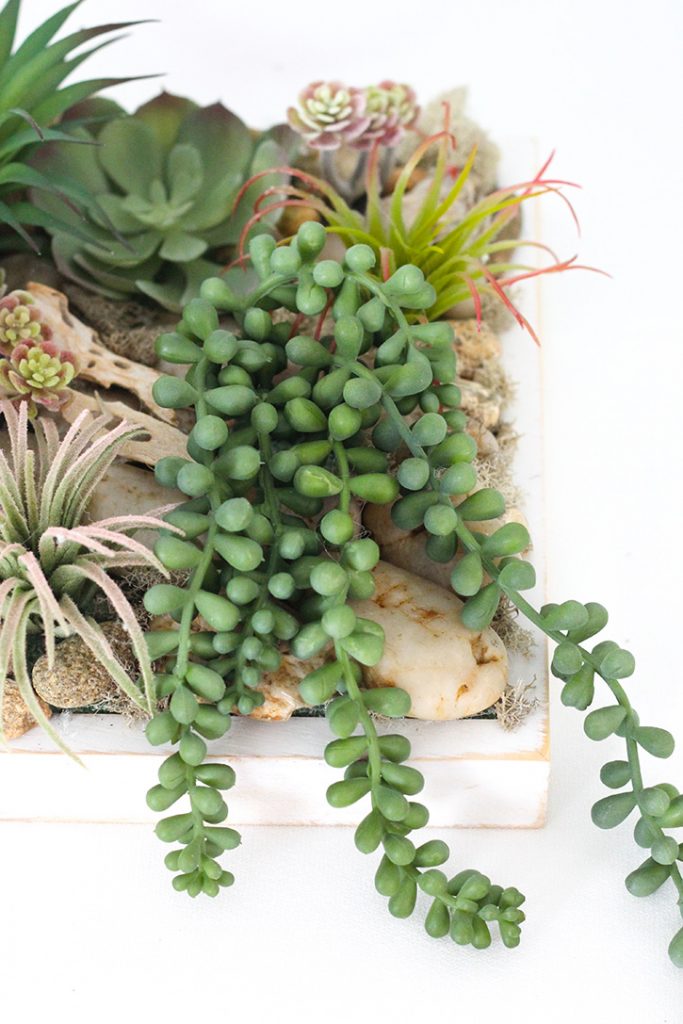
Reindeer moss is great for stuffing into tiny crevices between rocks, and also to cover the edges of the foam along the sides. A few little dots of hot glue easily holds a clump of moss into place. When adding a bit of hanging succulent like string of pearls, place the pick so that some of it will cascade down over the edge.
Your wall hanging could also work well as an interesting centerpiece for a coffee table or dining table-there are many possibilities for displaying it.
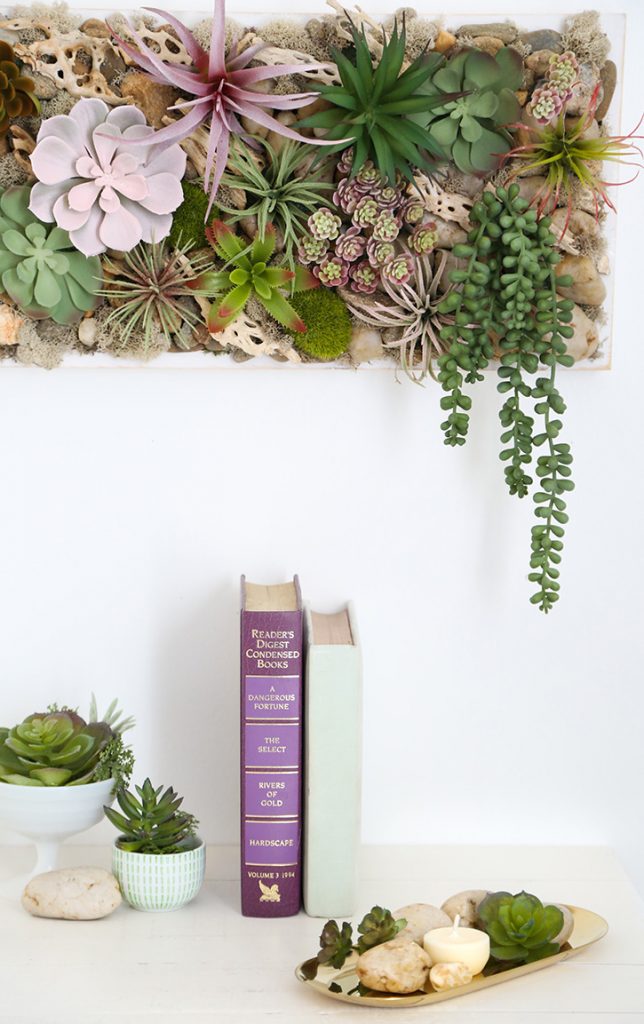
Your custom wall hanging will be a perfect addition to your decor, with the colors and style to fit your room’s personality. It will be a three dimensional miniature landscape that you can get lost in, with surprises around every corner the more you look at it!
Thanks for sharing all of your experiences!